
Latest Versions
Install Games
Guide Information
Install game dumps, updates and DLC via USB with Sphaira which is a replacement hbmenu with lots of useful features.
- Install NSP/NSZ/XCI/XCZ
- 10+ Minutes
- Installing your own 'backups' will result in a ban if you connect to Nintendo. Use appropriate ban protection.
What You Need
- Unpatched/Modchipped Switch
- MicroSD Card (64GB+)
- USB Cable
- Switchway CFW Pack
- PC
USB Installs With Sphaira
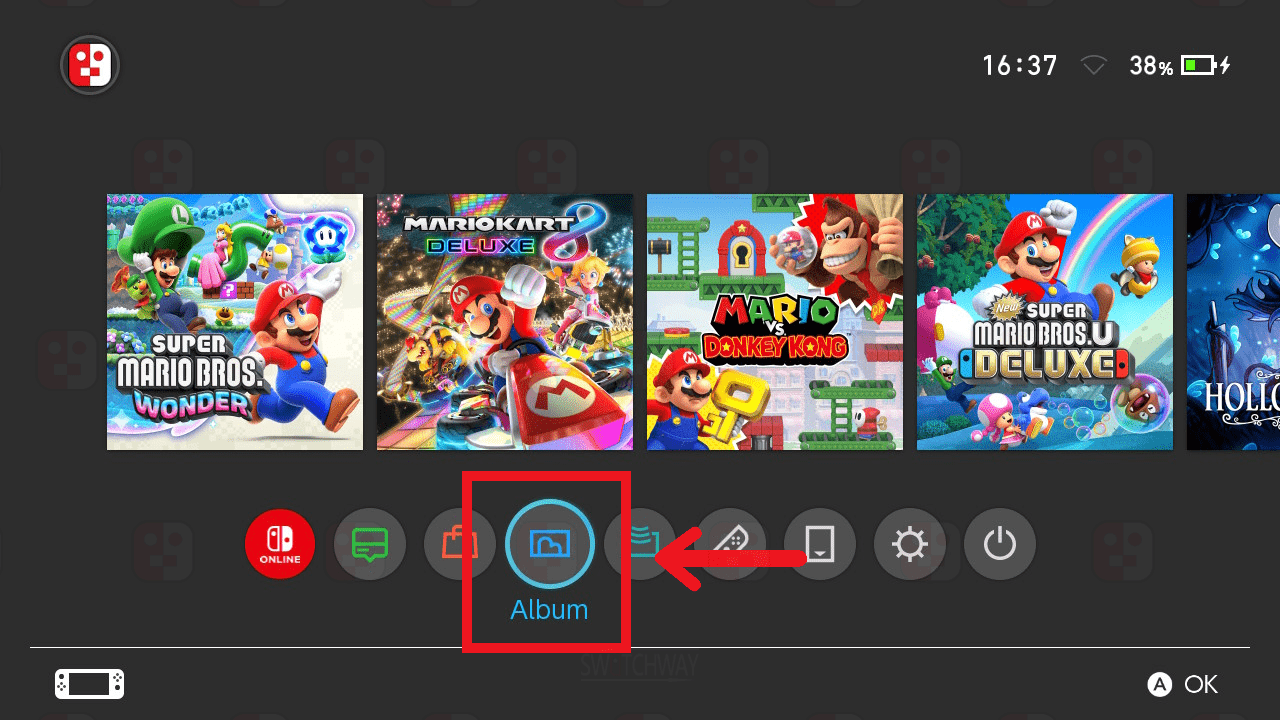
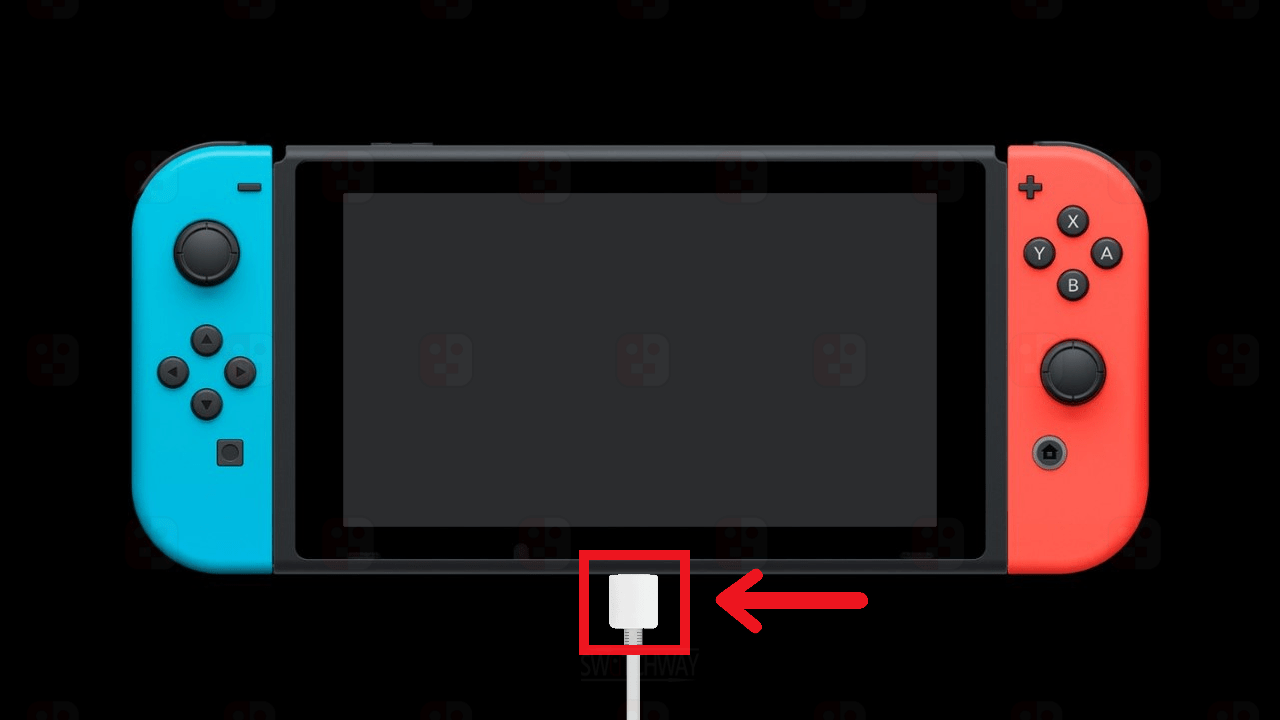
- Boot Atmosphere CFW, open the Album to access Sphaira and connect your Switch to your PC with a USB cable.
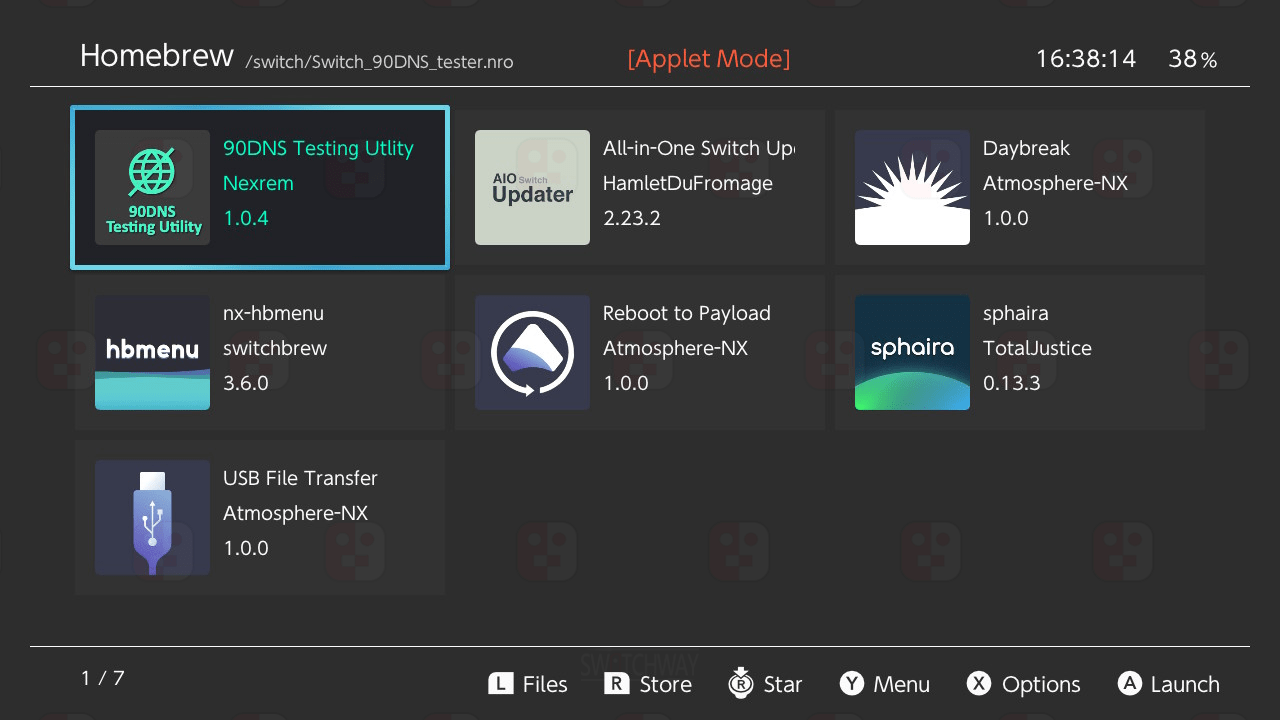
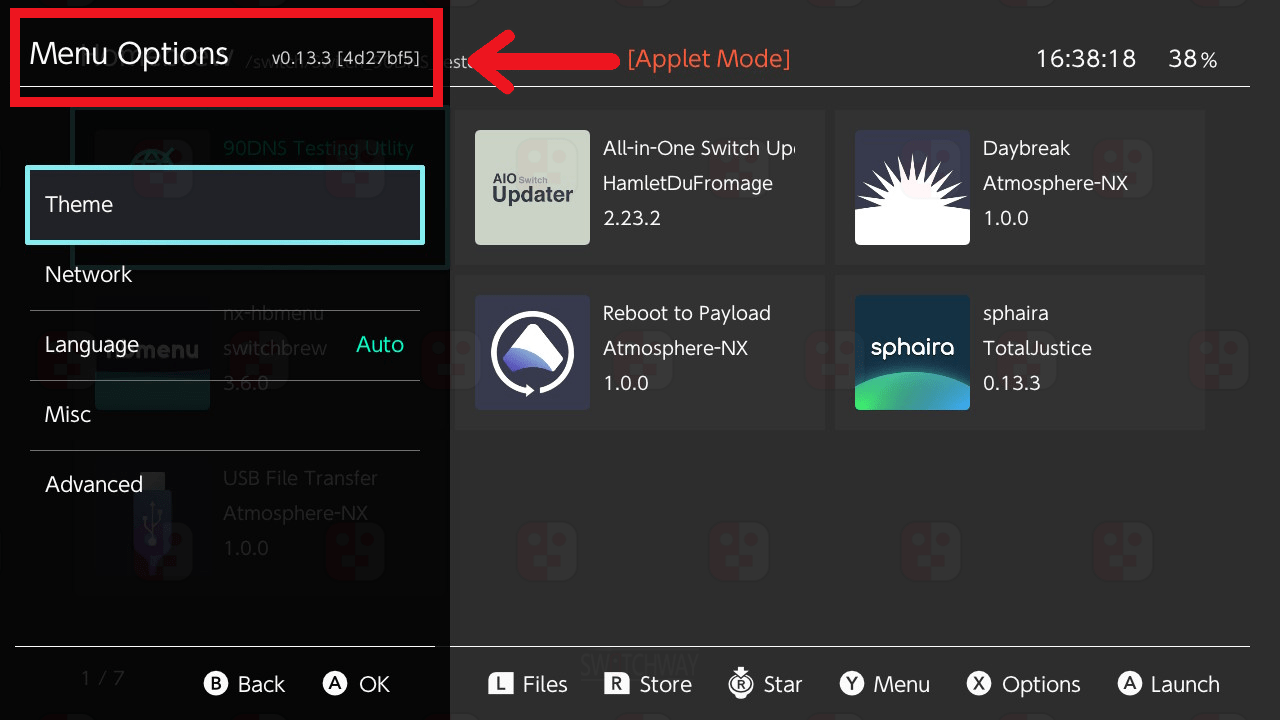
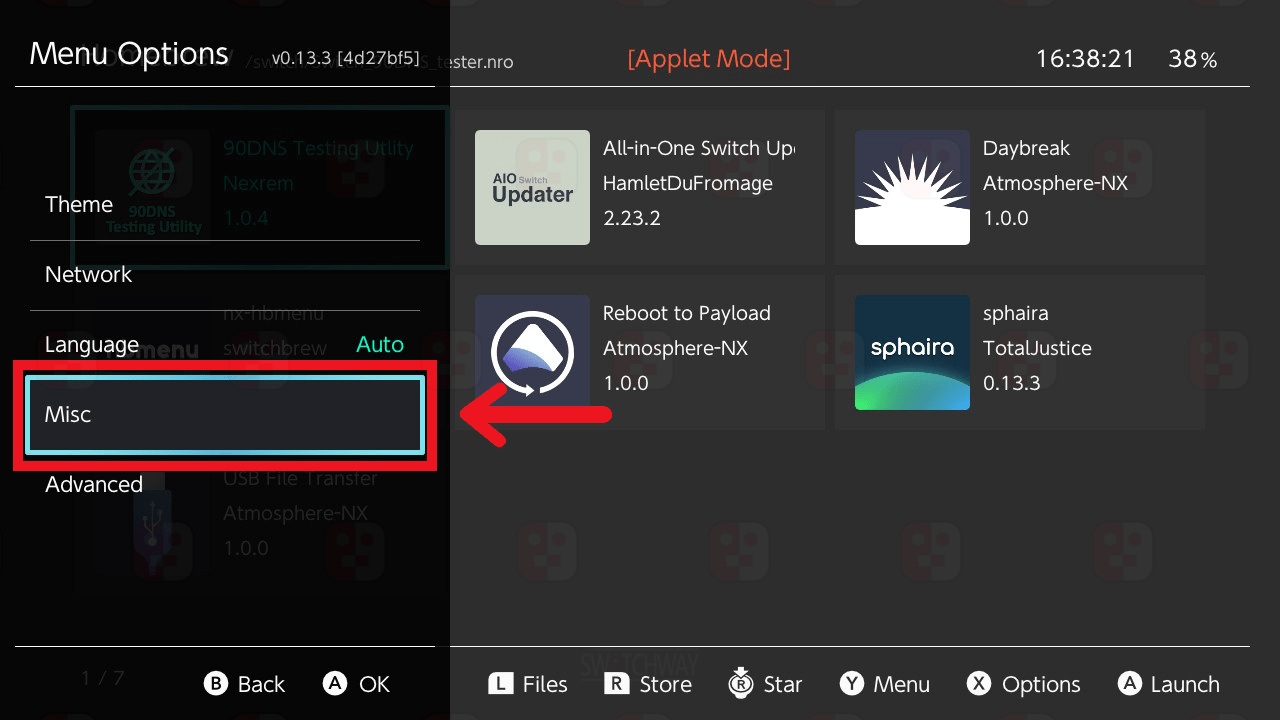
- In Sphaira, press the Y button to access the Menu Options, then scroll down to Misc and press the A button to open the Misc menu.
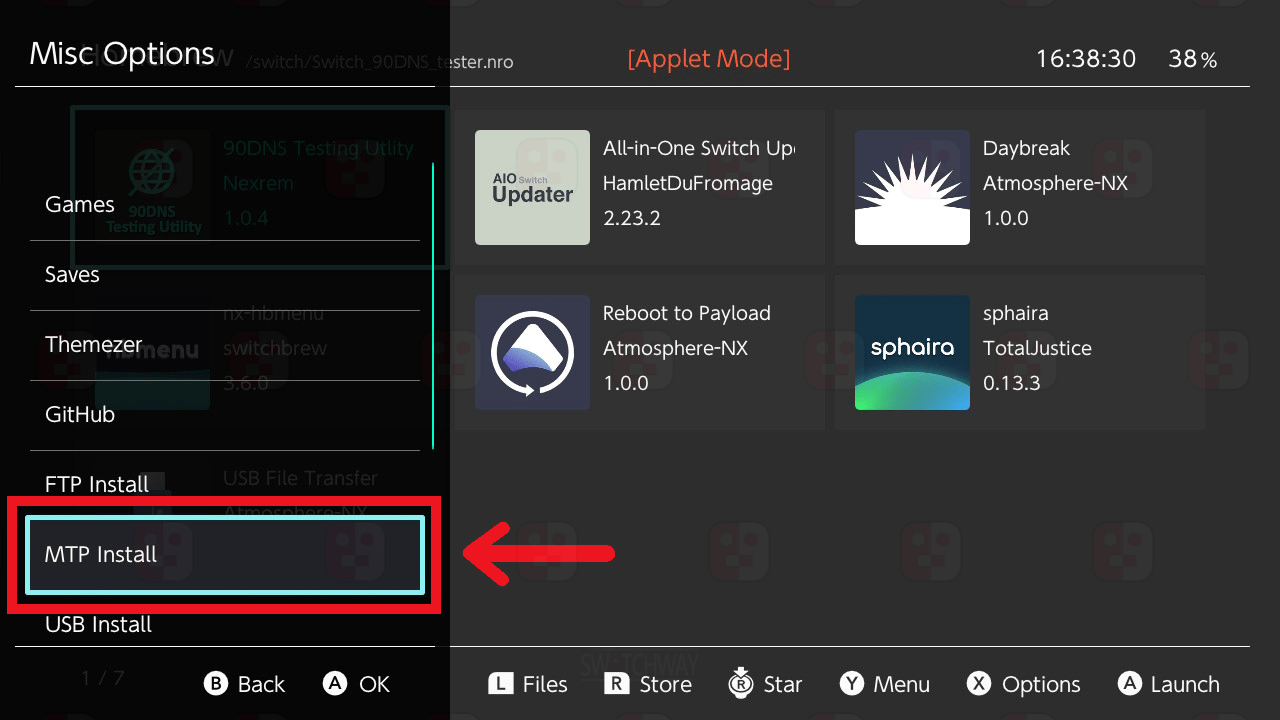
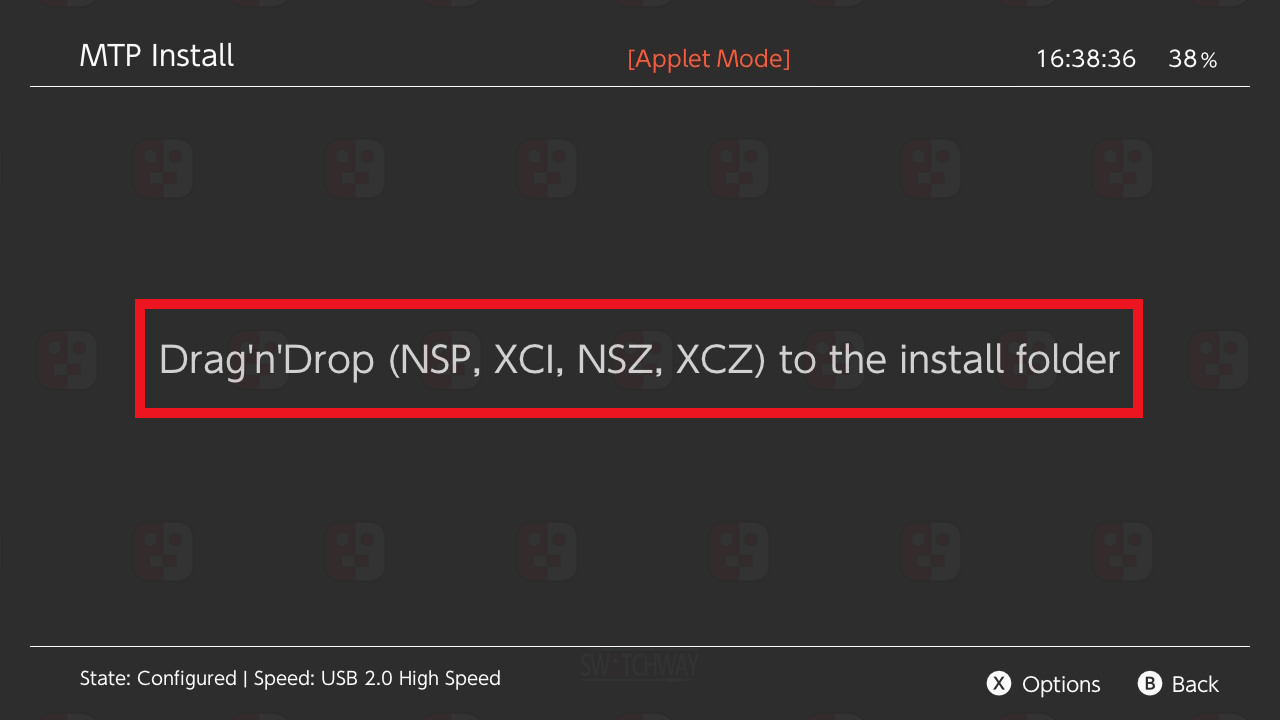
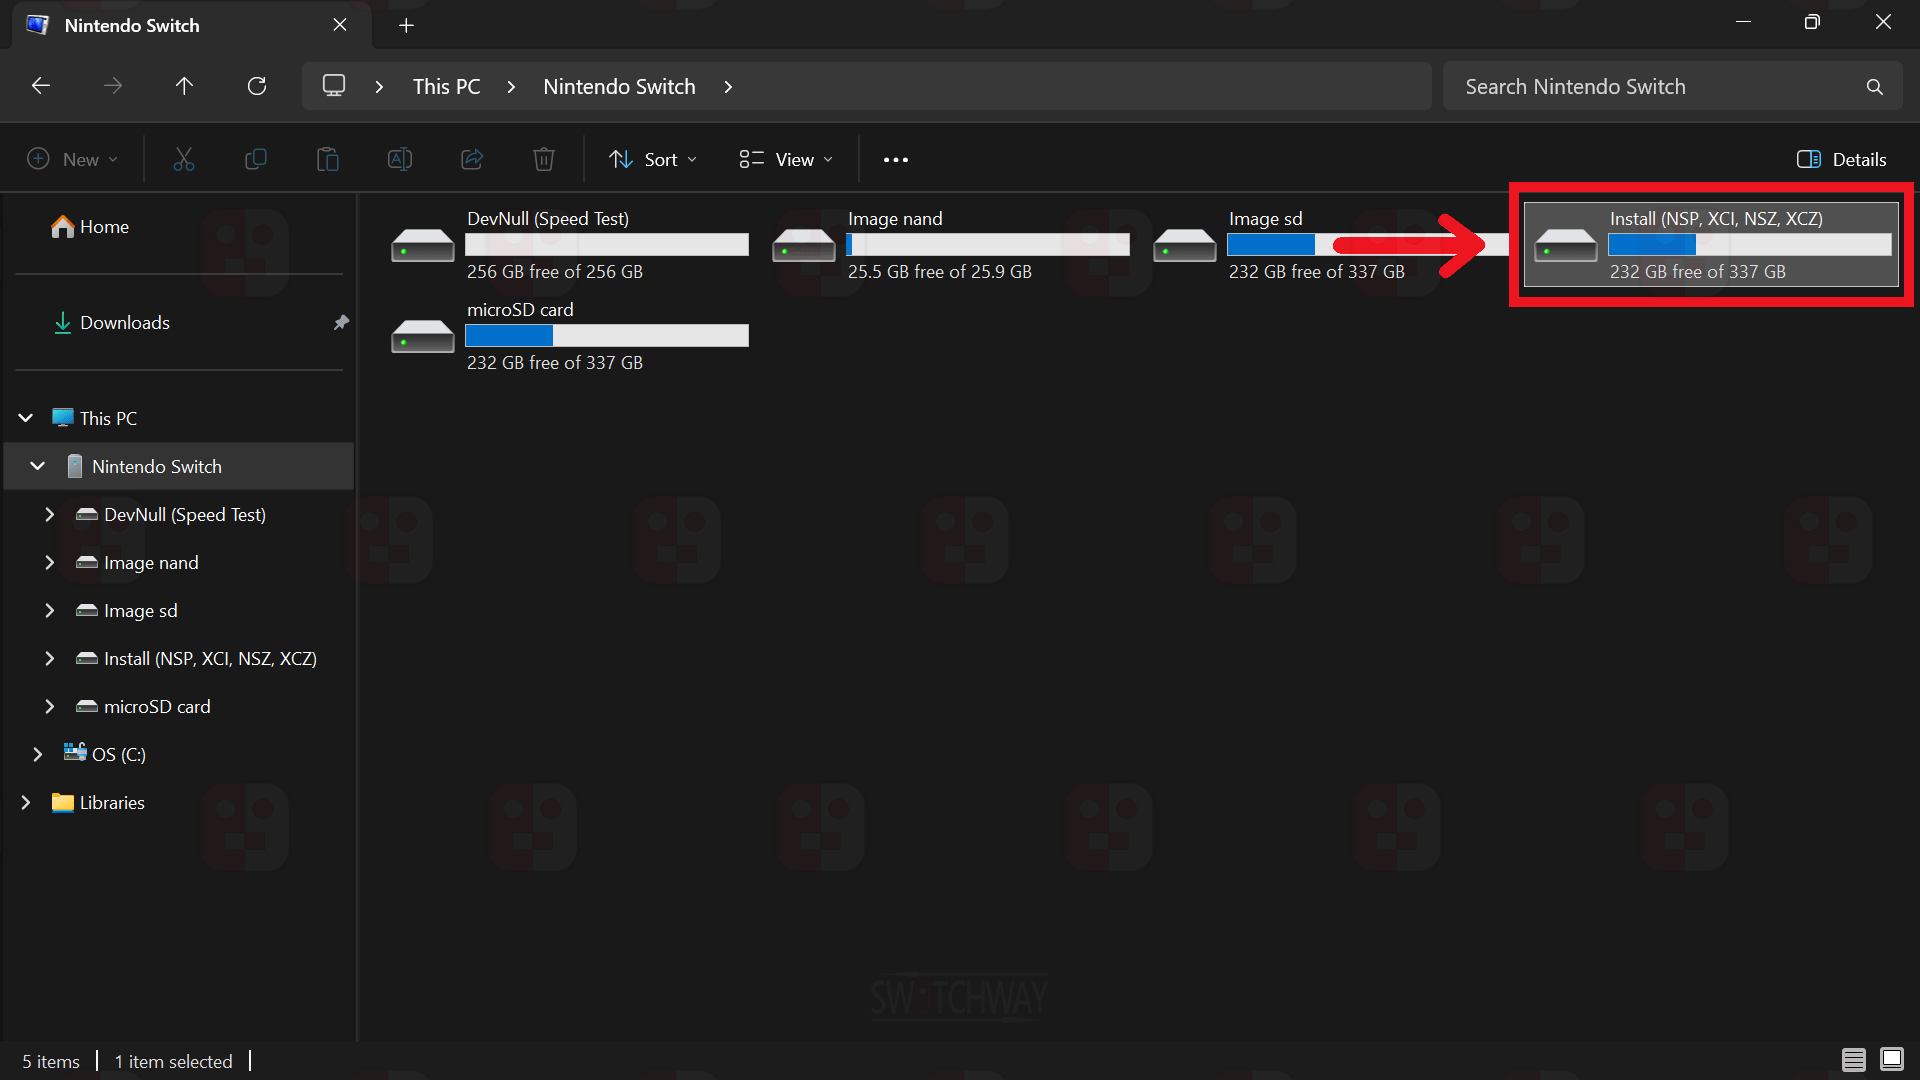
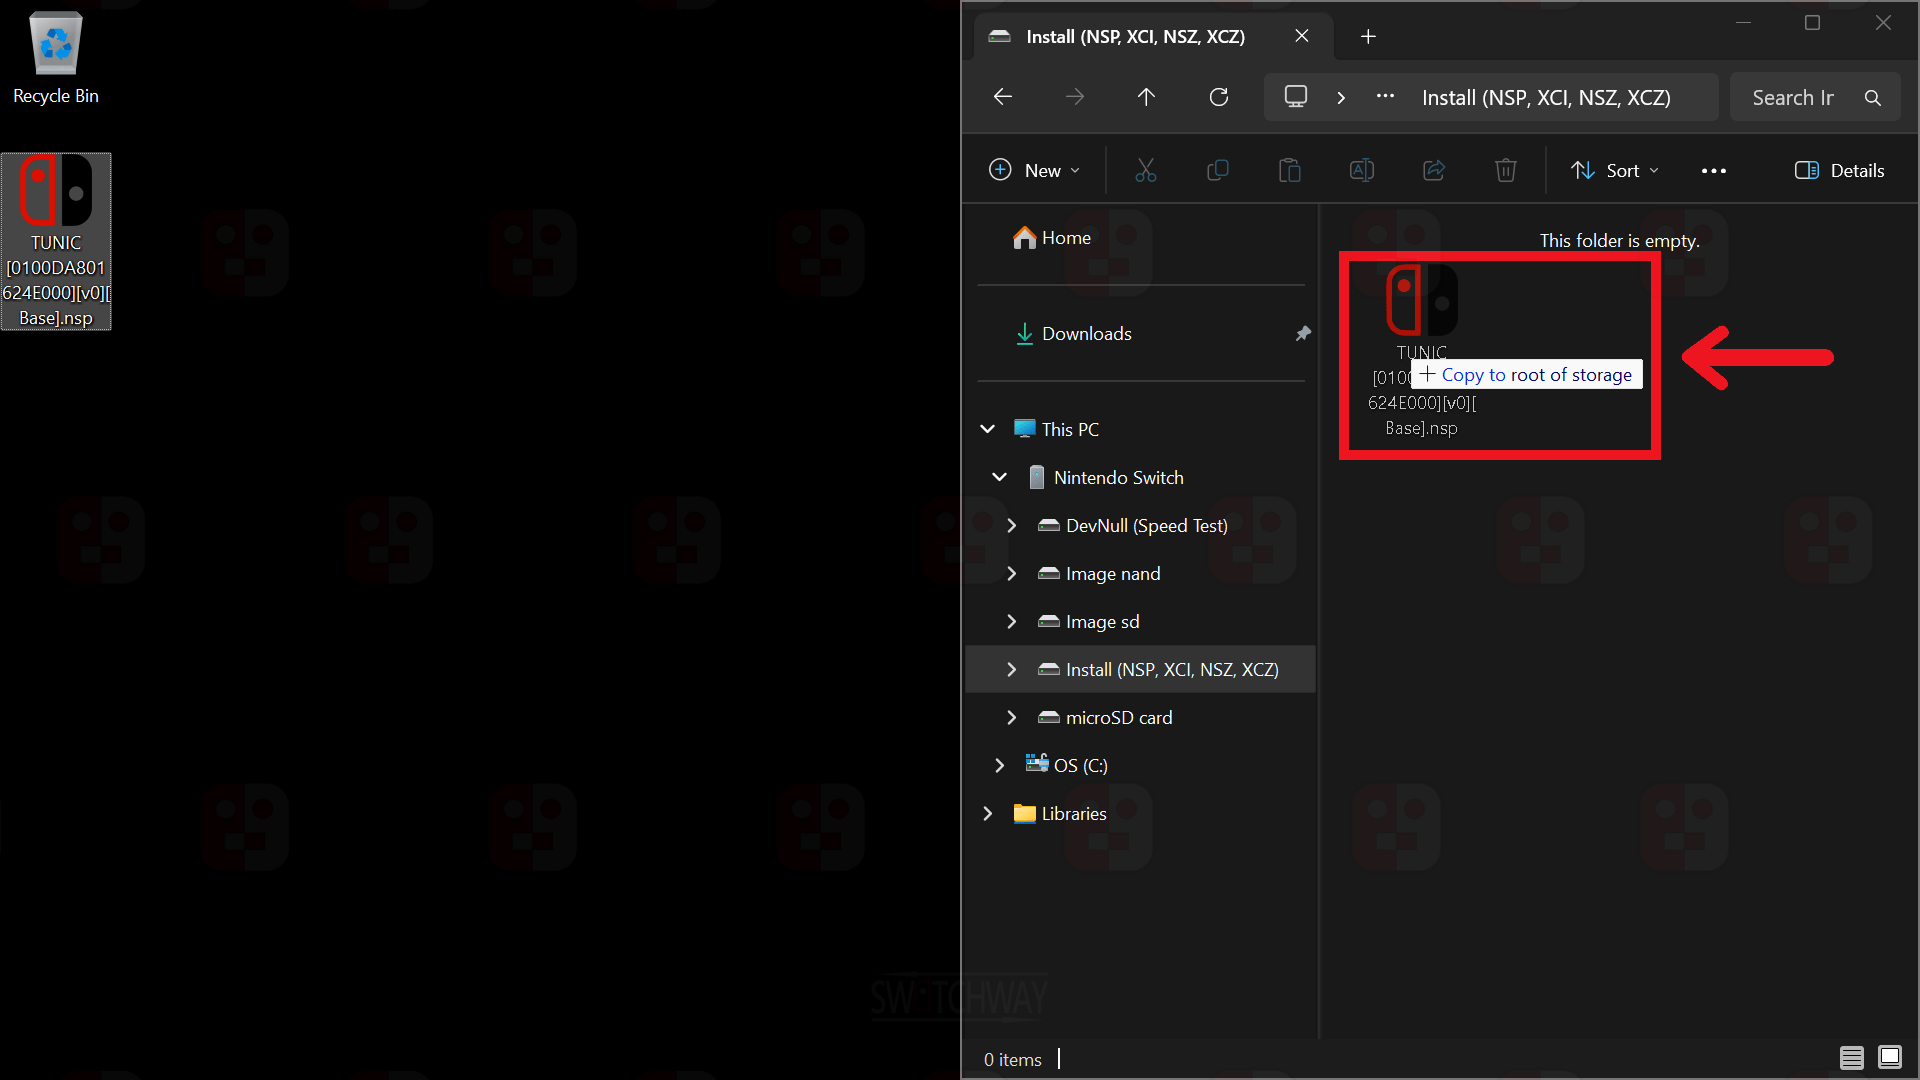
- Scroll down to MTP Install and press the A button. Your Switch will display a screen telling you to Drag’n’Drop (NSP, XCI, NSZ, XCZ) to the install folder. (Your Switch will now be connected to your PC and will show as Nintendo Switch in the file explorer on your PC.).

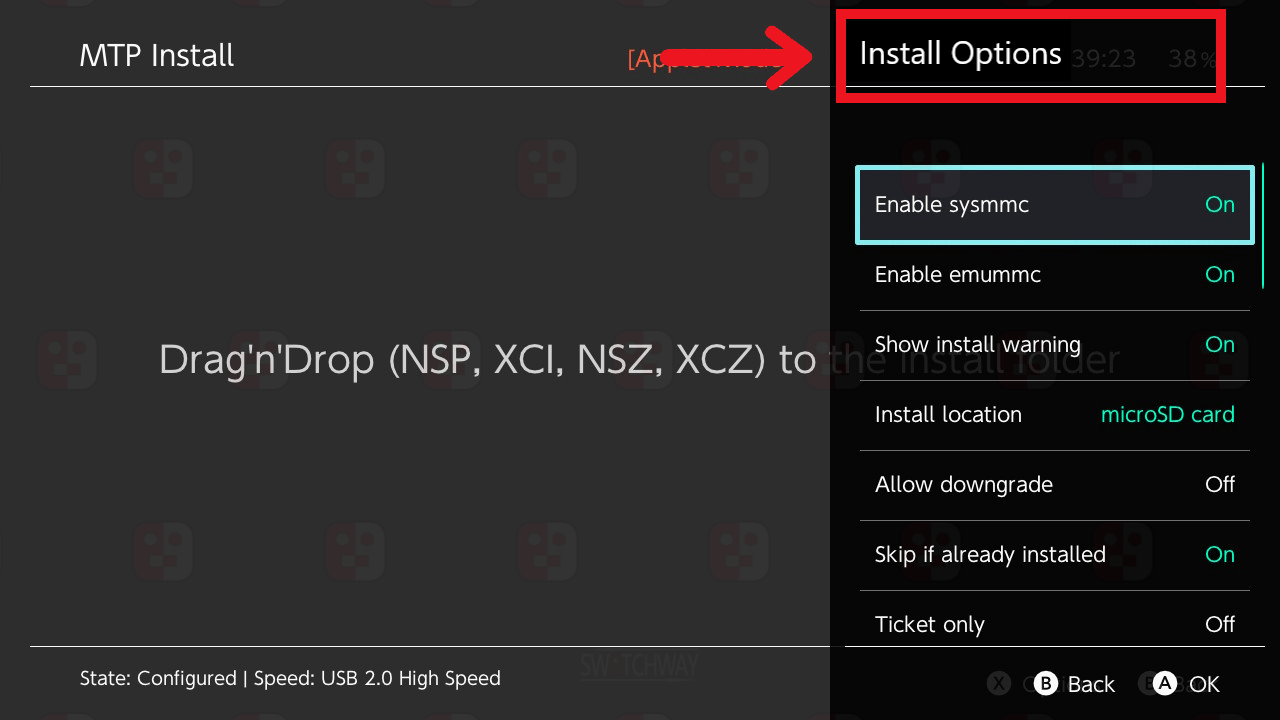
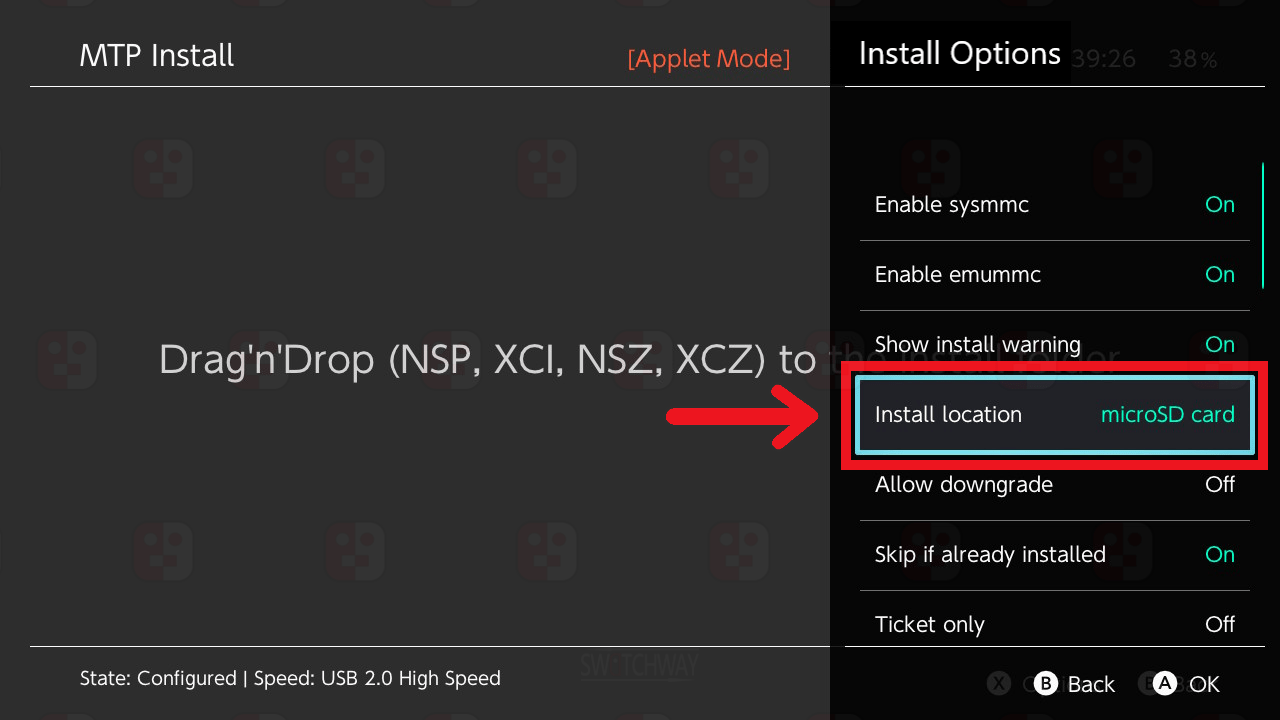
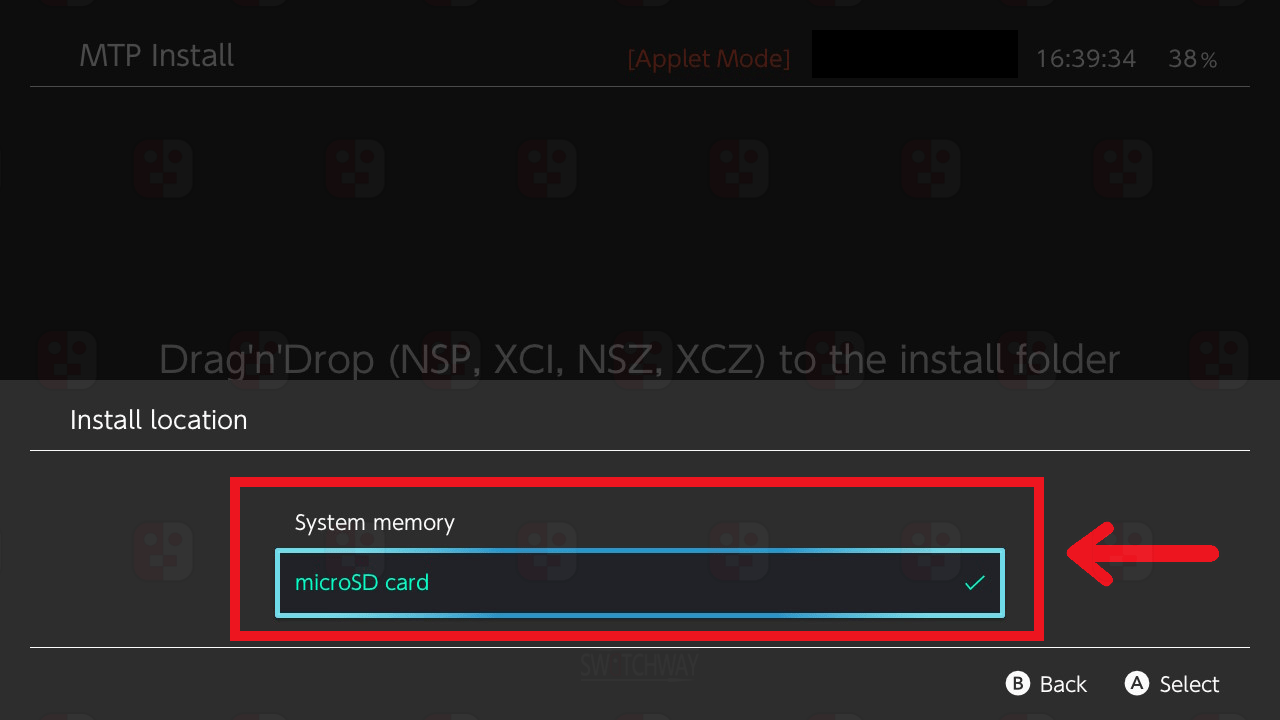
- Press the X button to open the Install options menu. Scroll down to Install location and press the A button to open the Install location menu. Press the A button to select where you want the game to install, then press the B button to exit the Install options menu and return to the Drag’n’Drop (NSP, XCI, NSZ, XCZ) to the install folder screen.
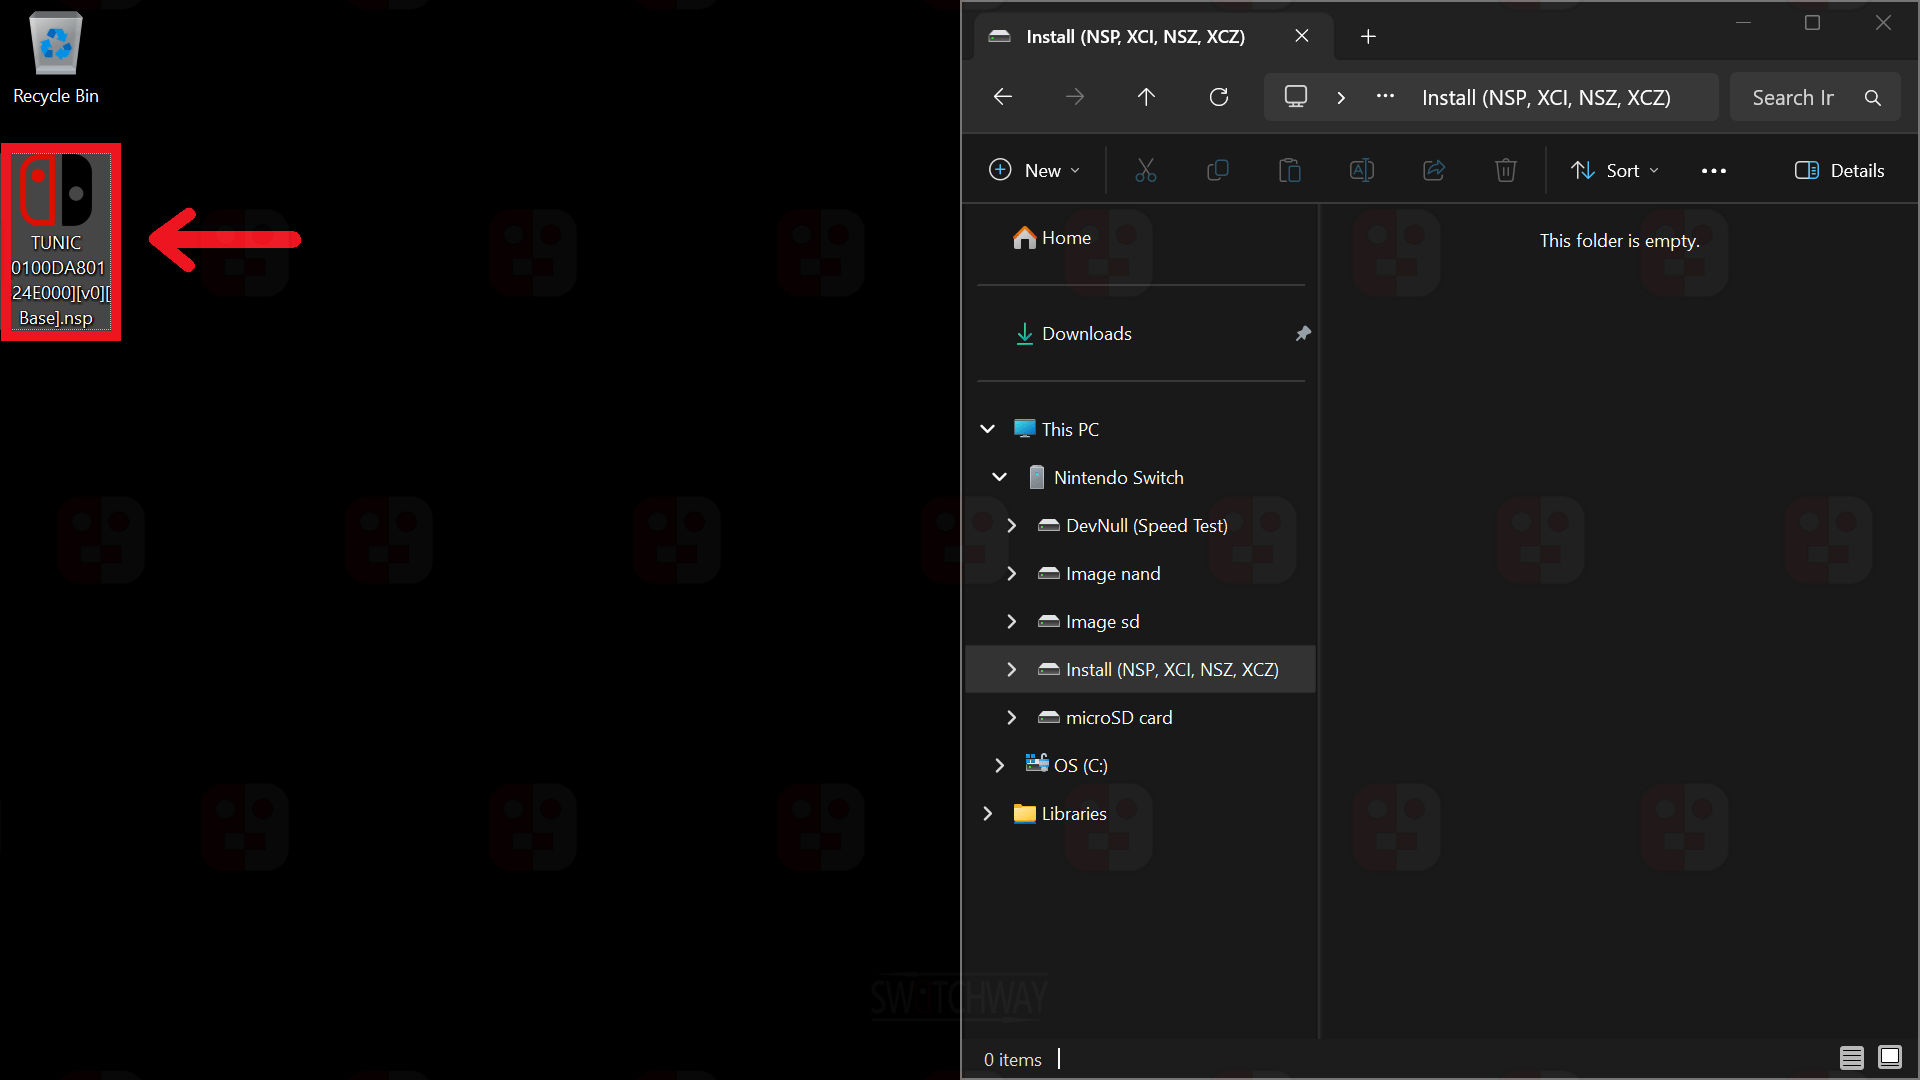
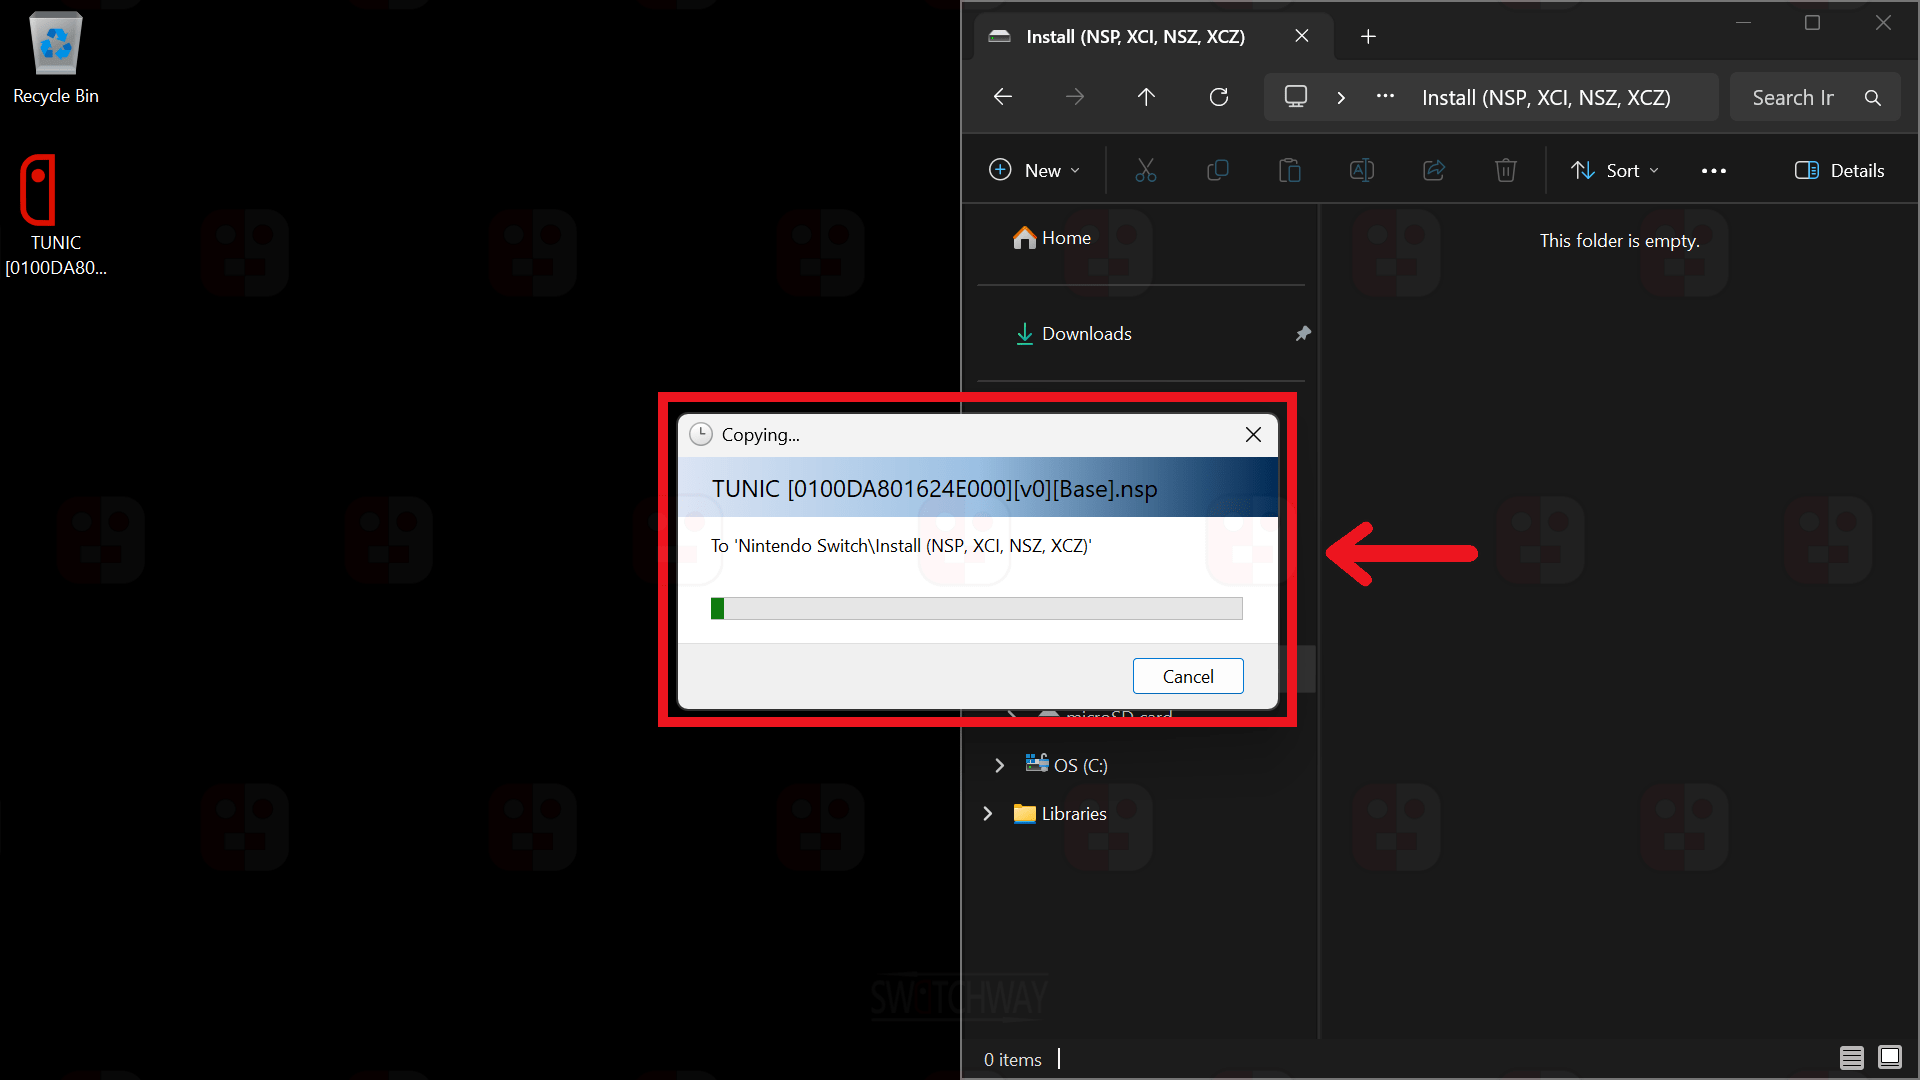
- On your PC open the Nintendo Switch > Install (NSP, XCI, NSZ, XCZ) drive and drag/drop or copy the base game, update or DLC file(s) you want to install from your PC into the Install (NSP, XCI, NSZ, XCZ) drive.
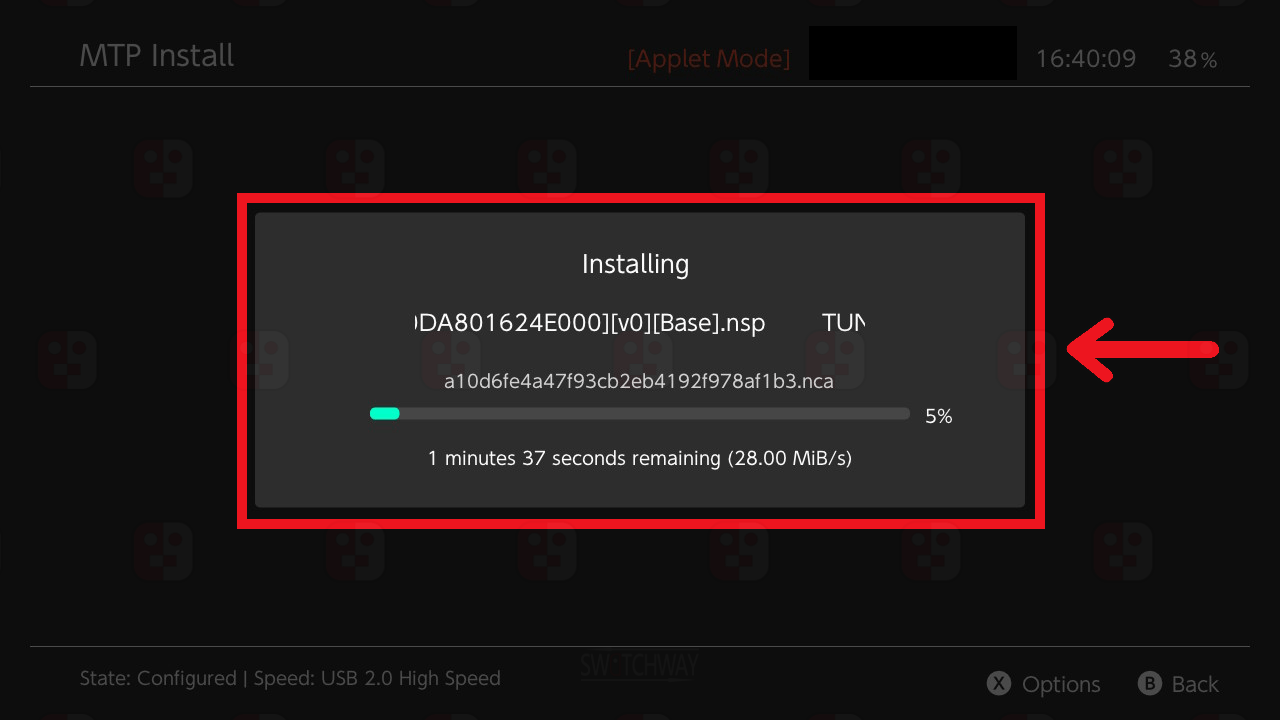
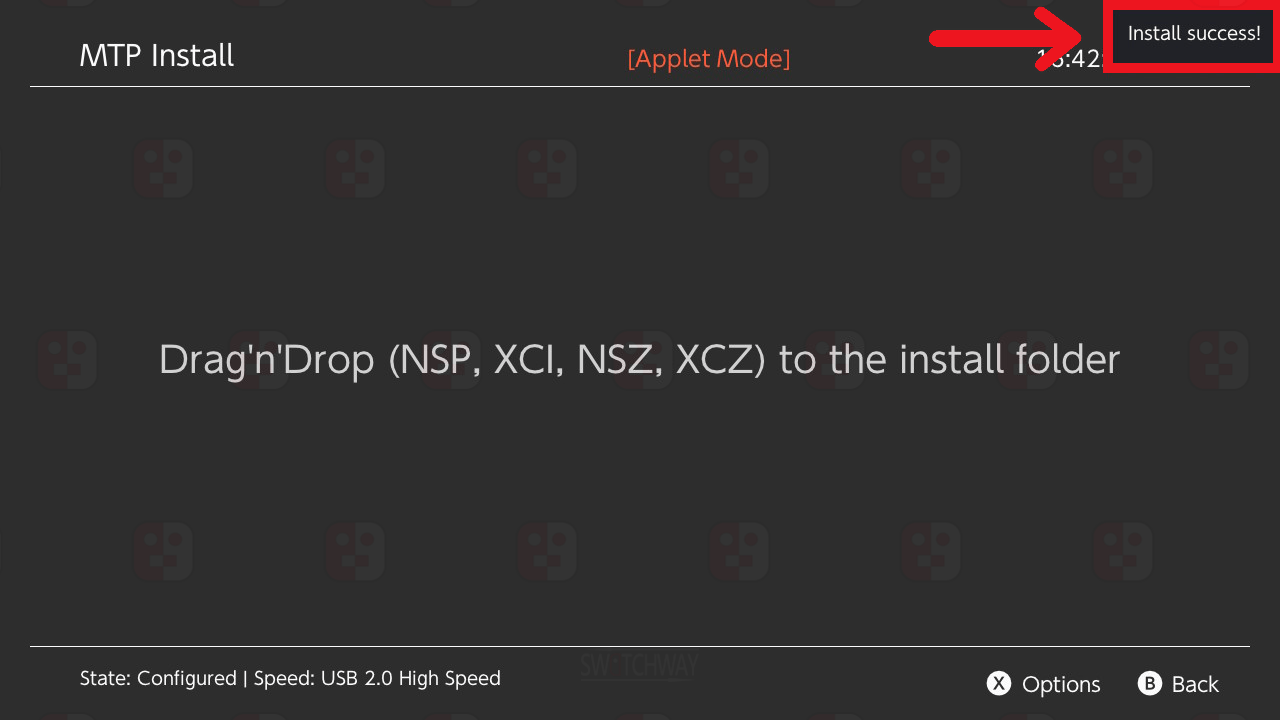
- An install screen will be displayed on your switch and on your PC. Once the installation is complete an Install success! message will pop up on the top right of the screen on your Switch. Exit Sphaira with the Home button, the game will be installed on the Home screen.
Guide Information
Install game dumps, updates and DLC via USB with Tinwoo and ns-usbloader.
- Install NSP/NSZ/XCI/XCZ
- 10+ Minutes
- Installing your own 'backups' will result in a ban if you connect to Nintendo. Use appropriate ban protection.
What You Need
- Unpatched/Modchipped Switch
- MicroSD Card (64GB+)
- USB Cable
- Tinwoo
- ns-usbloader
- PC
USB Installs With Tinwoo and ns-usbloader
- Download the software from the links below.
- Extract the Tinwoo-Installer.zip to the root of your microSD card.
- Run the Installer-x.x.exe to install ns-usbloader to your PC. Once installed, run ns-usbloader.
- Boot Atmosphere and run Tinwoo from the hbmenu in non applet mode (hold R whilst launching a game).
- Connect your Switch to your PC with a USB cable.
- In Tinwoo, select Install via USB and press OK to accept the warning. You will see the following notice: “USB connection successful! Waiting for list of files to be sent…”.
- If you can't get a USB connection, click the cog symbol on the left side of ns-usbloader, then click Download and install drivers on the top right and follow the steps to install the drivers.
- In ns-usbloader, click “Select files” at the bottom left of the screen and select the file(s) you want to install (you can highlight multiple files), the files will be displayed on the list in ns-usbloader.
- Once the files are added to the list in ns-usbloader, click on “Upload to NS” at the bottom right of the screen.
- You will see the game files get added to Tinwoo on your Switch. Press the A or Y (install all) button to select the file(s) to install in Tinwoo, the press the + button on your Switch to install the file(s), then choose the location for your install:
SD Card will install to: the Nintendo folder in sysMMC, or to emuMMC/RAW1/Nintendo in emuMMC.
Internal Storage will install to: the internal storage in sysMMC, or to the emuMMC partition in emuMMC.
- Once you have chosen the location for your install, press the A button to continue. You will see the progress in Tinwoo.
- Click OK in Tinwoo once you see the confirmation that the file(s) were successfully installed and exit Tinwoo. Your game(s) will be installed to your home screen.
Guide Information
Install game dumps, updates and DLC via USB with DBI.
- Install NSP/NSZ/XCI/XCZ
- 10+ Minutes
- Installing your own 'backups' will result in a ban if you connect to Nintendo. Use appropriate ban protection.
What You Need
- Unpatched/Modchipped Switch
- MicroSD Card (64GB+)
- USB Cable
- DBI
- PC
USB Installs With DBI
- Download the software from the link below (the last English version is v658 so download that).
- Put the DBI.nro into the switch folder on the root of your microSD card.
- Connect your Switch to your PC with a USB cable.
- Boot Atmosphere and run DBI from the hbmenu.
- In DBI, select Run MTP responder from the menu and wait a few moments for it to finish scanning.
- Your Switch will now connect to the PC and show up as “Switch” in Windows explorer.
- Open either:
Drive 5: MicroSD install for microSD card installs.
Drive 6: NAND install for internal/emuMMC partition installs.
- Copy or drag your game backup, update or DLC into one of the above drives (can be in folders).
- The installation will start and DBI will display Installation complete when it’s finished.
- Game files are deleted automatically from drive 5: or 6: drive after installation.
⚠️ Warning ⚠️
Modifying your Switch is dangerous. It can lead to account bans, which will prevent you from accessing Nintendo's online services and can also lead to potential console bricks. If you decide to modify your Switch in any way, we take no responsibility for any damage you cause to your switch. If you have any questions, or need help getting started, you can join our discord server by clicking the link above.