A complete guide to hack your Switch for the first time.
All Files Included
NAND Backup
Ban Protection
emuMMC Set Up
50+ Minutes
What You Need
Jig (Unpatched only)
MicroSD Card (64GB+)
Unpatched/Switch With Modchip
USB Cable
Windows PC
Getting Started
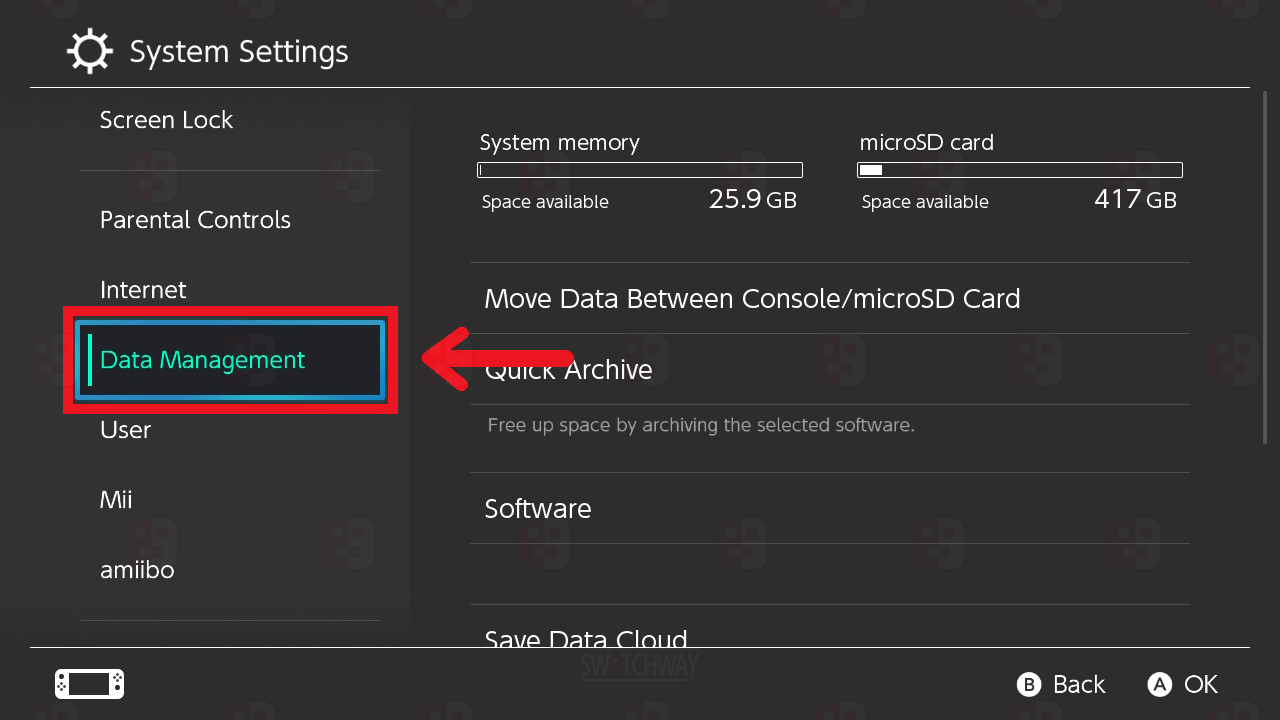
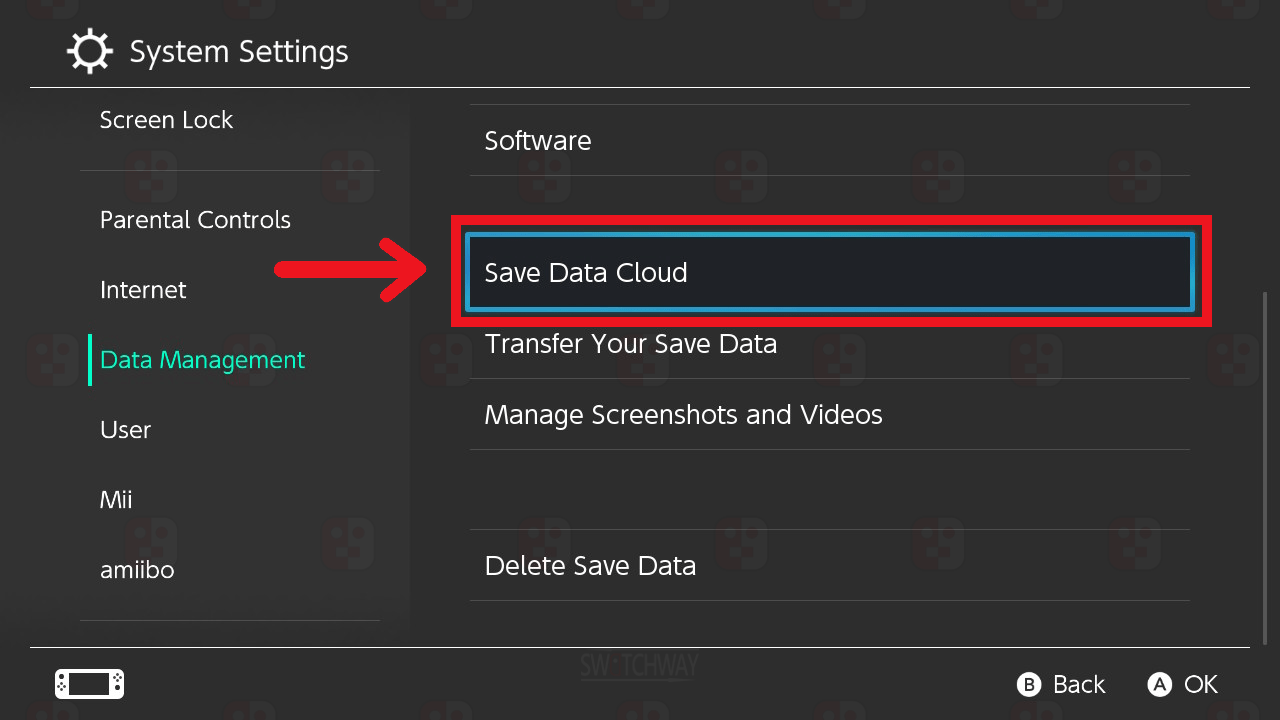
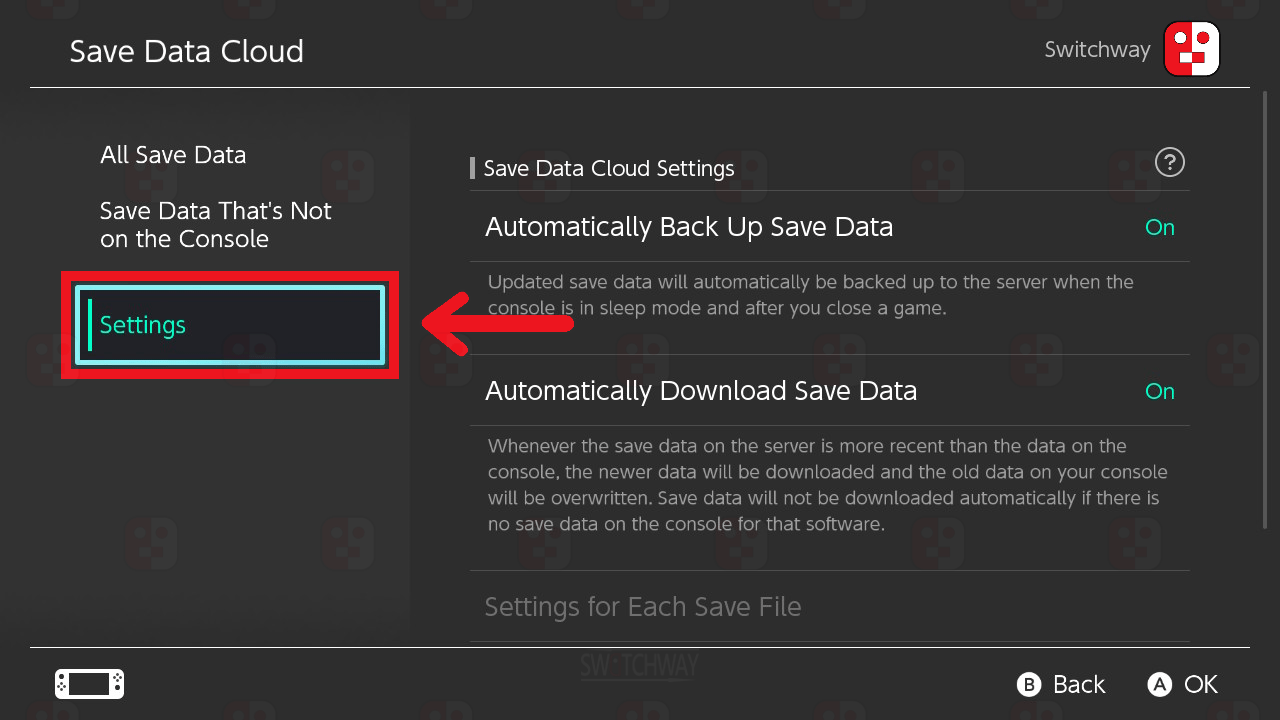
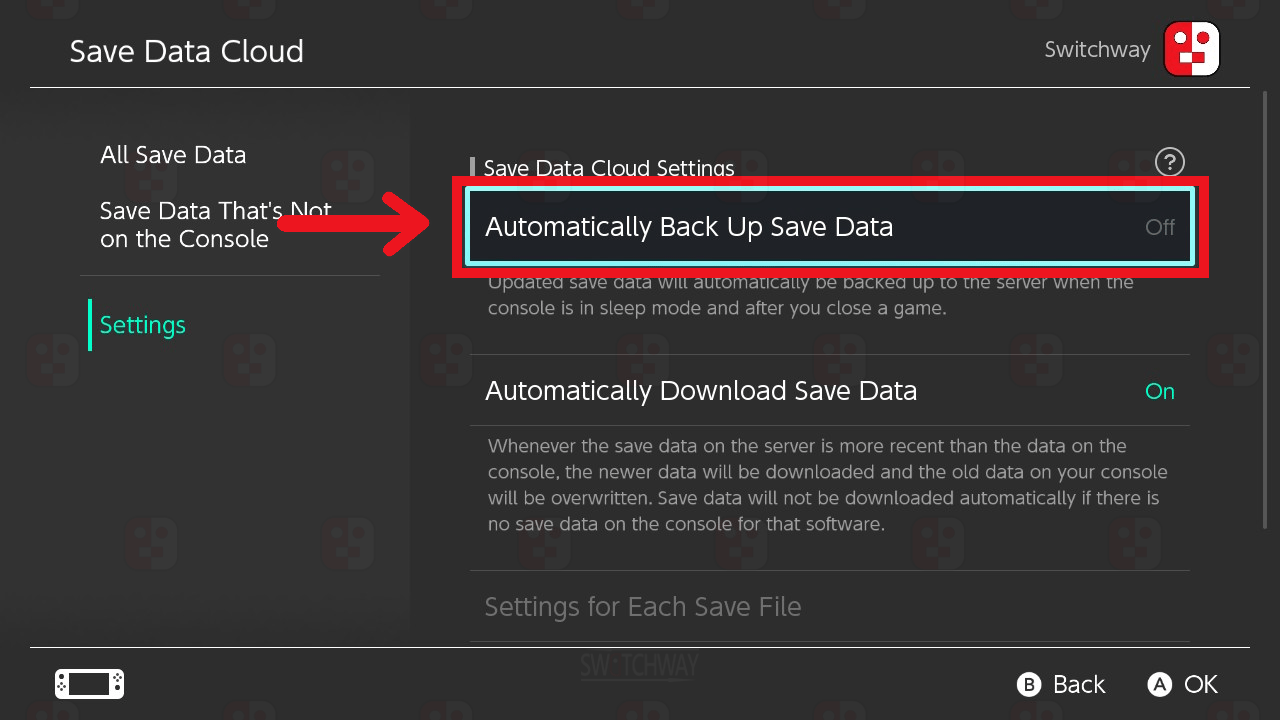
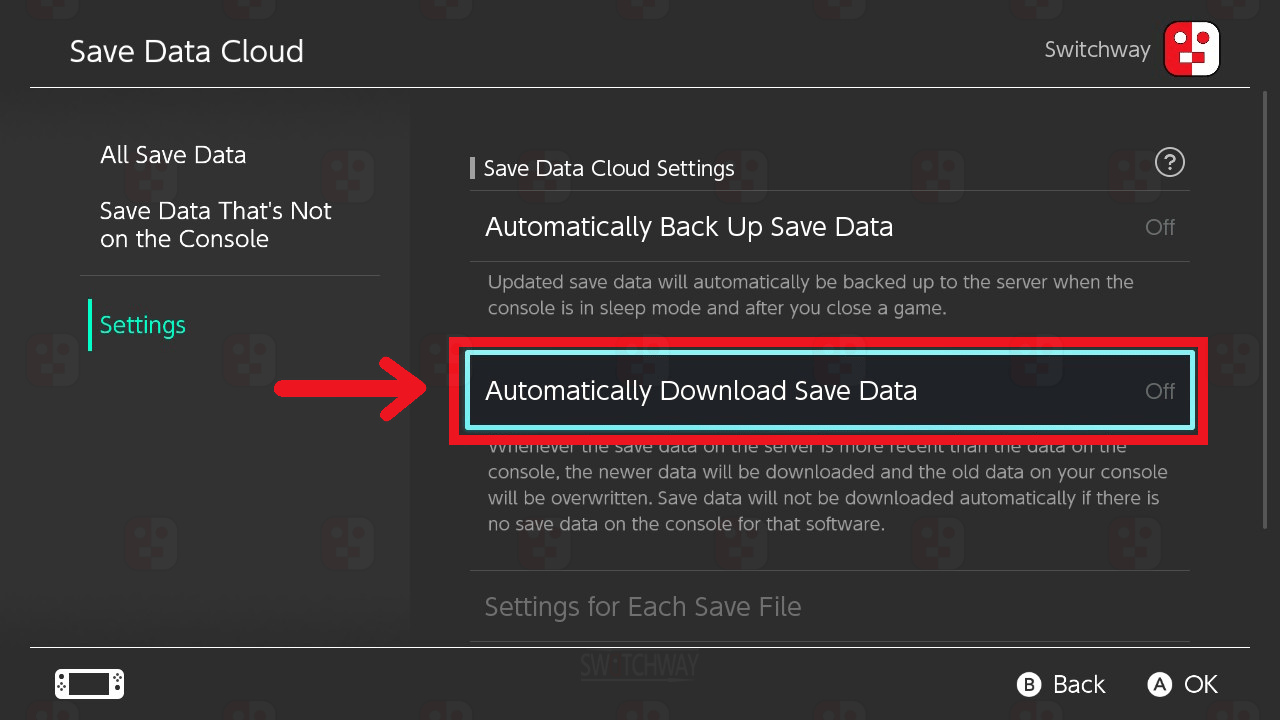
If you have Cloud Saves enabled, go to Data Management > Save Data Cloud > Settings > Make sure Automatically Back Up Save Data and Automatically Download Save Data are both set to Off.
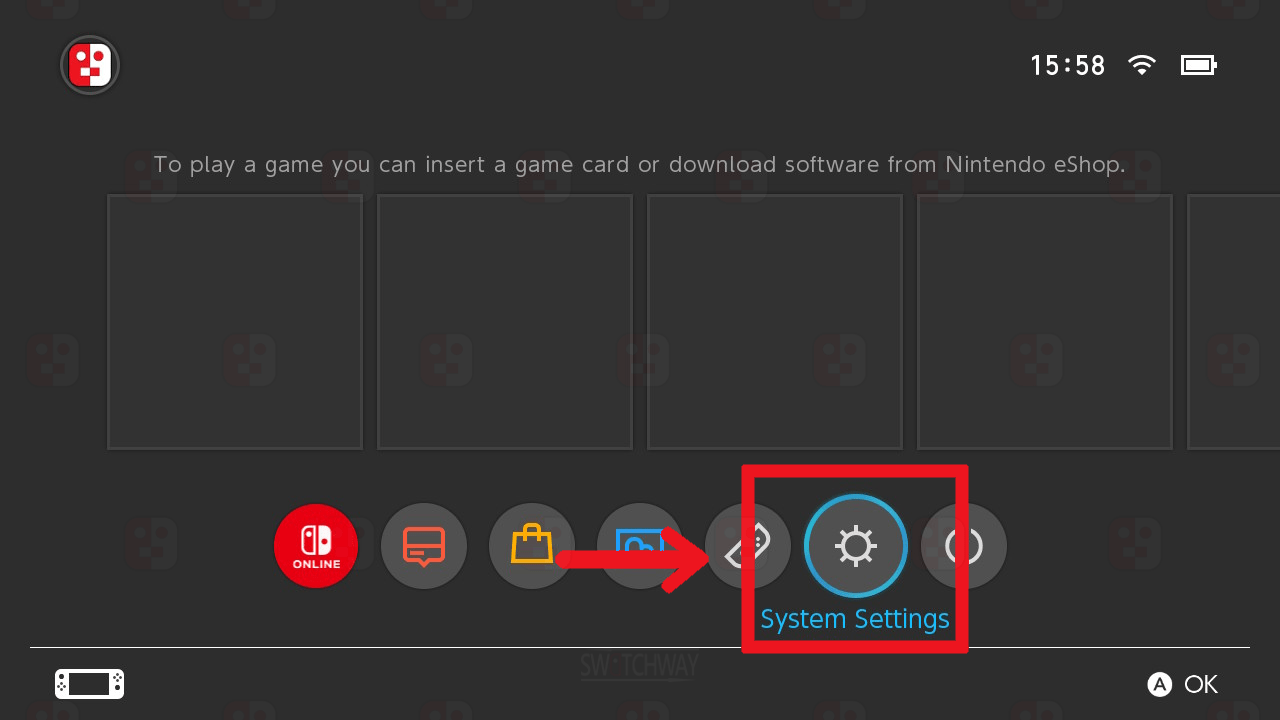
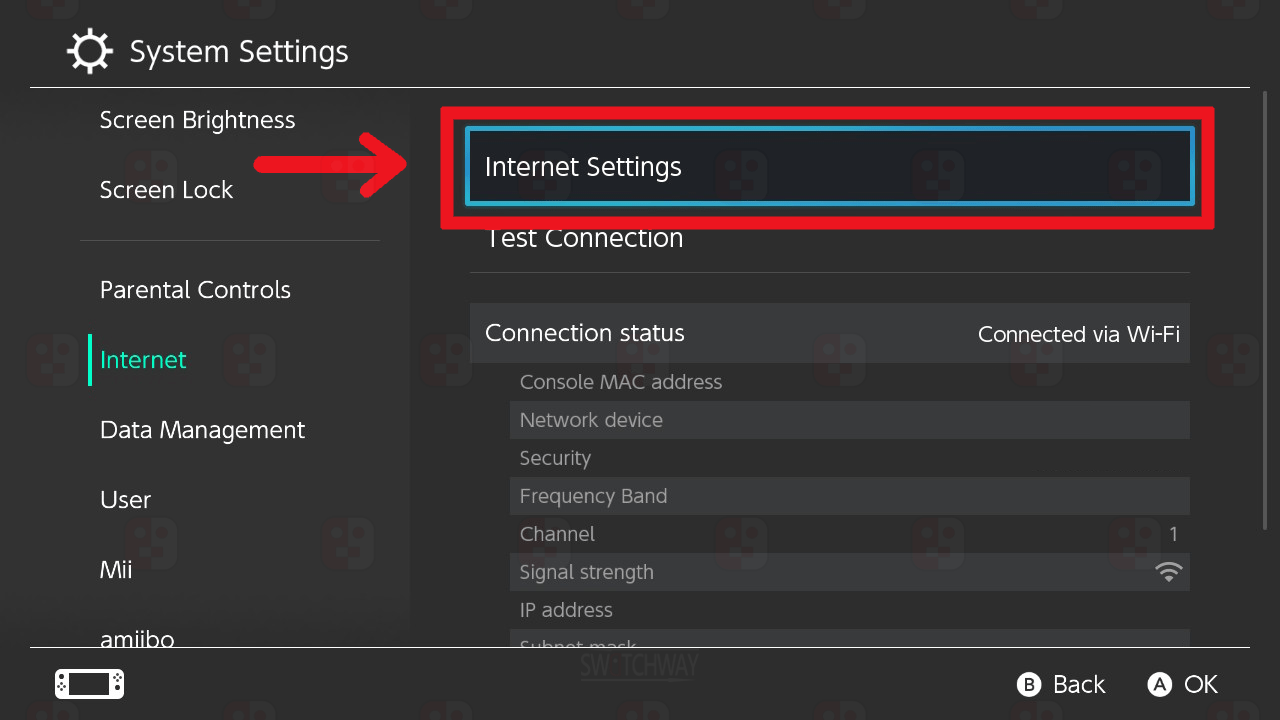
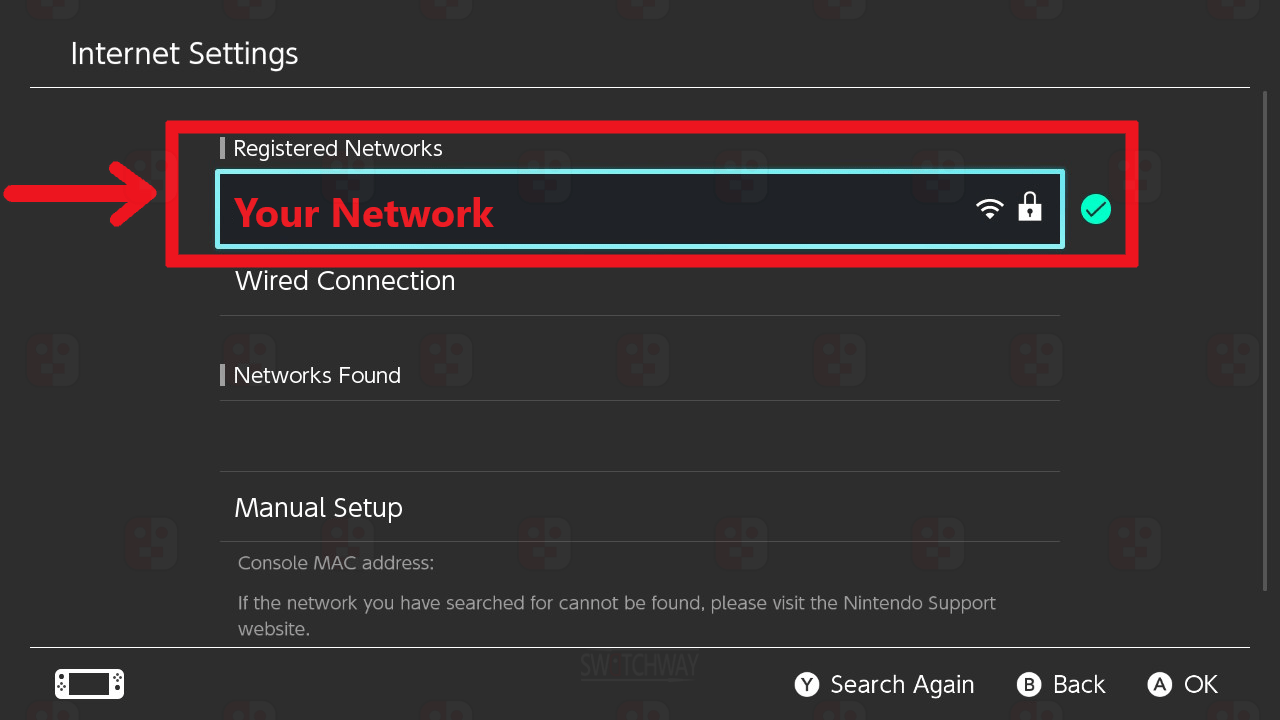
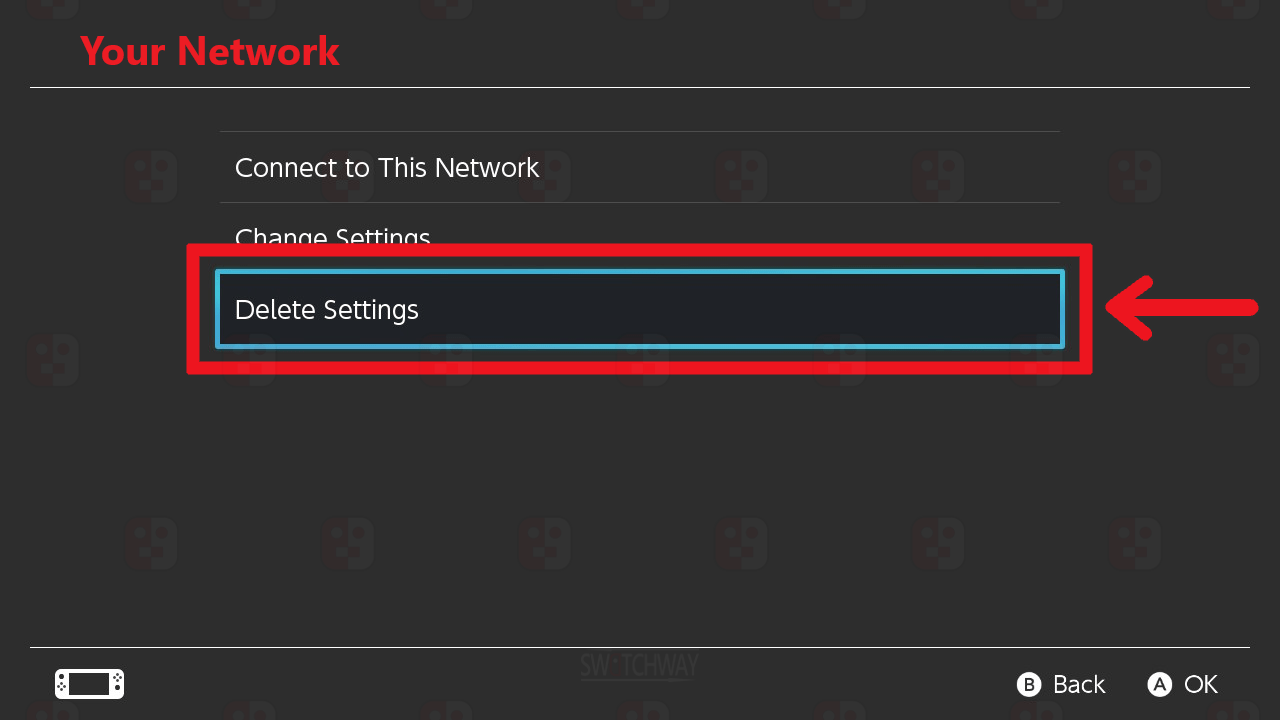
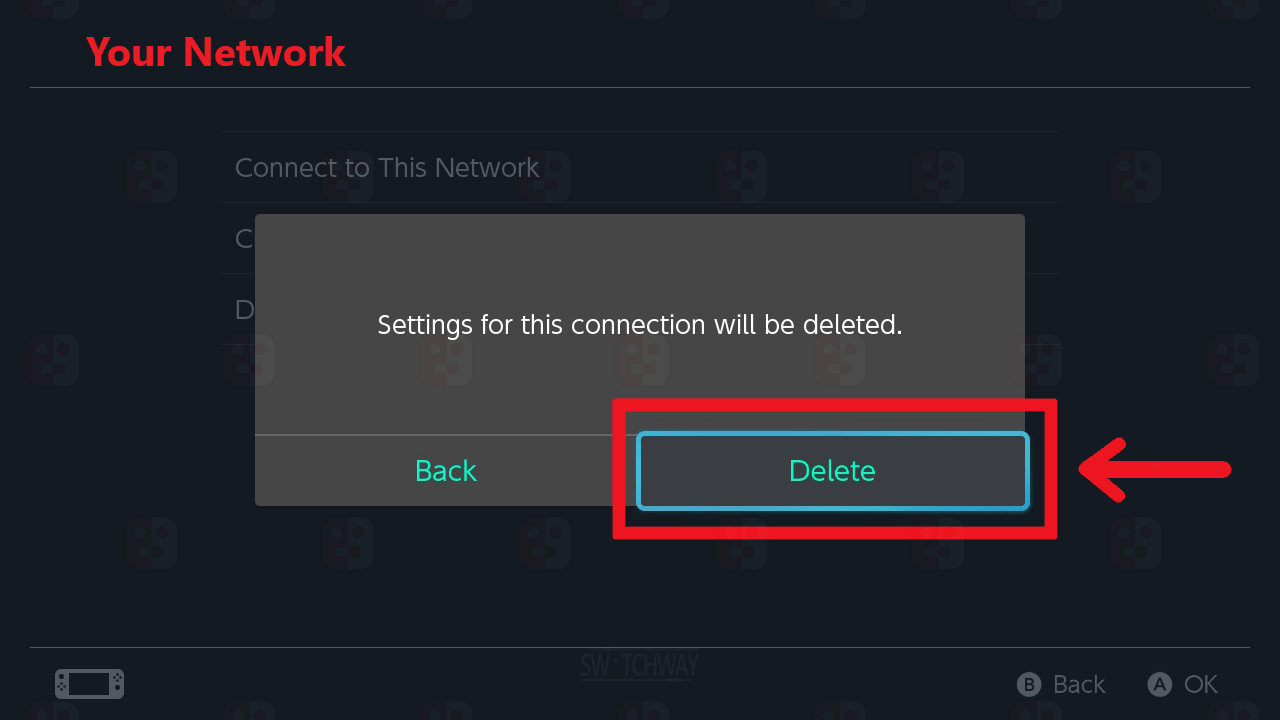
Delete your internet connections.
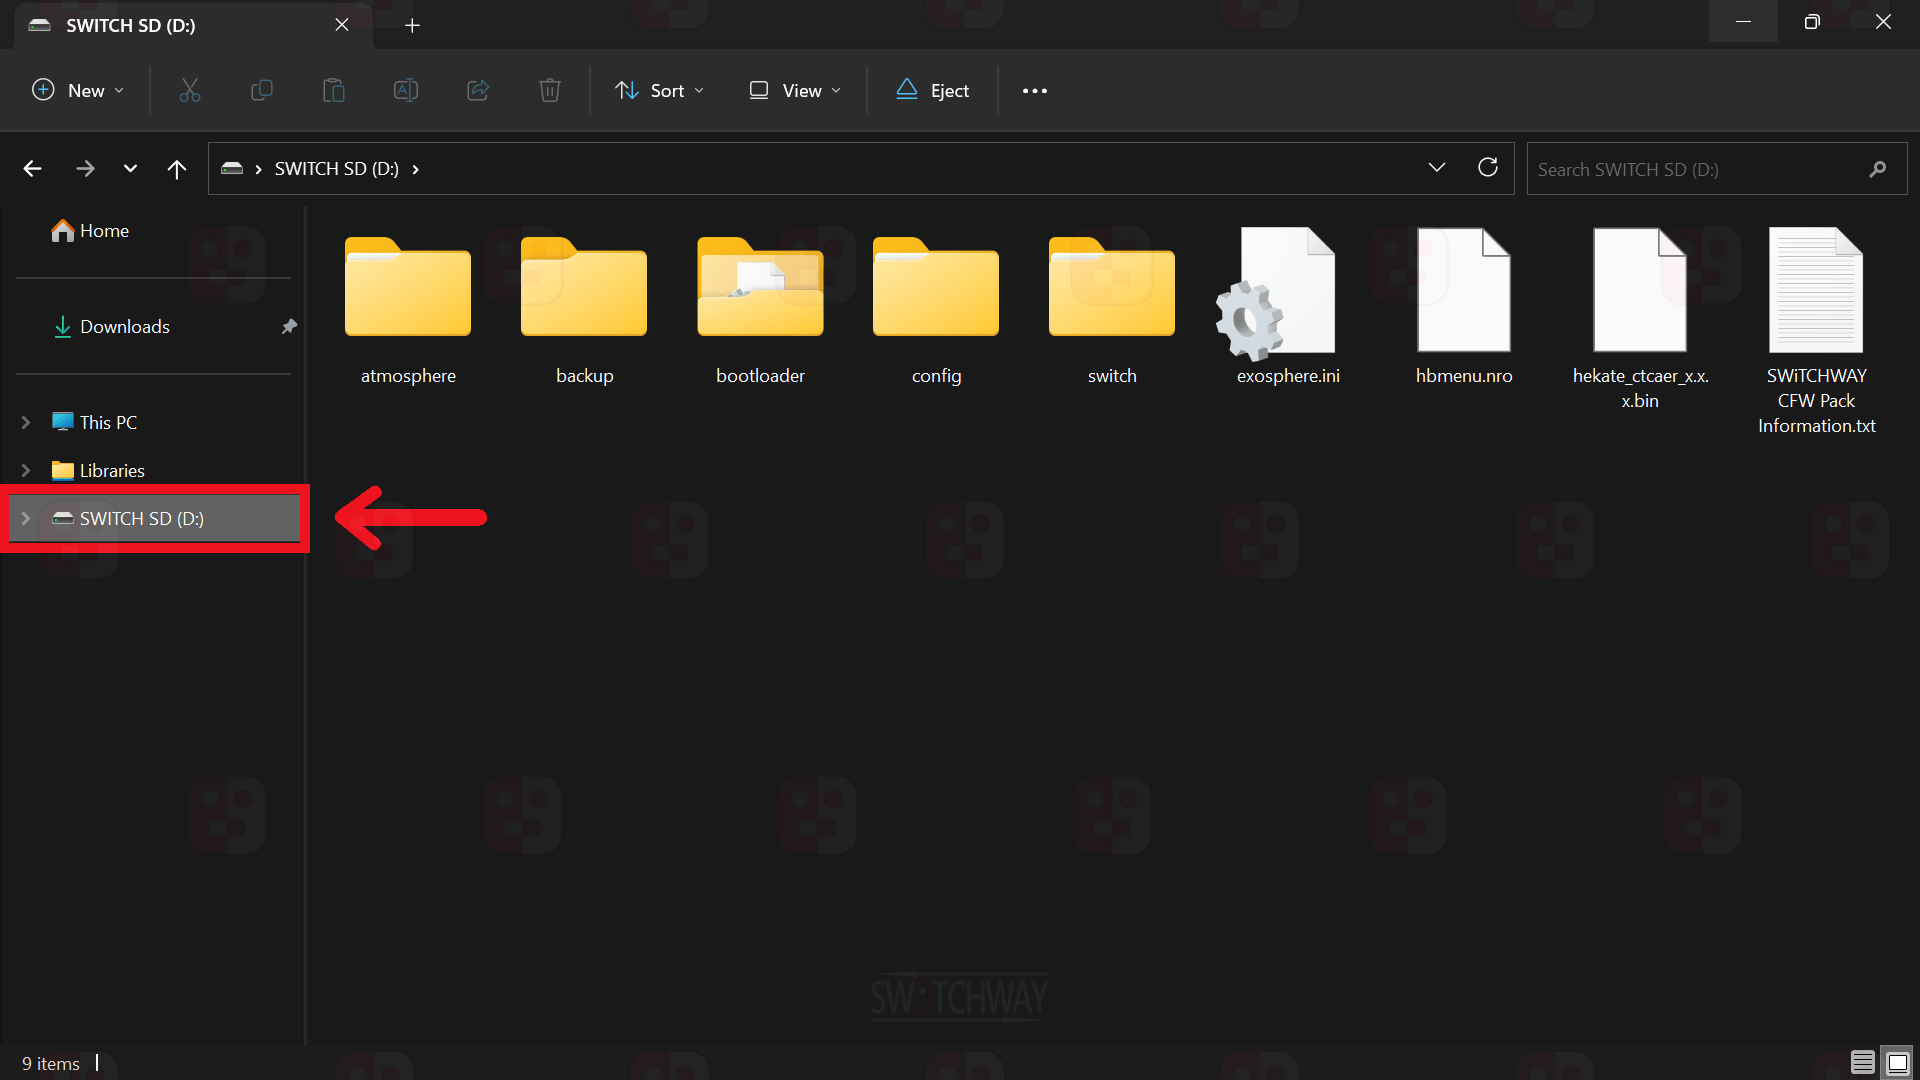
Power your Switch off, remove the microSD card and insert it into your PC.
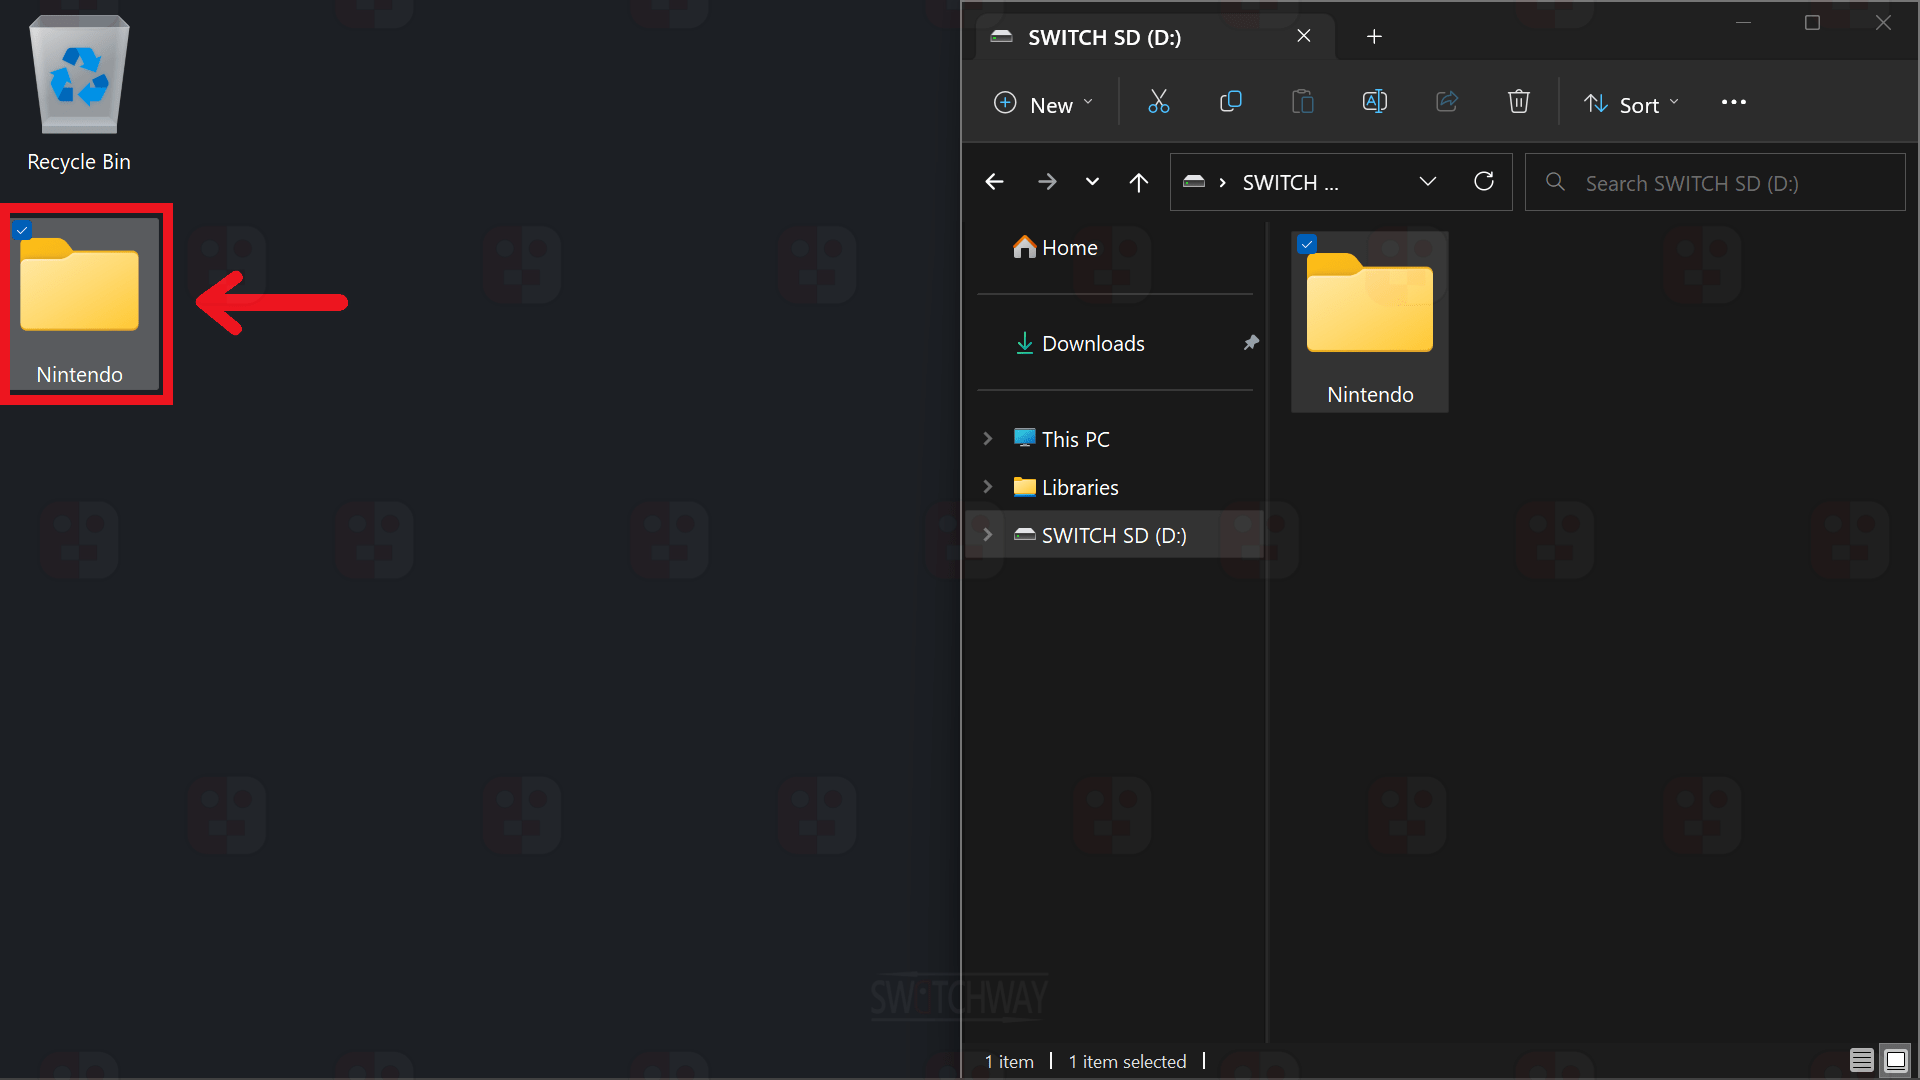
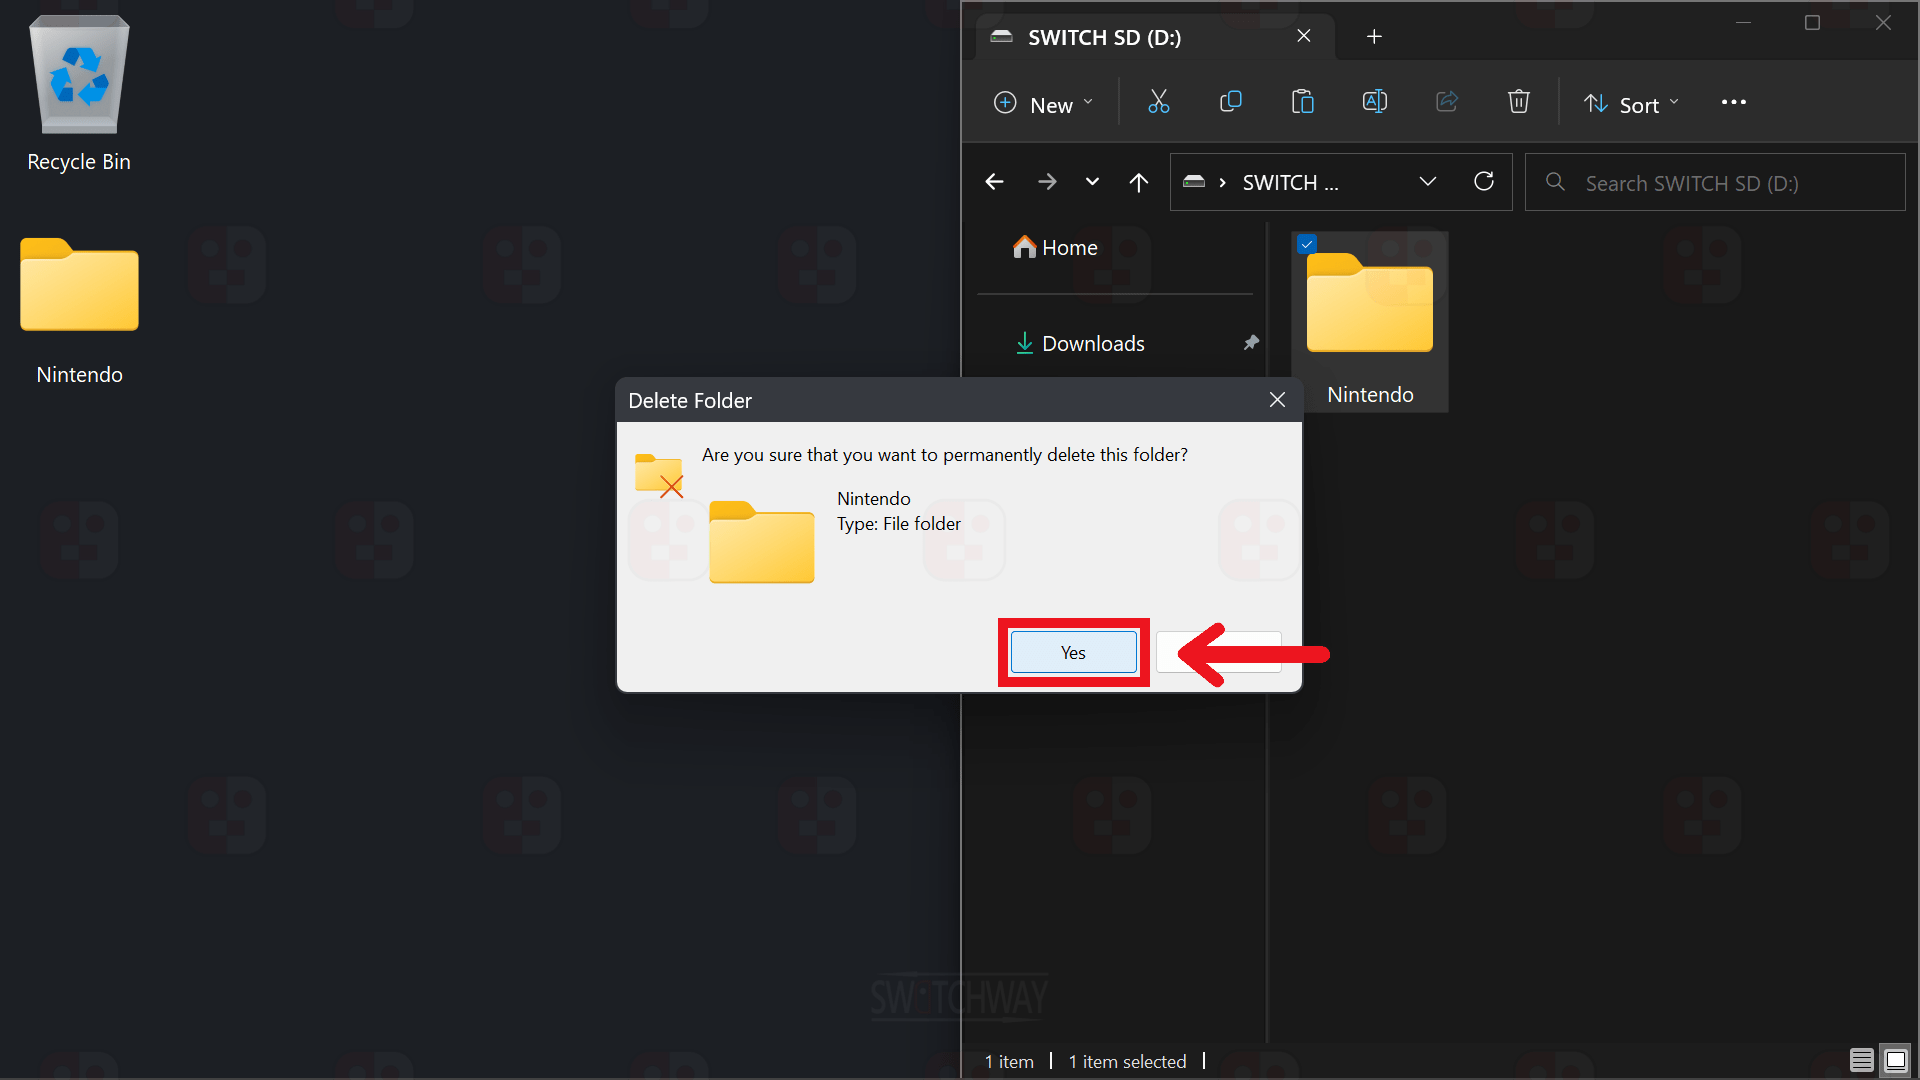
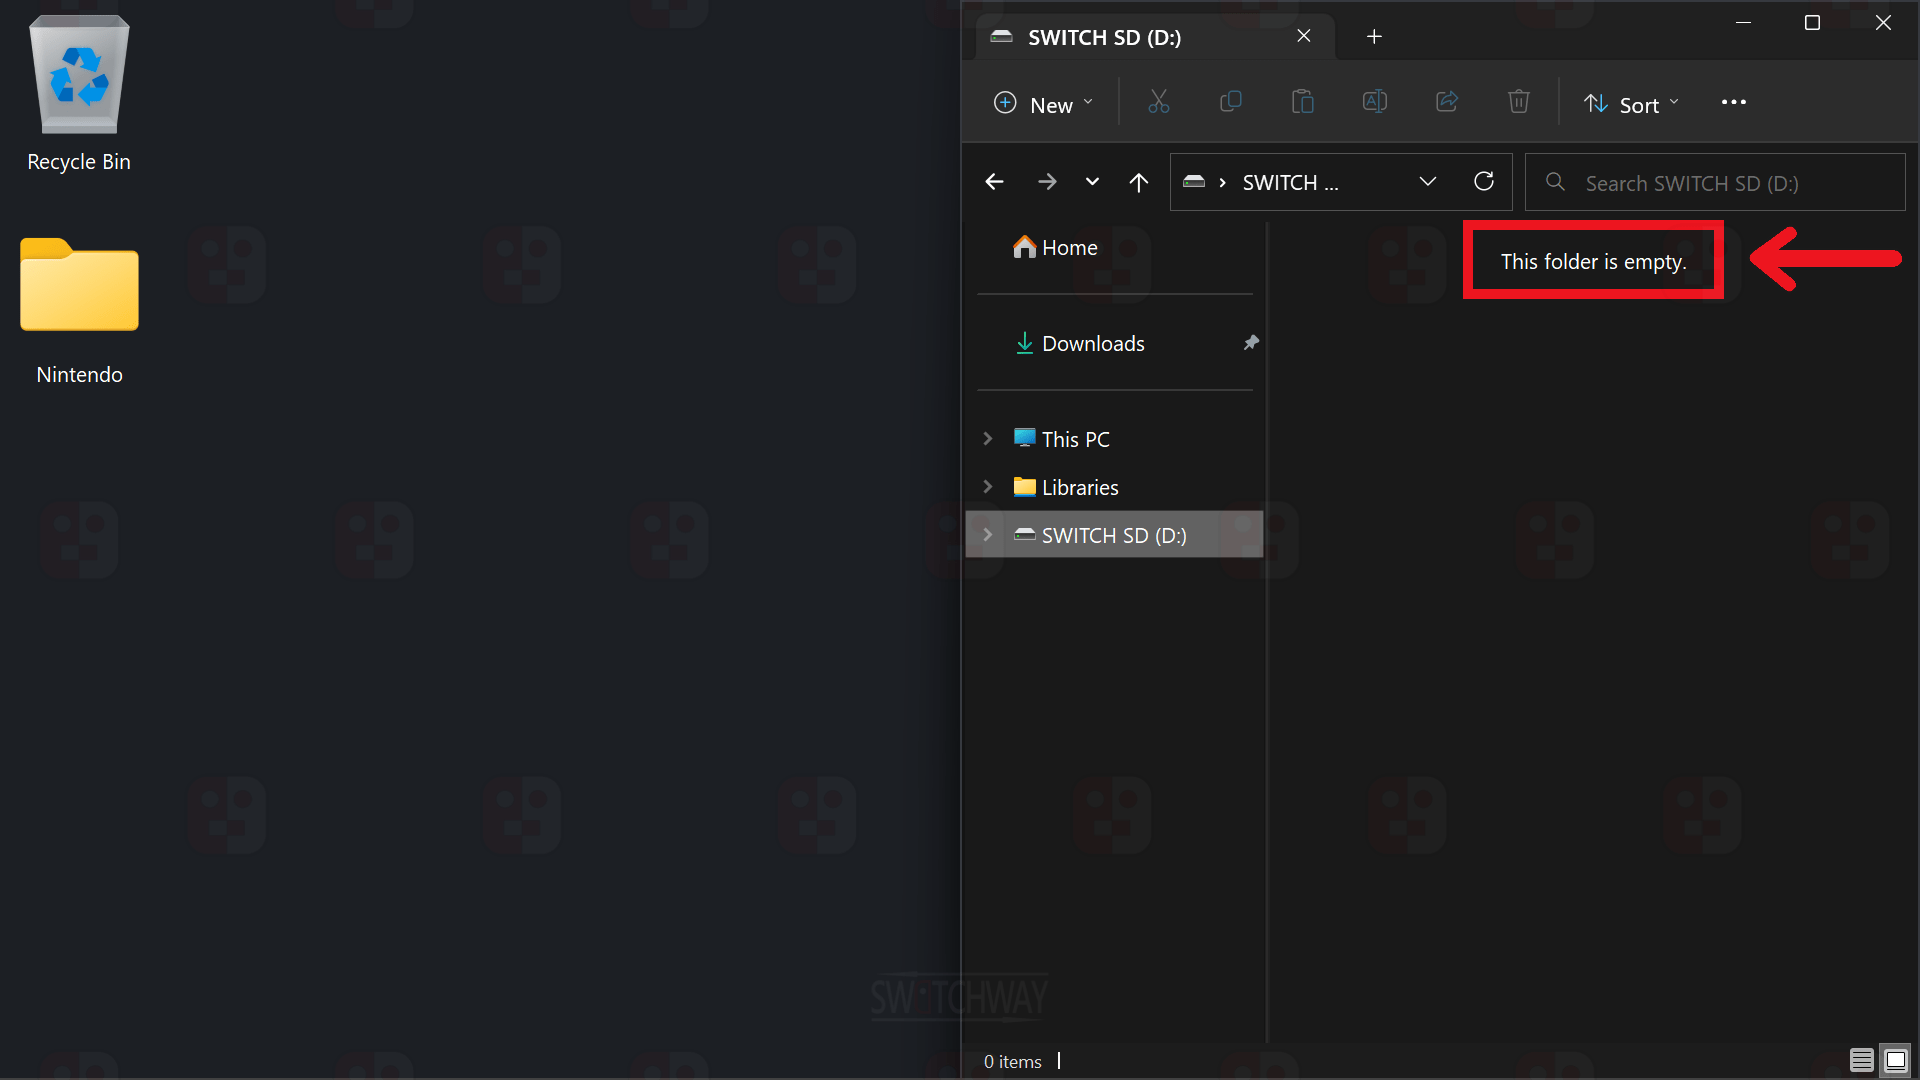
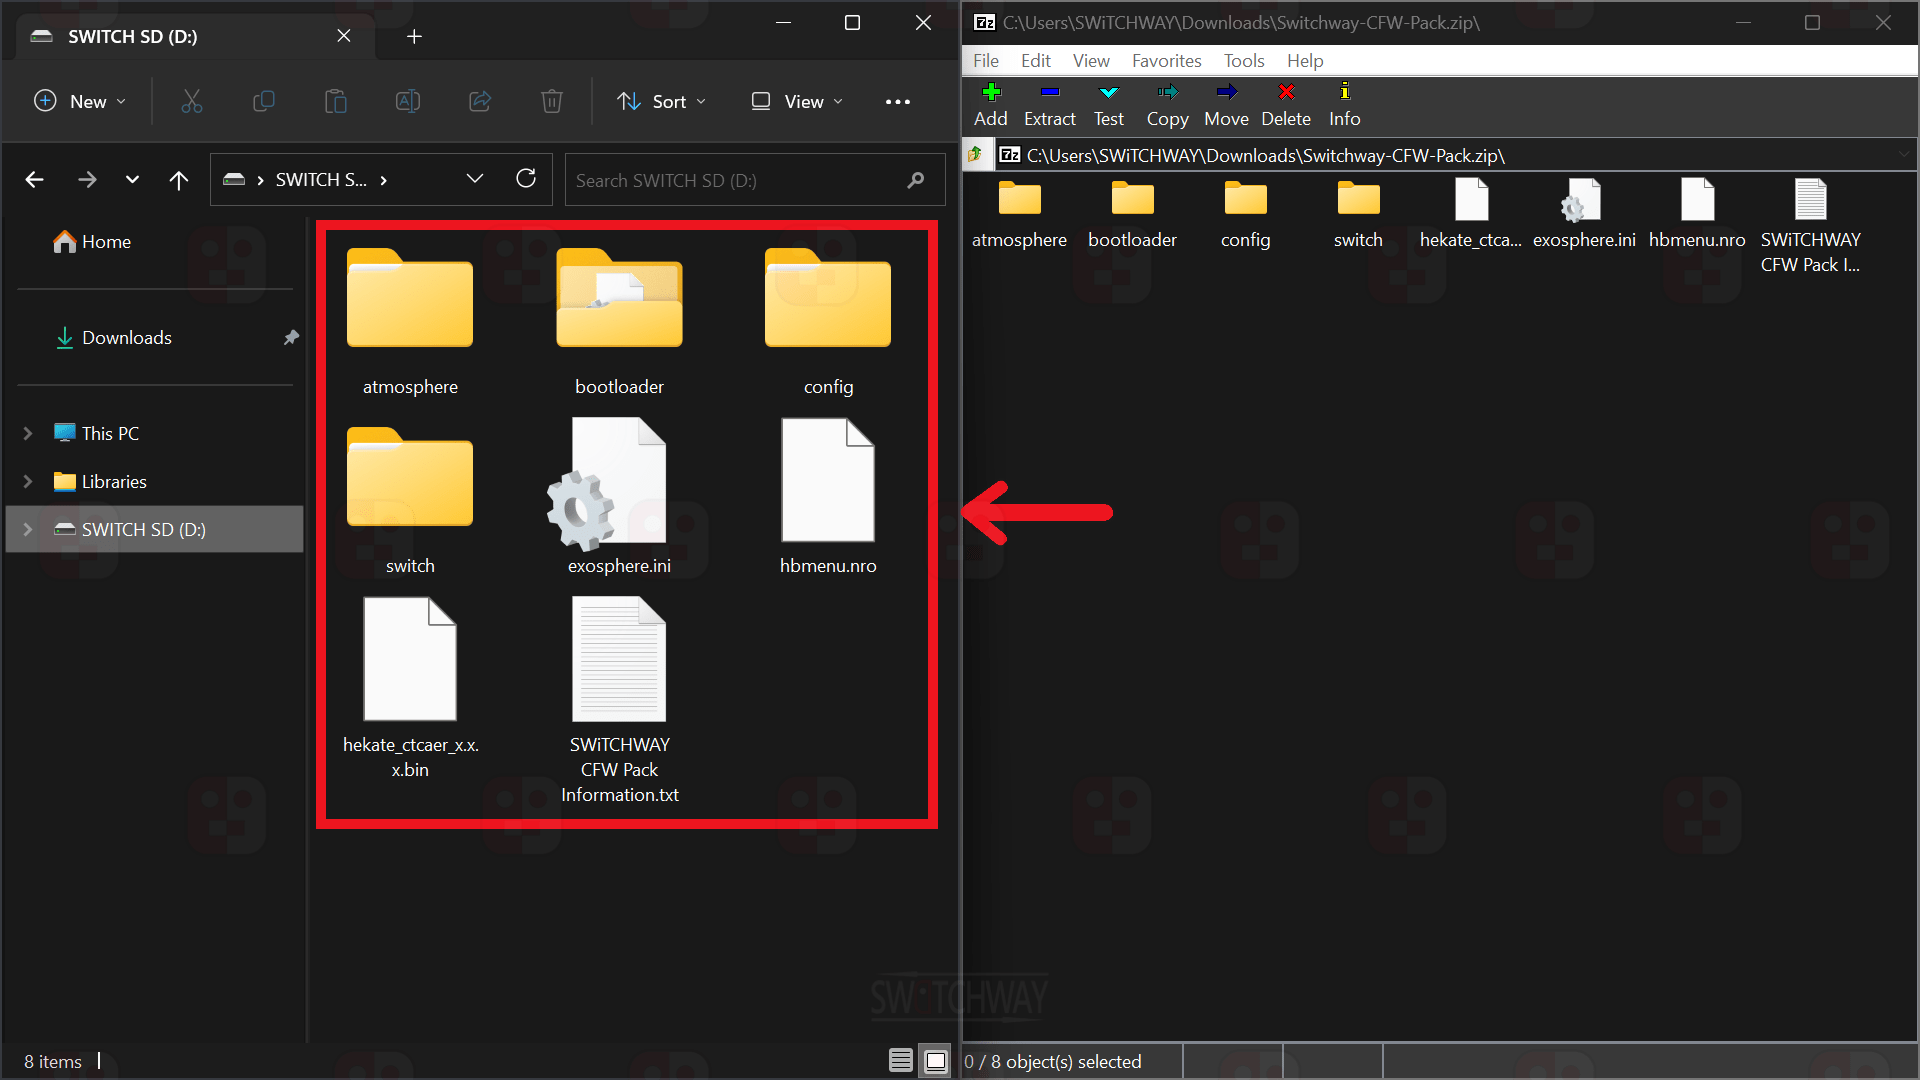
Make a full backup of the contents to your PC, then delete everything on the microSD card.
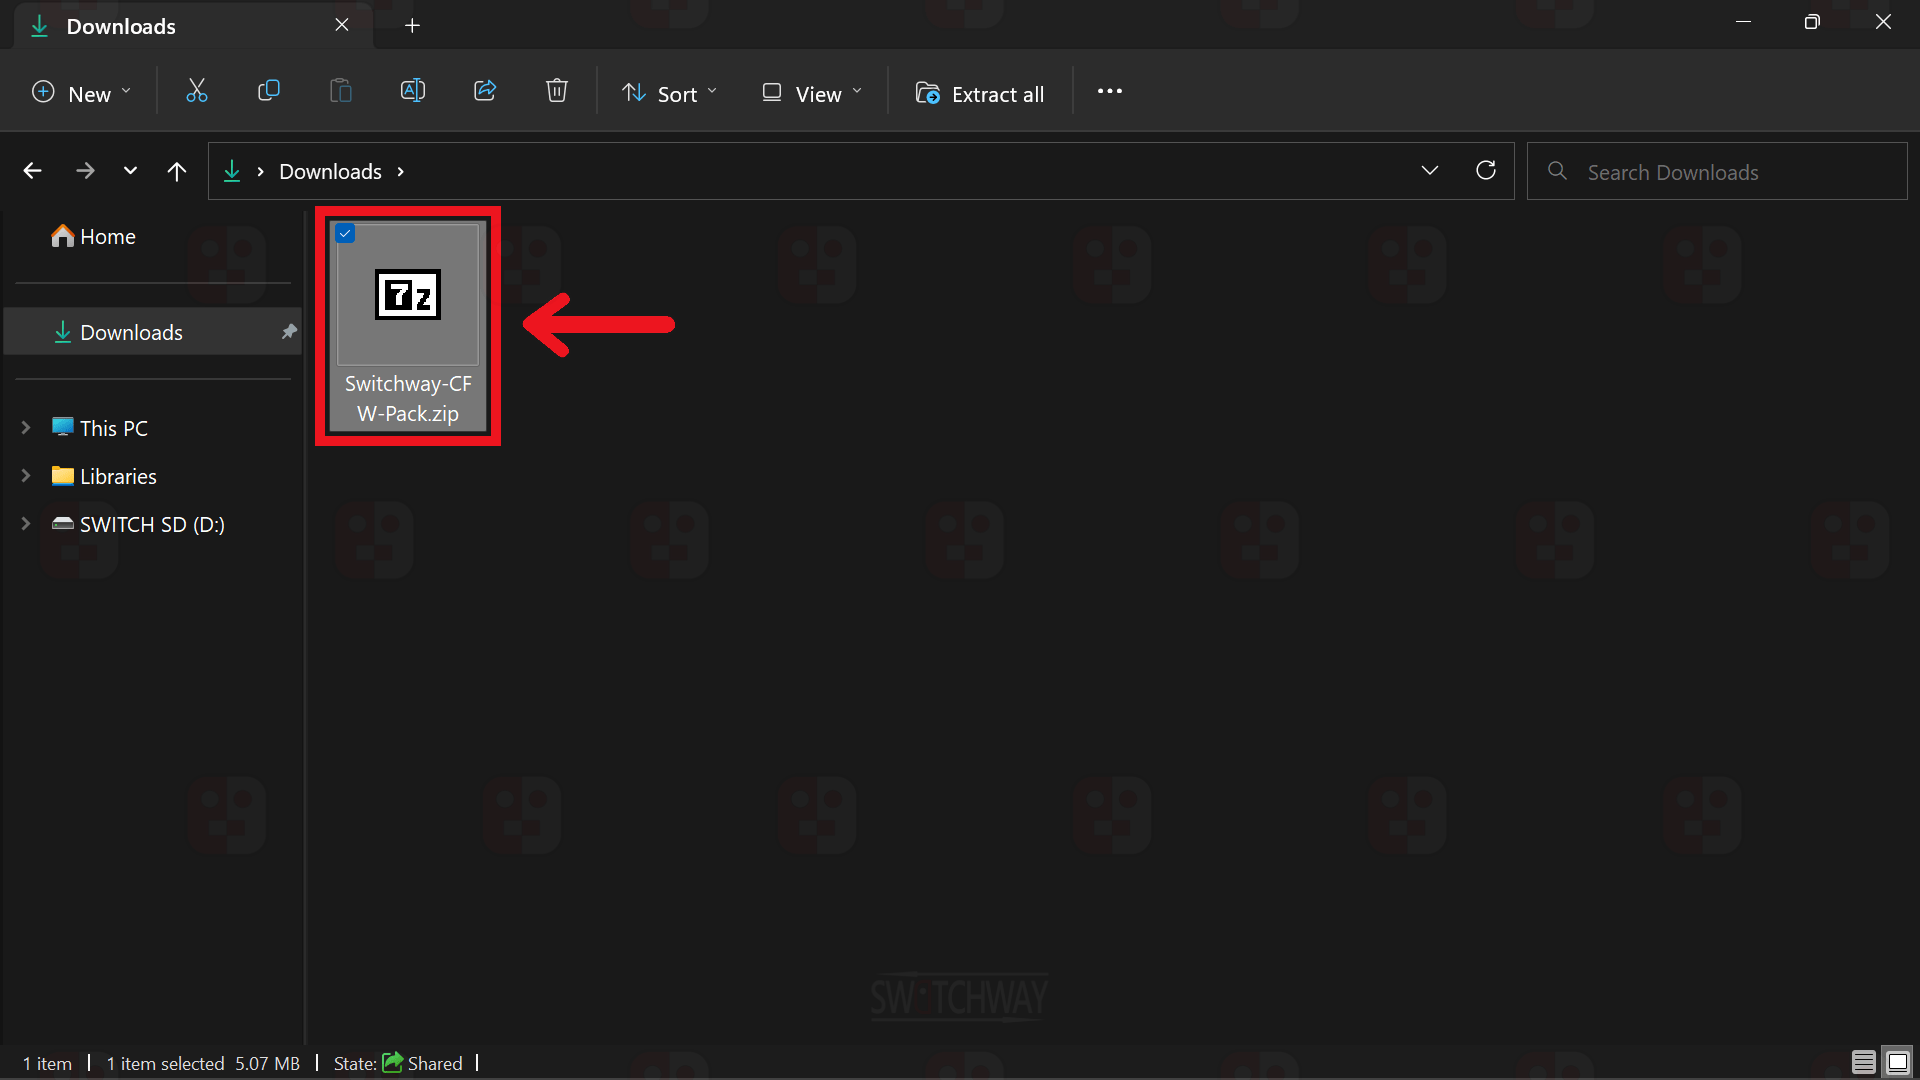
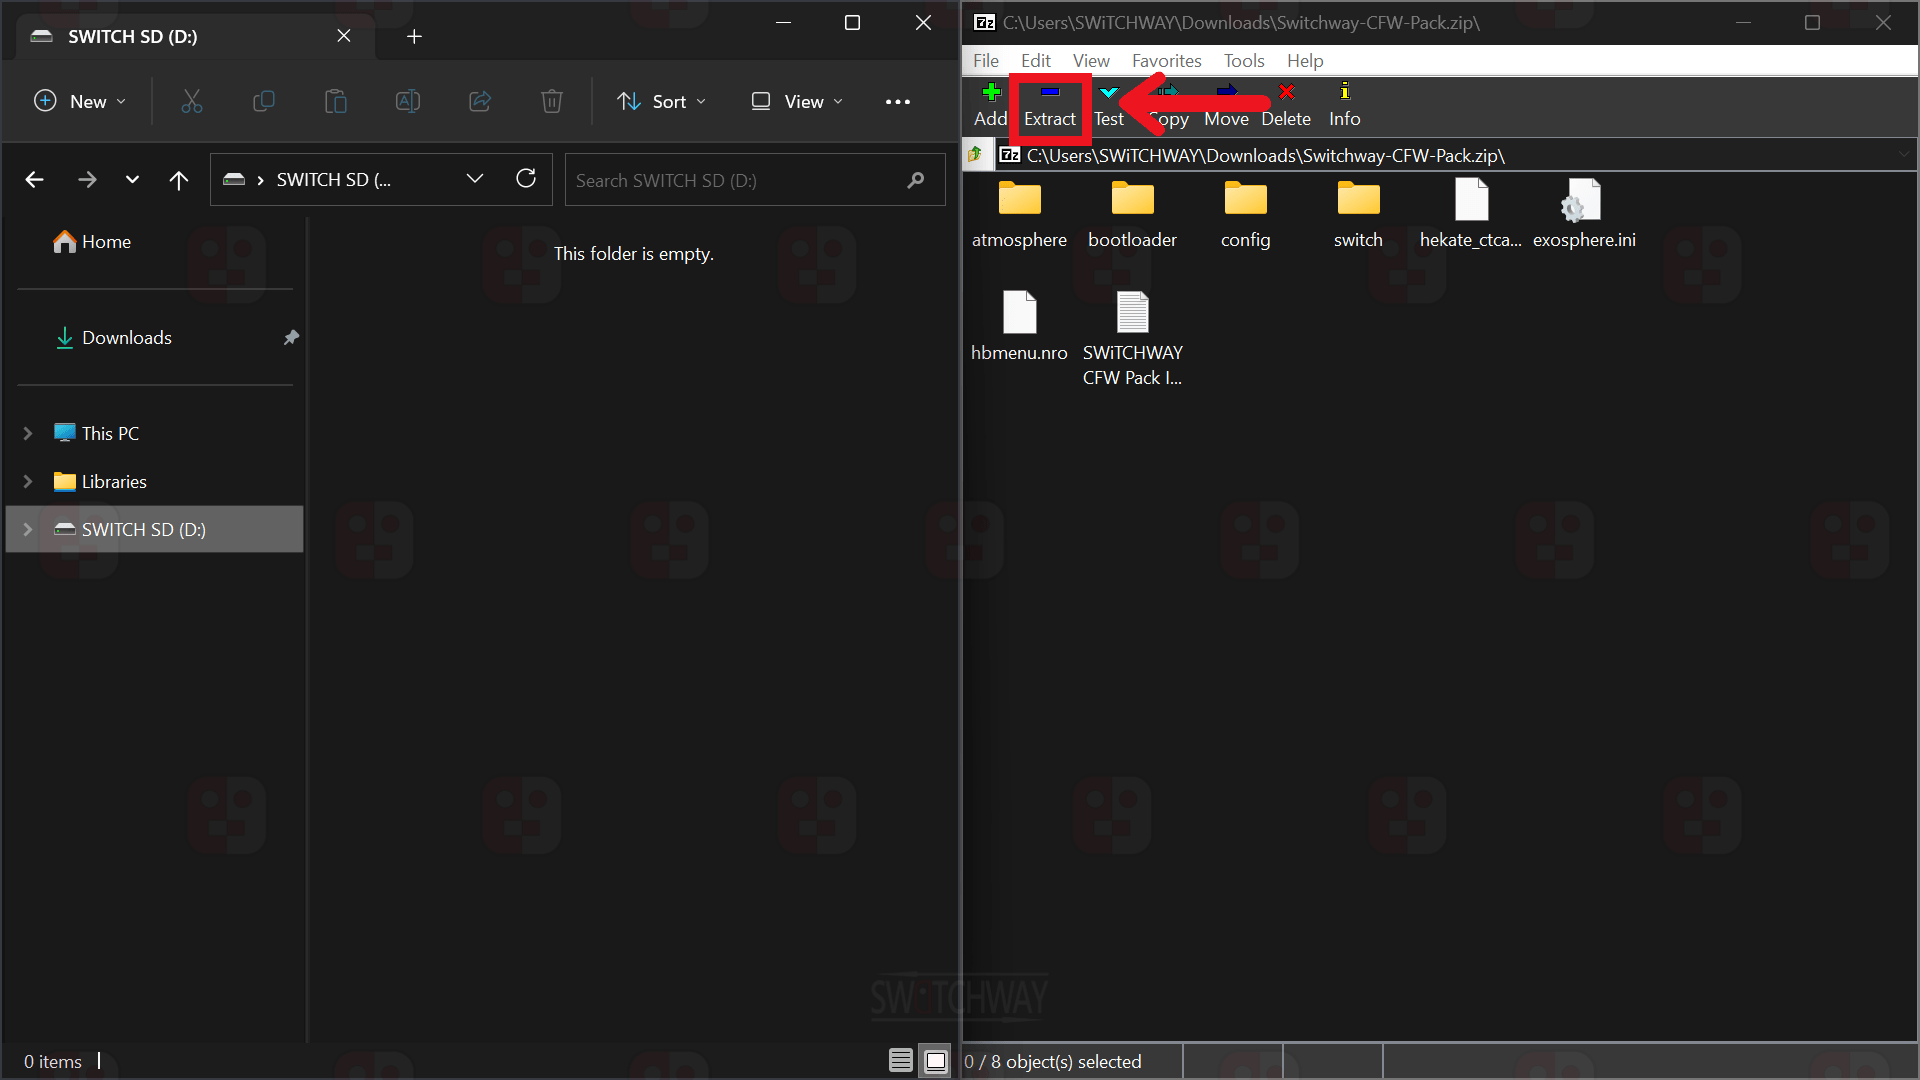
Download the Switchway-CFW-Pack.zipfrom the link below (2nd link for Switch with modchip).
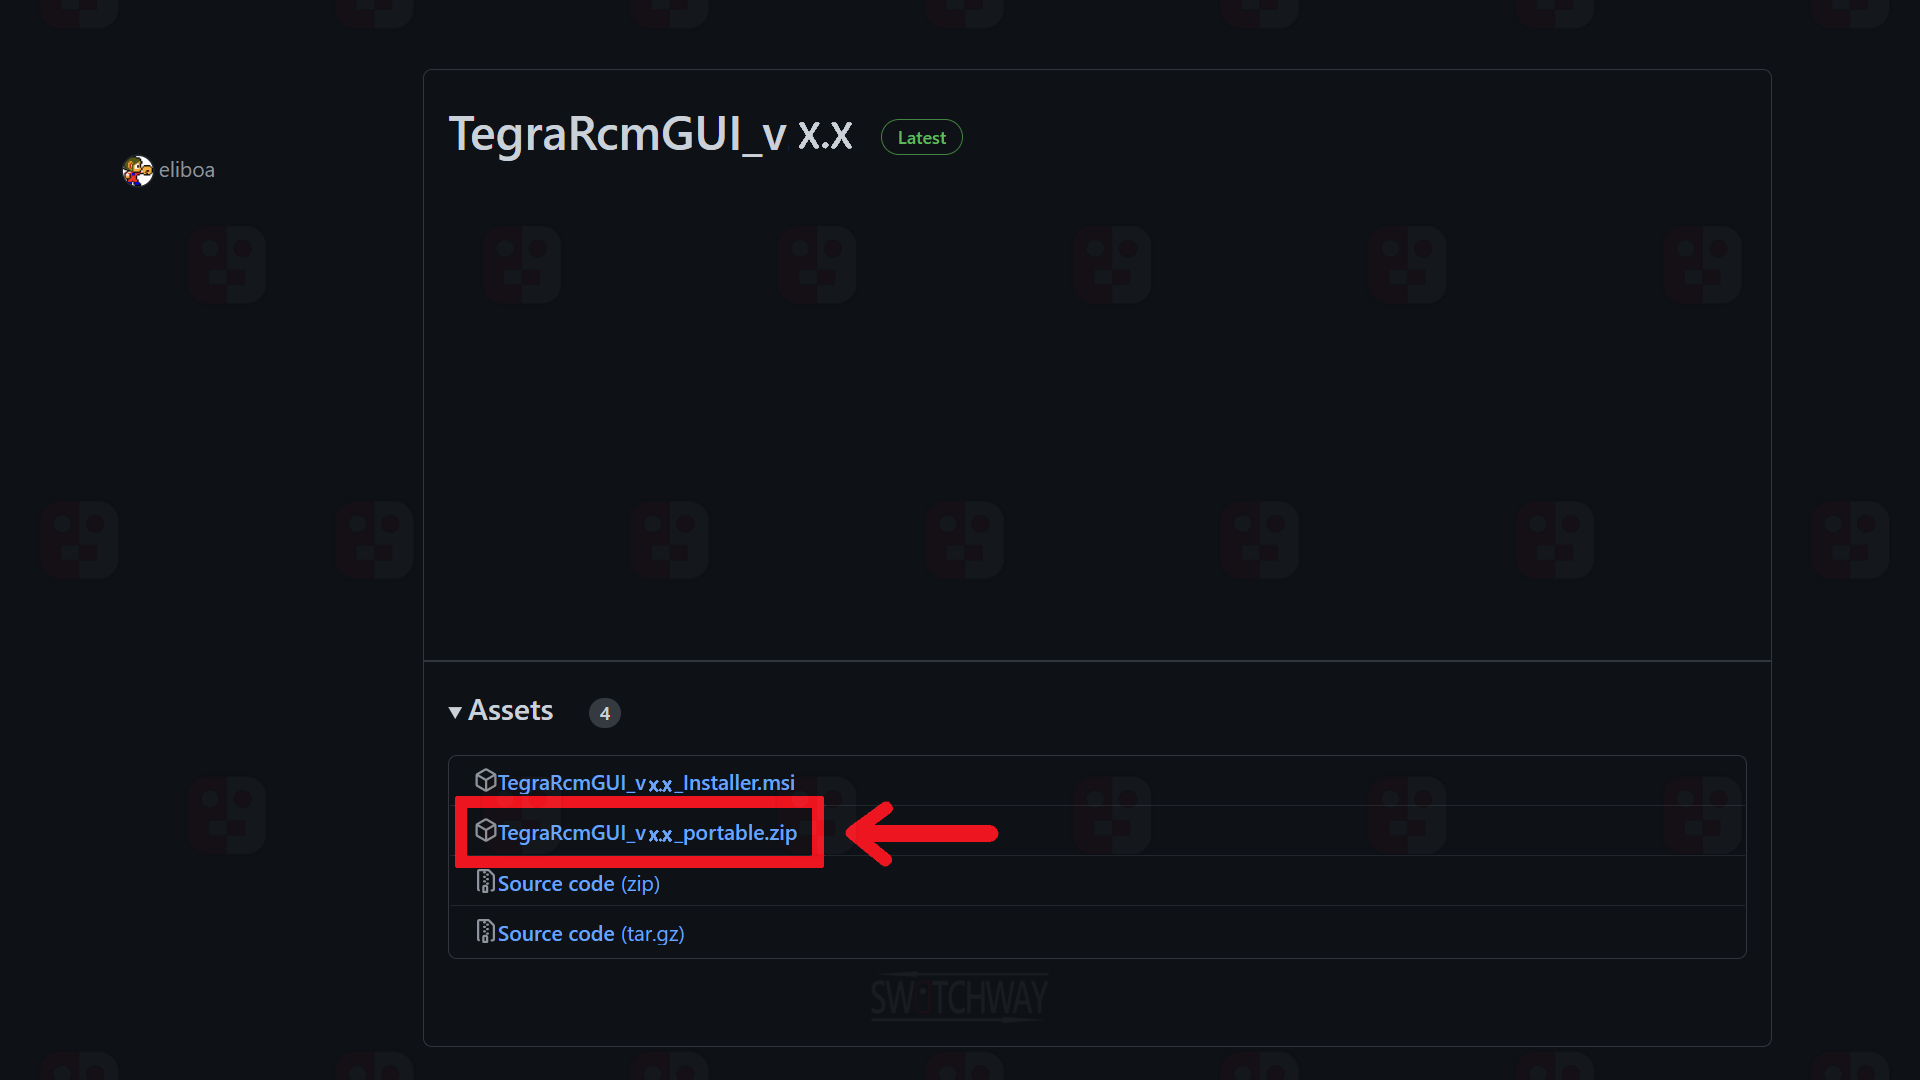
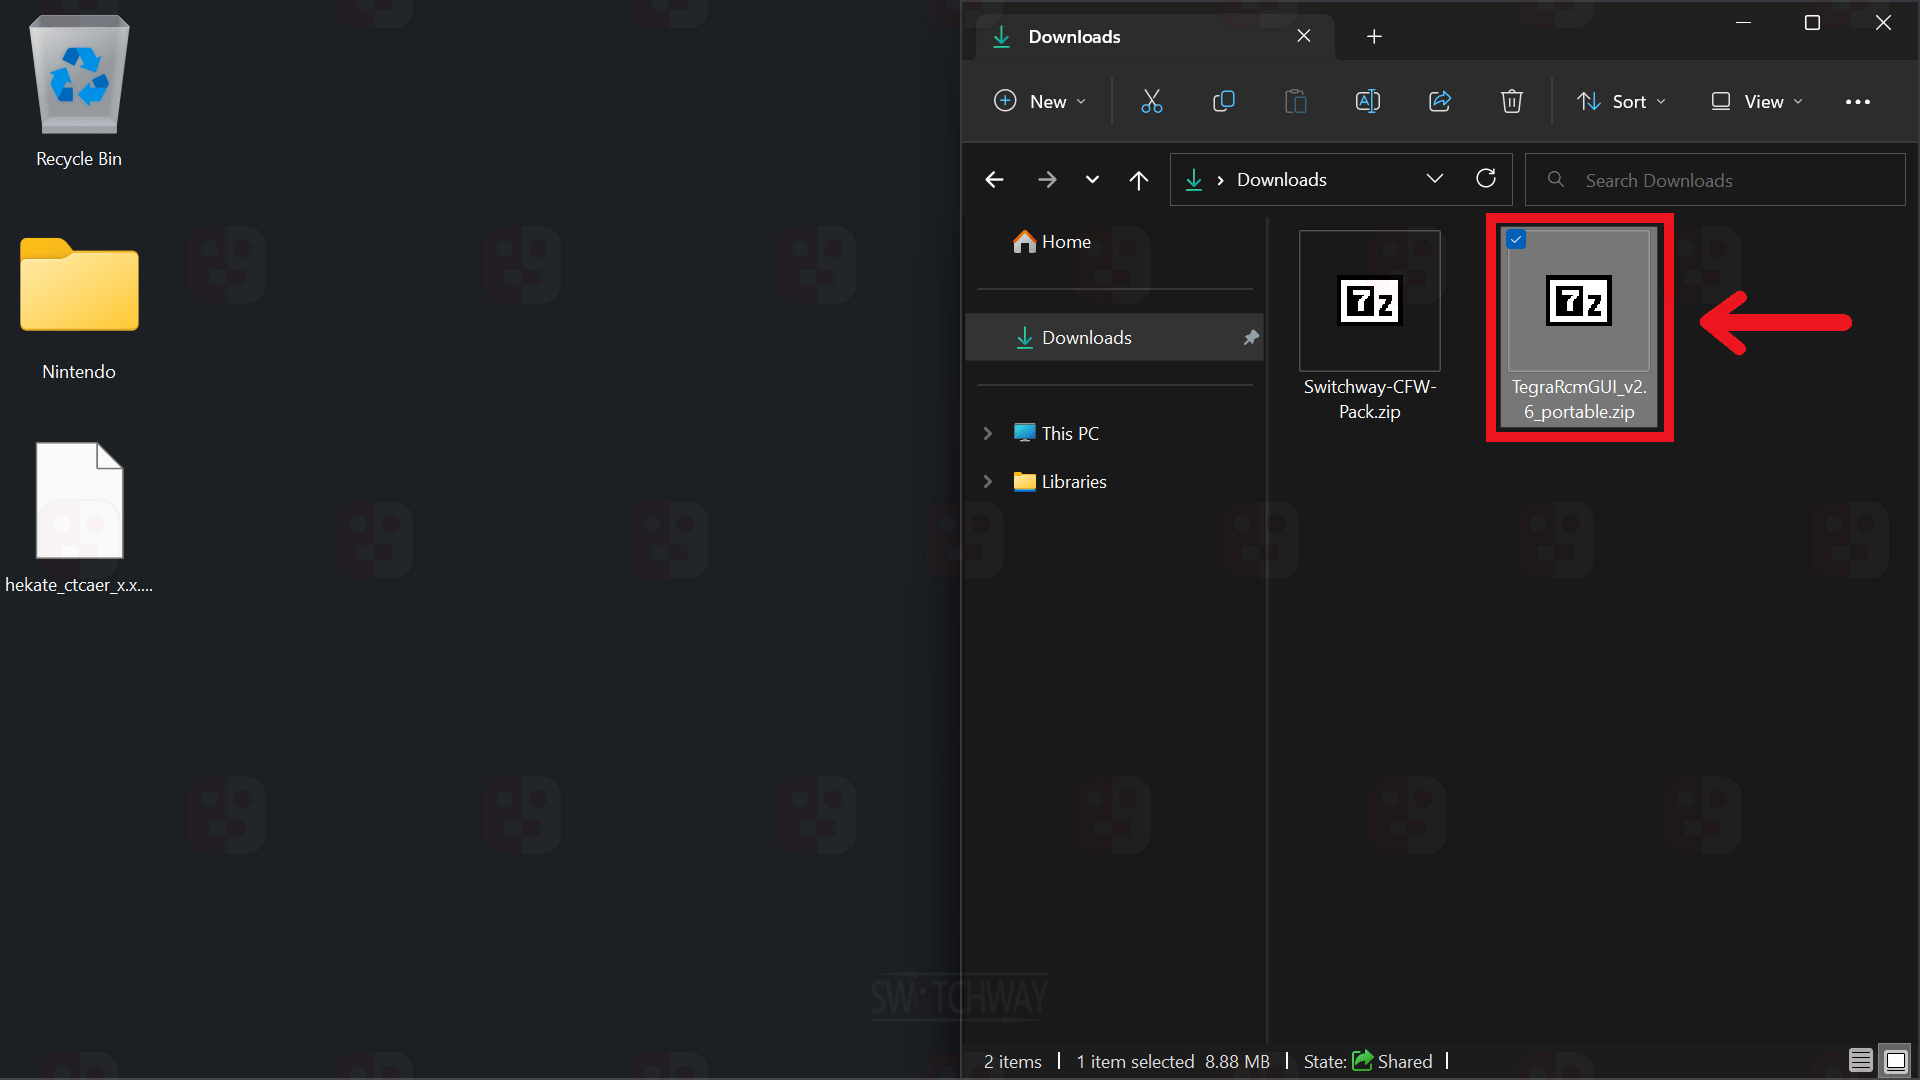
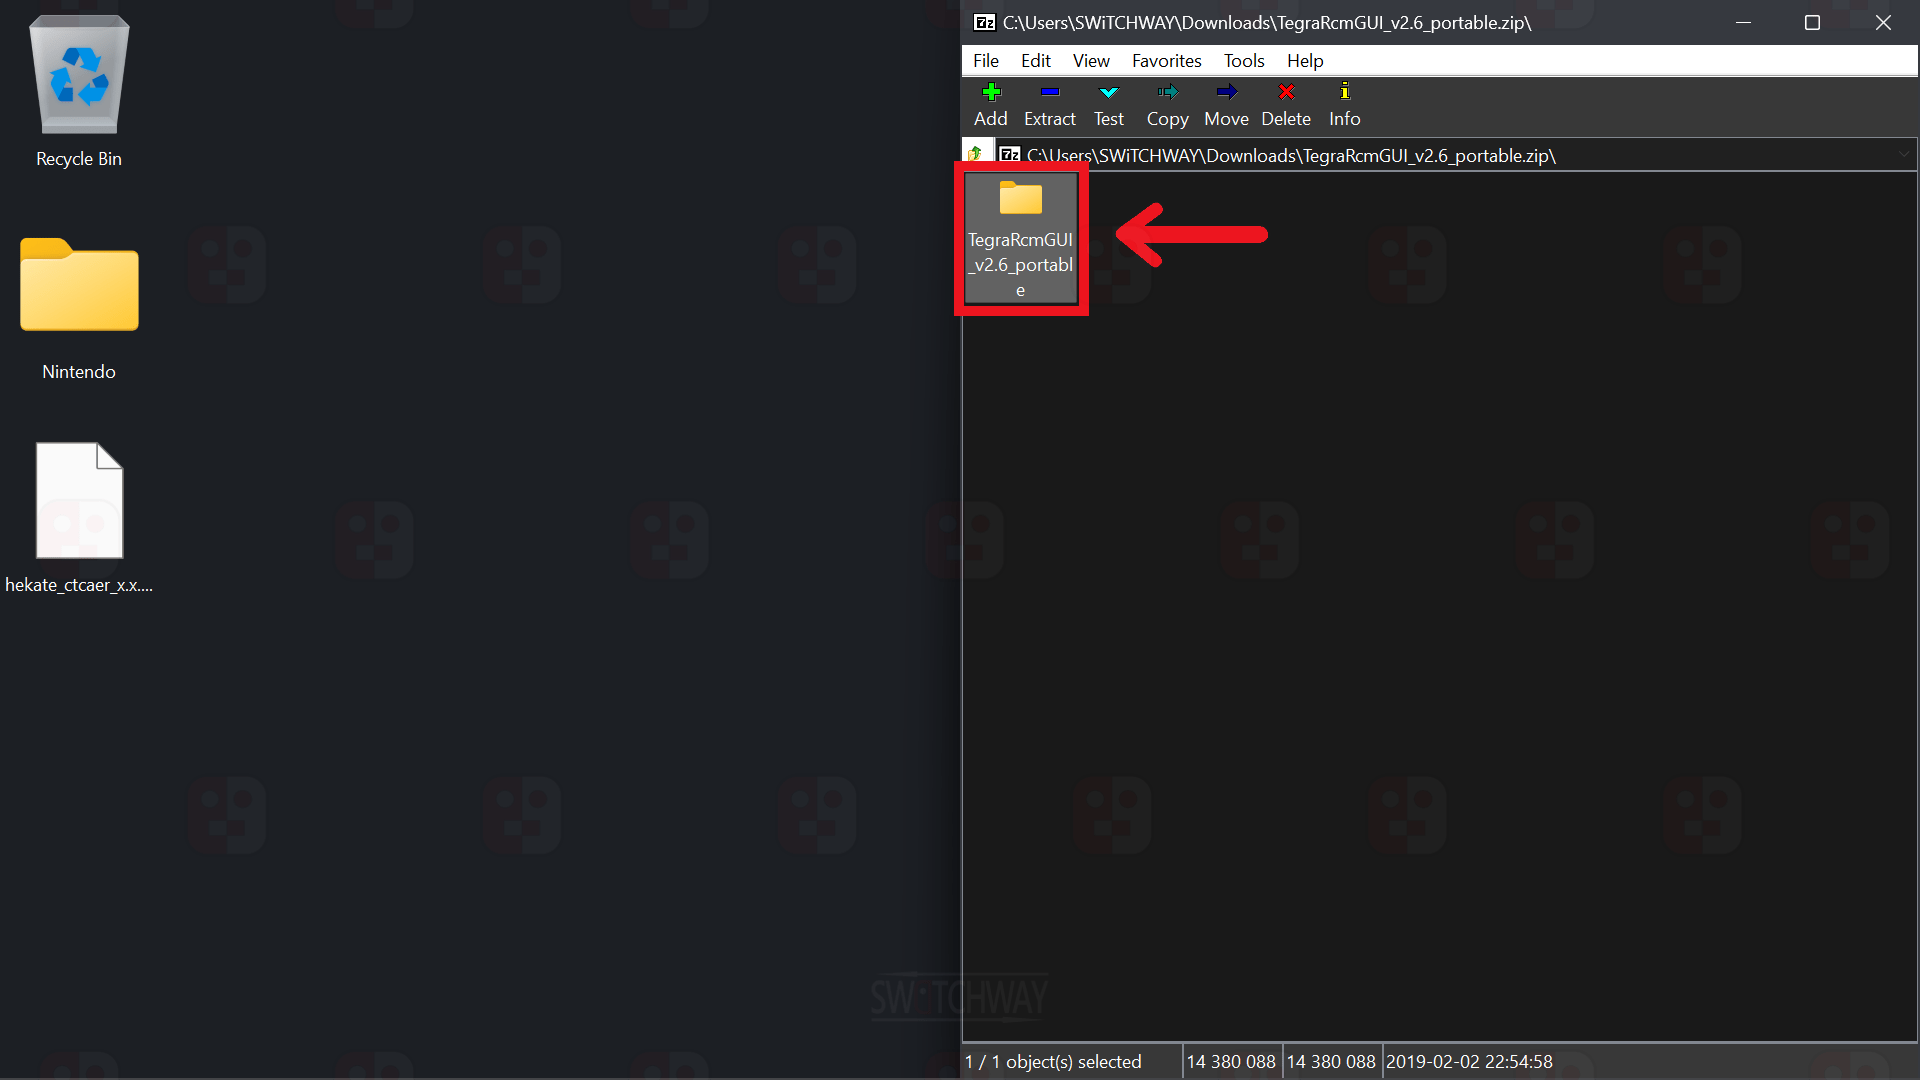
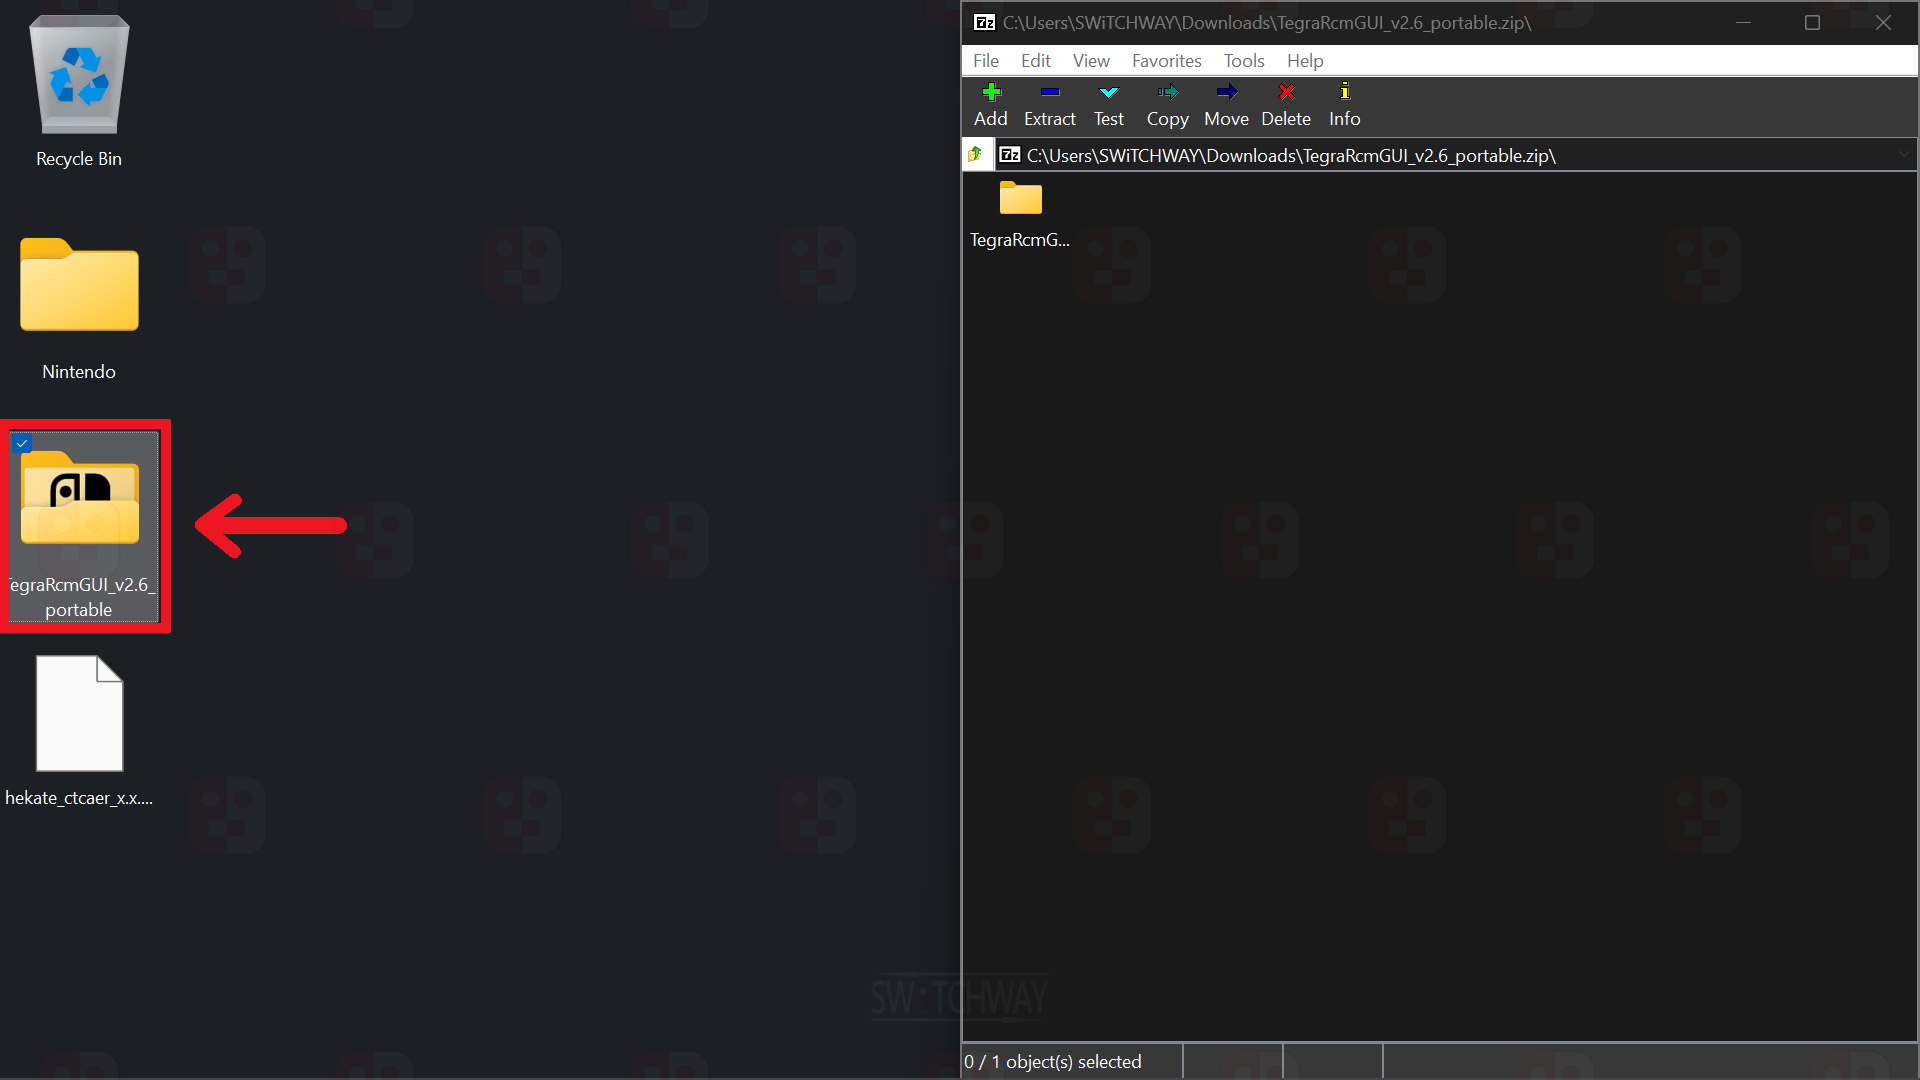
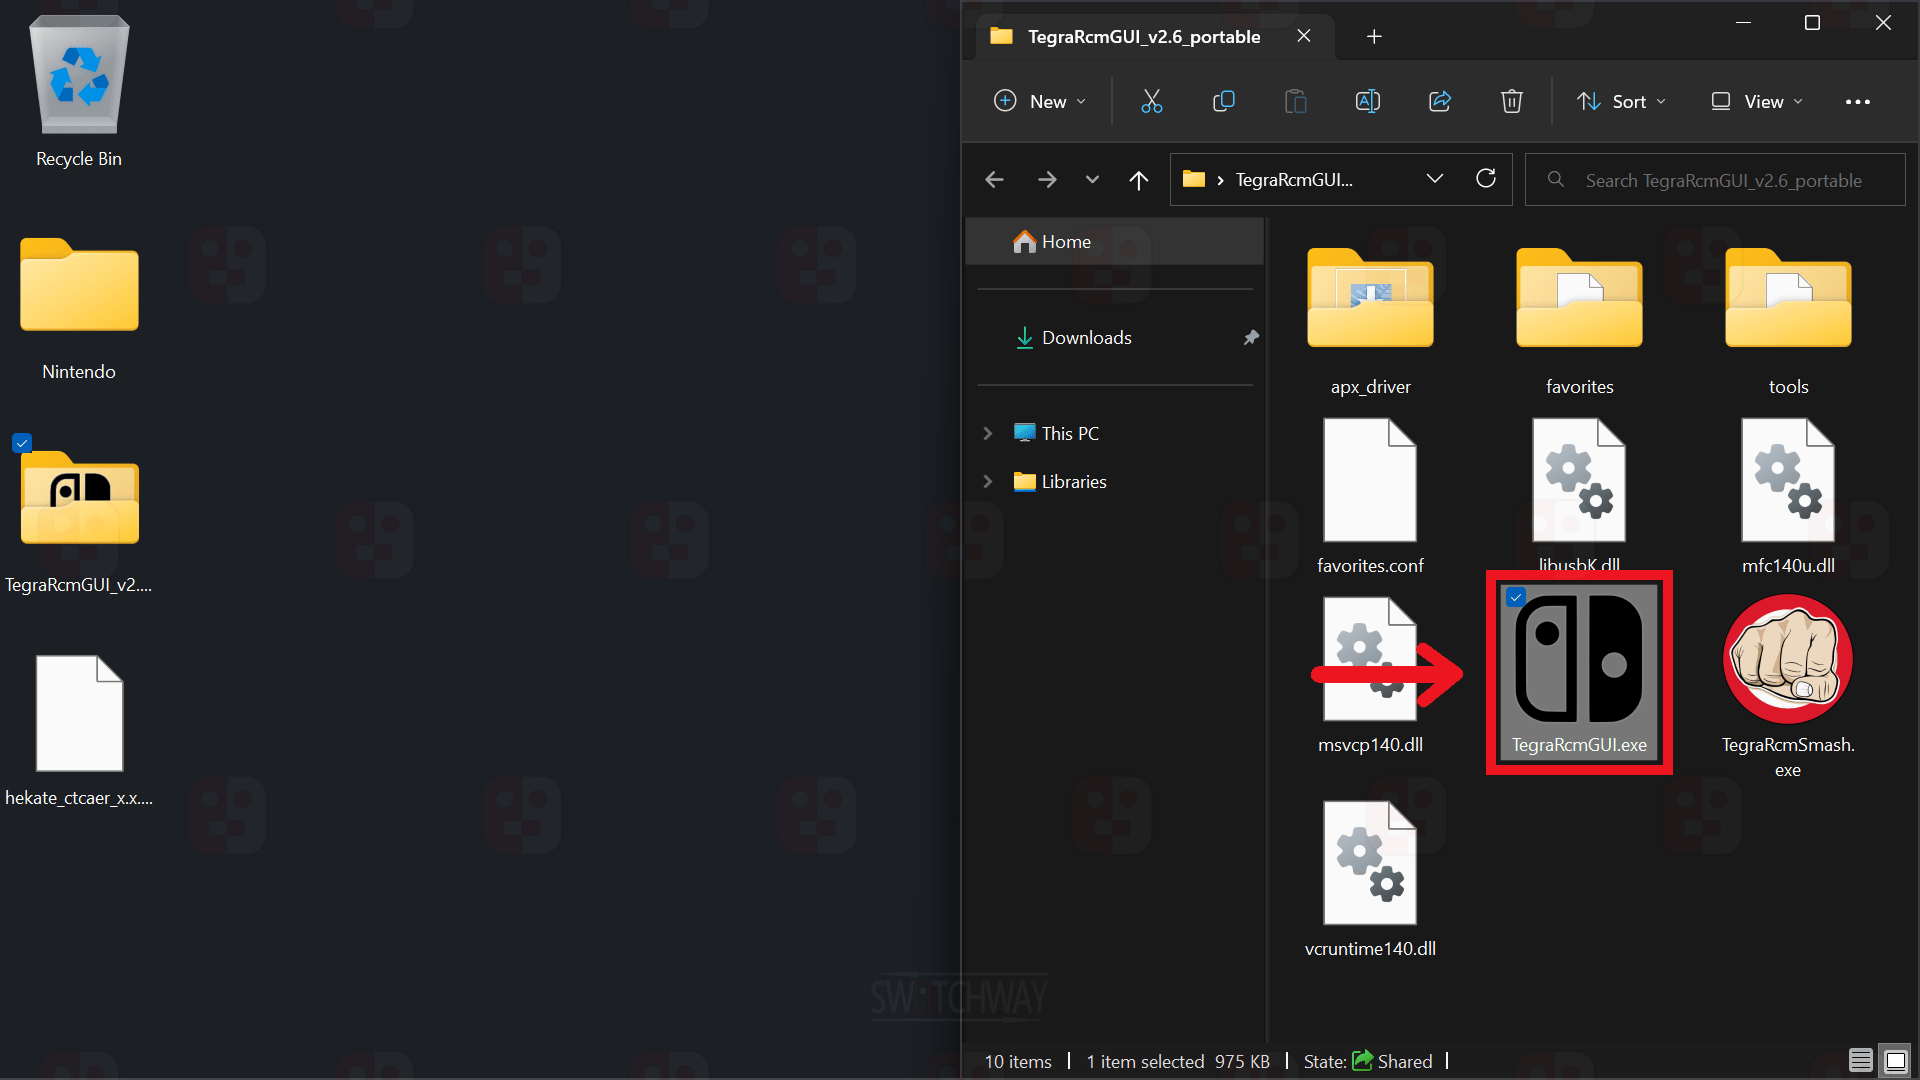
Open the TegraRcmGUI_vx.x_portable.zip and copy the TegraRcmGUI_vx.x_portable folder to your desktop. Open it and run TegraRcmGUI.exe.
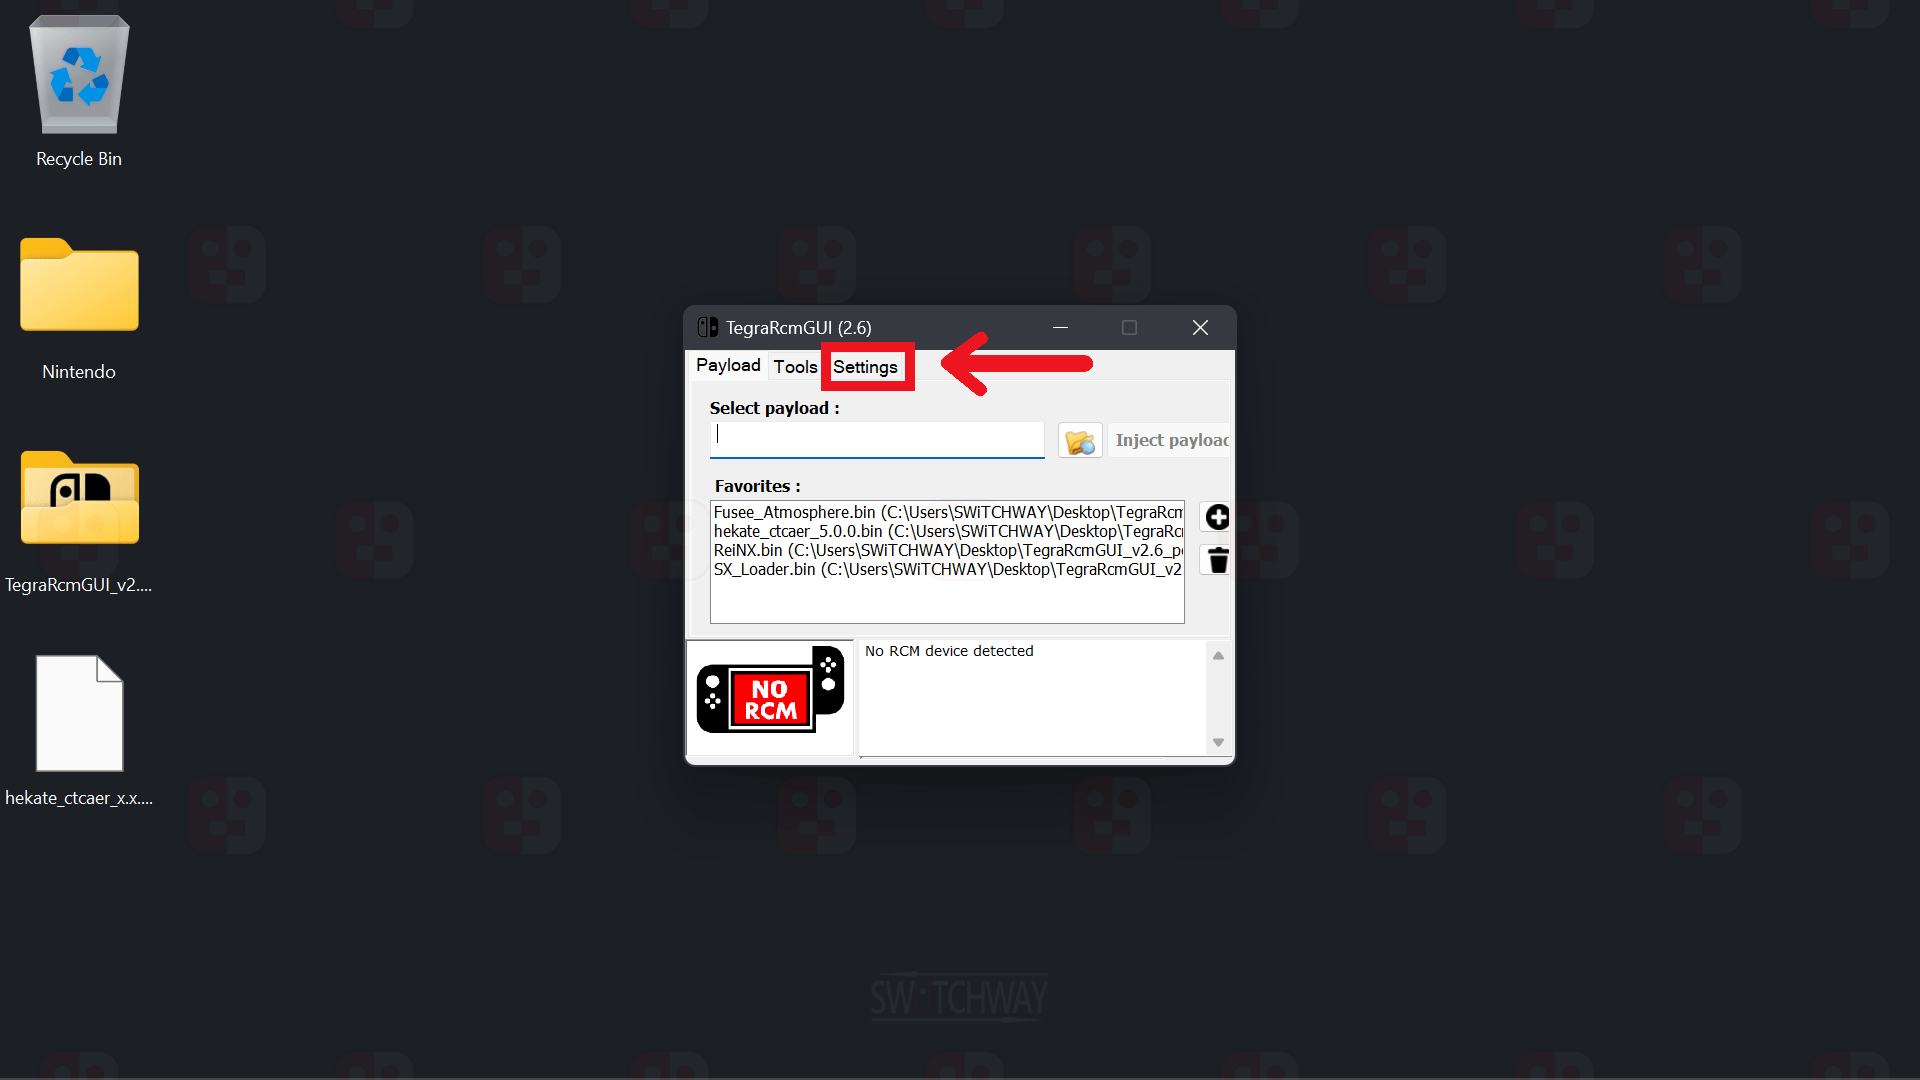
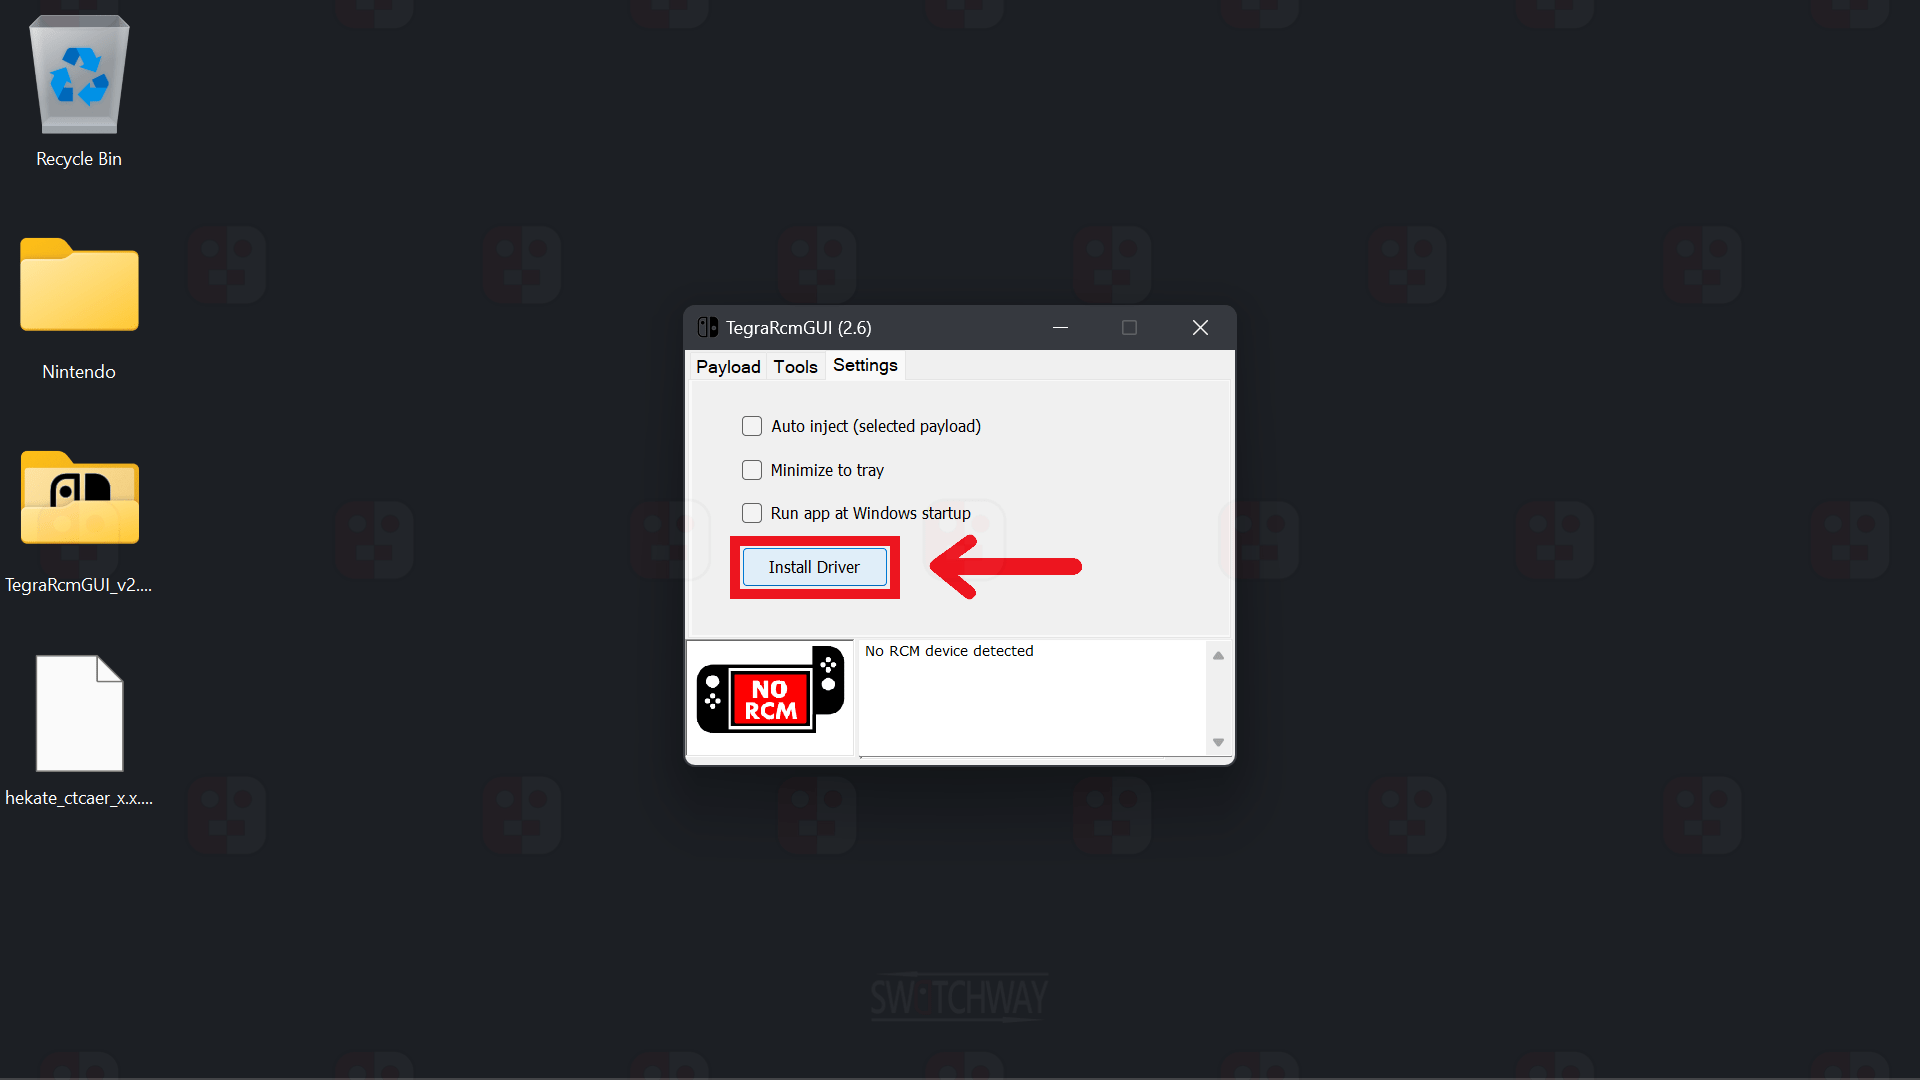
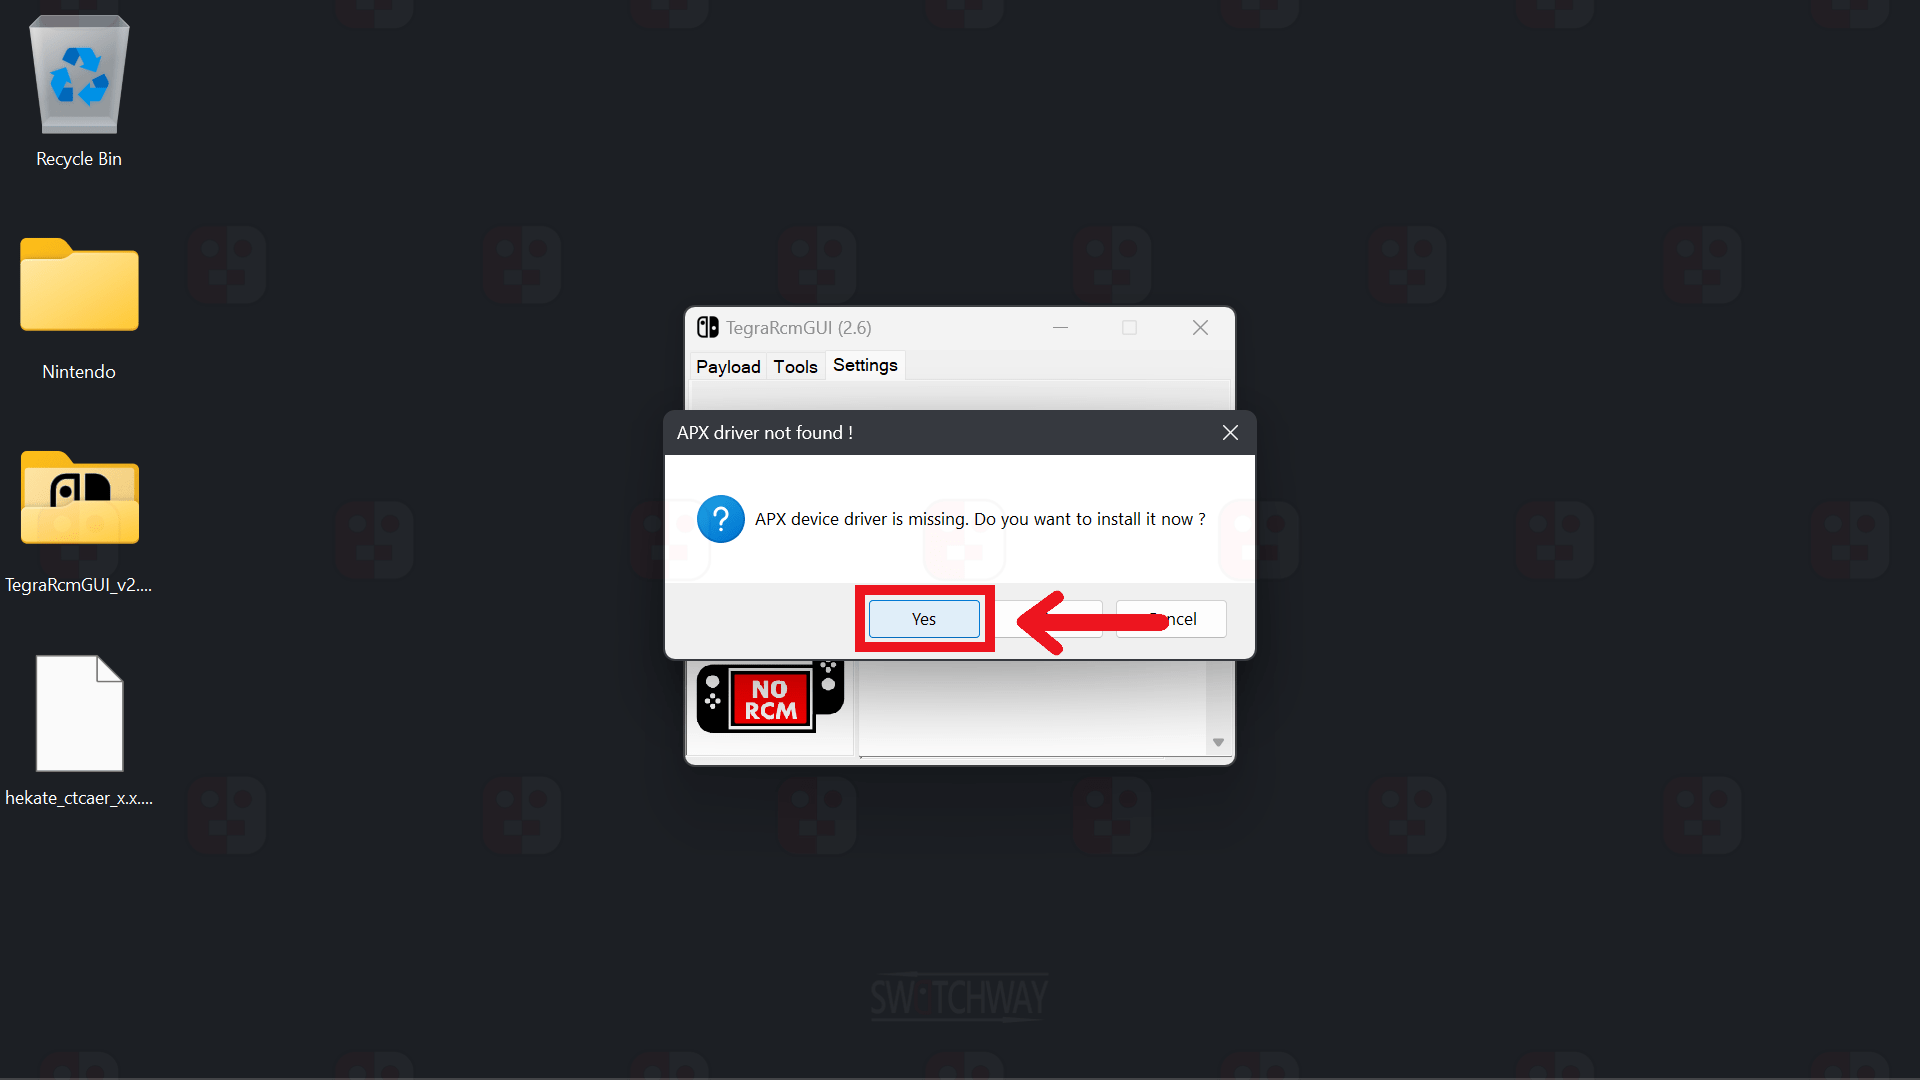
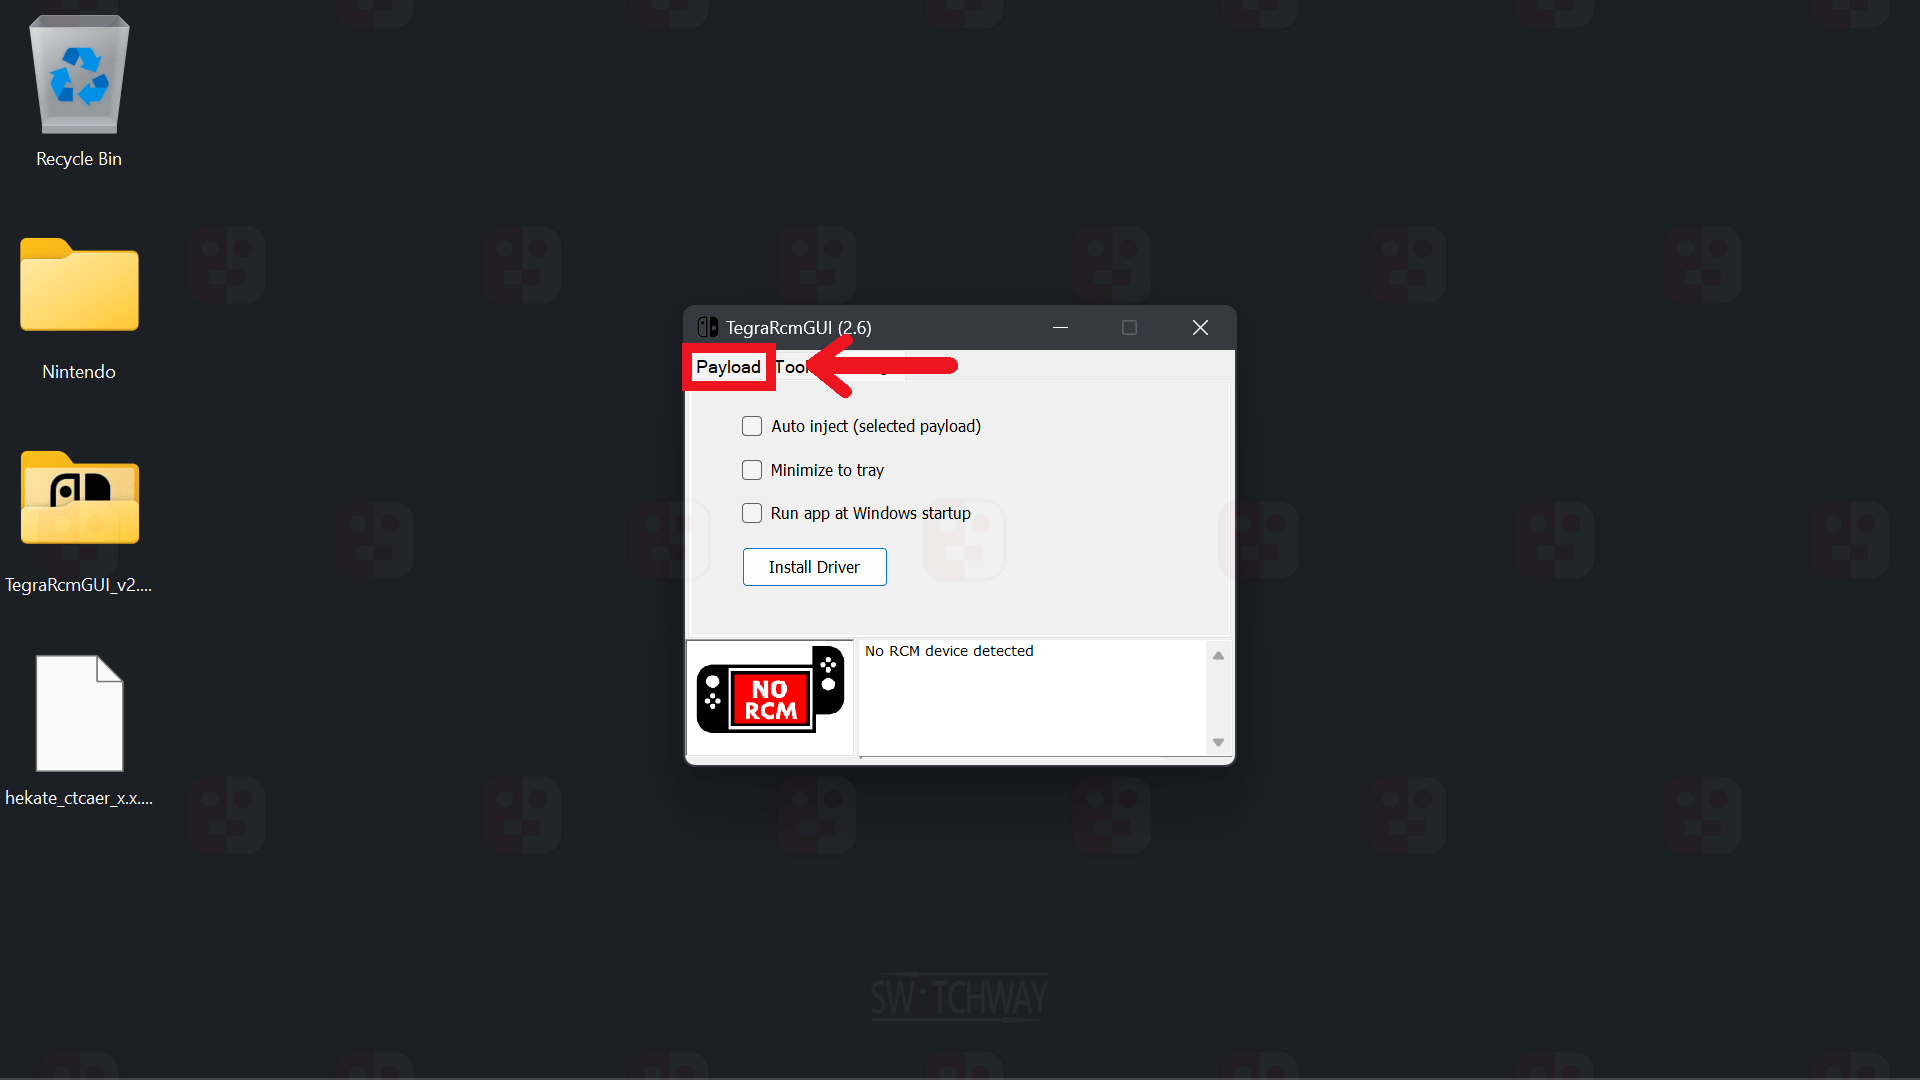
Go to Settings > Install Driver > follow the installer instructions to install the APX Device Driver. Click the Payload tab once it’s installed.
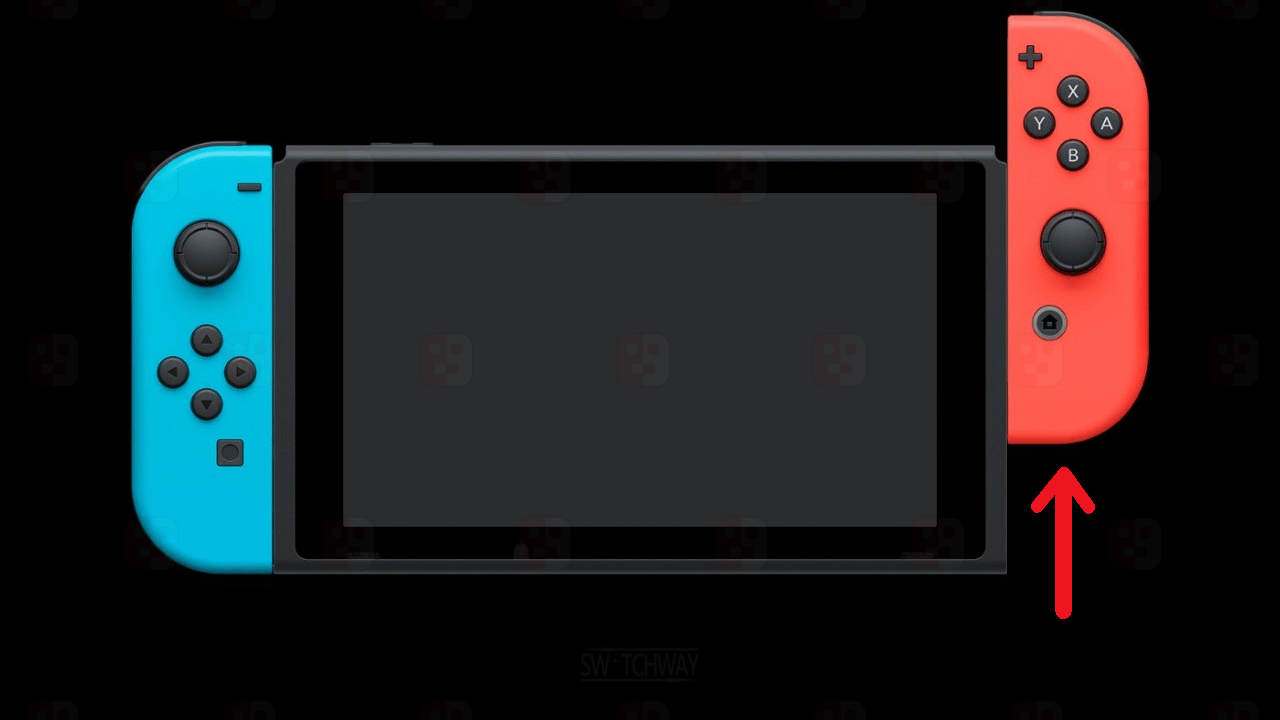
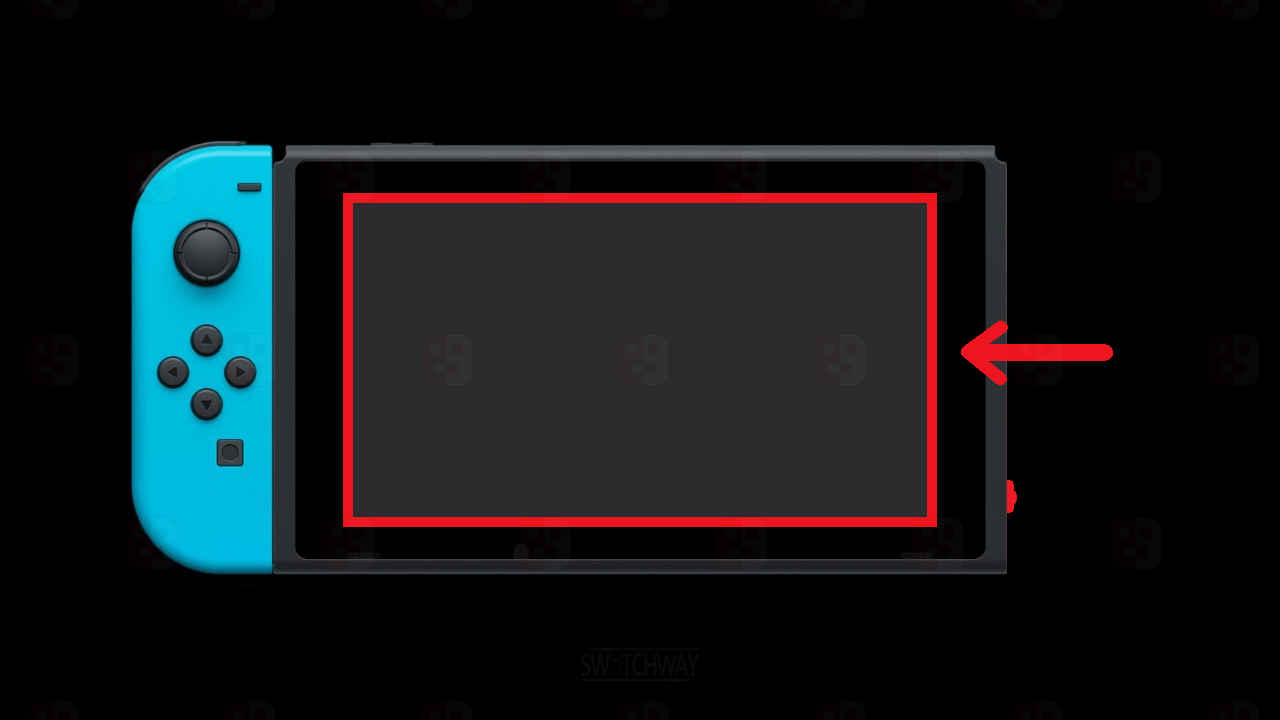
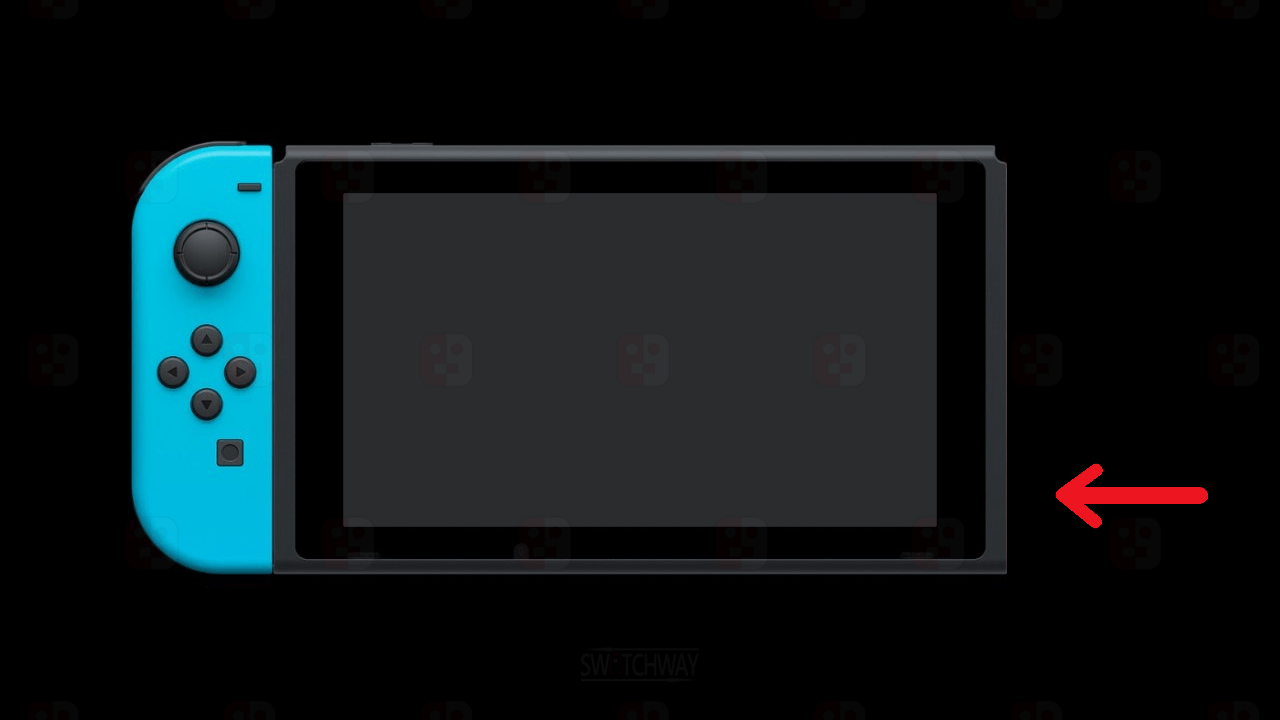
Remove the right joy-con and insert the jig, and push it all the way down into the bottom of the joy-con rail.
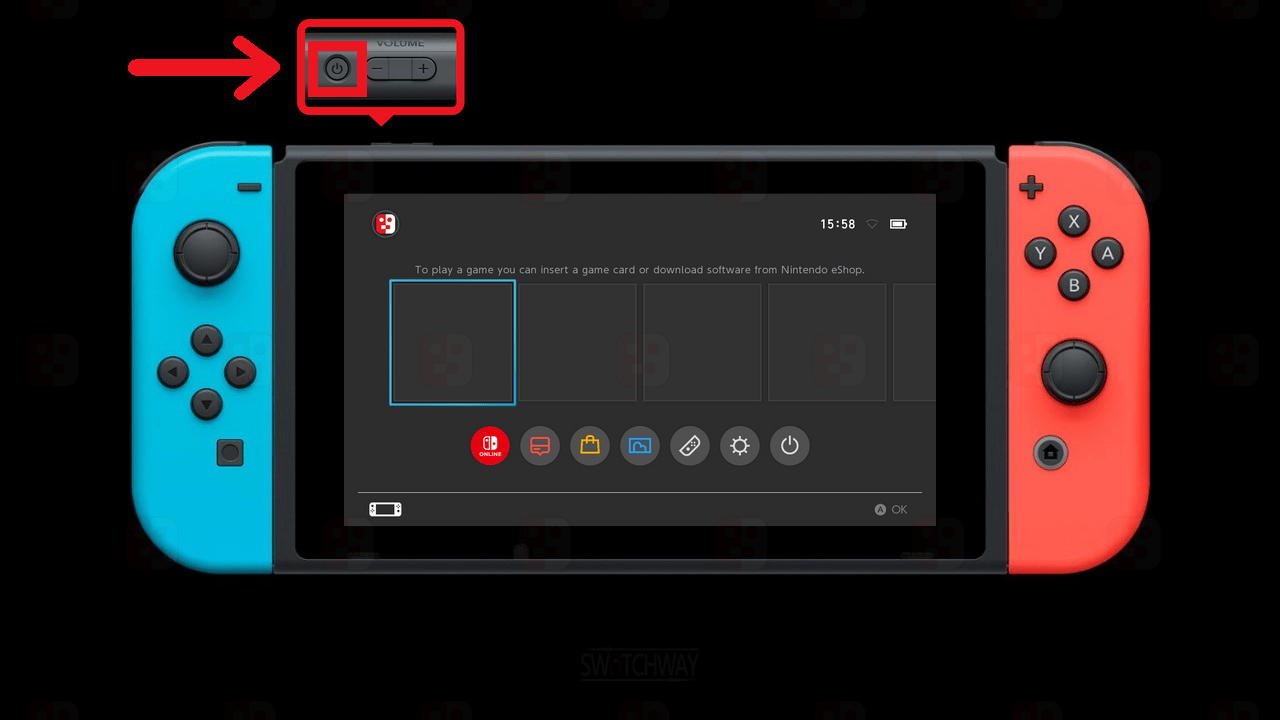
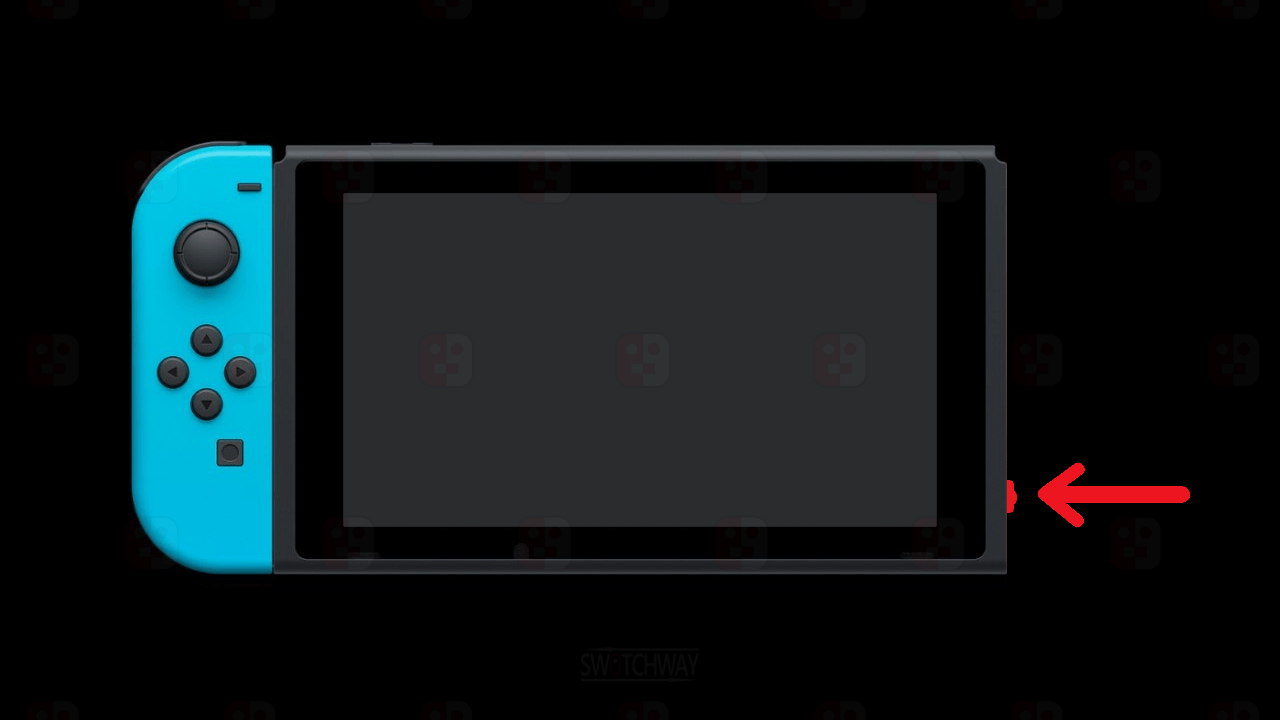
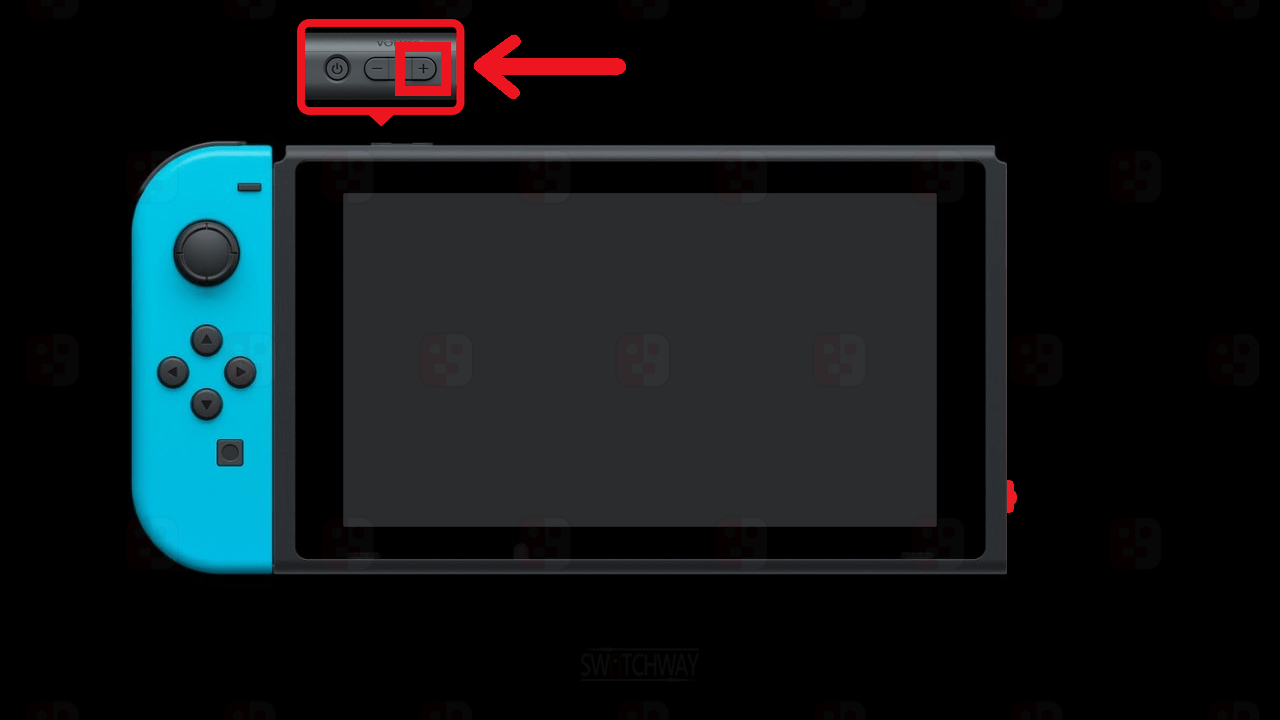
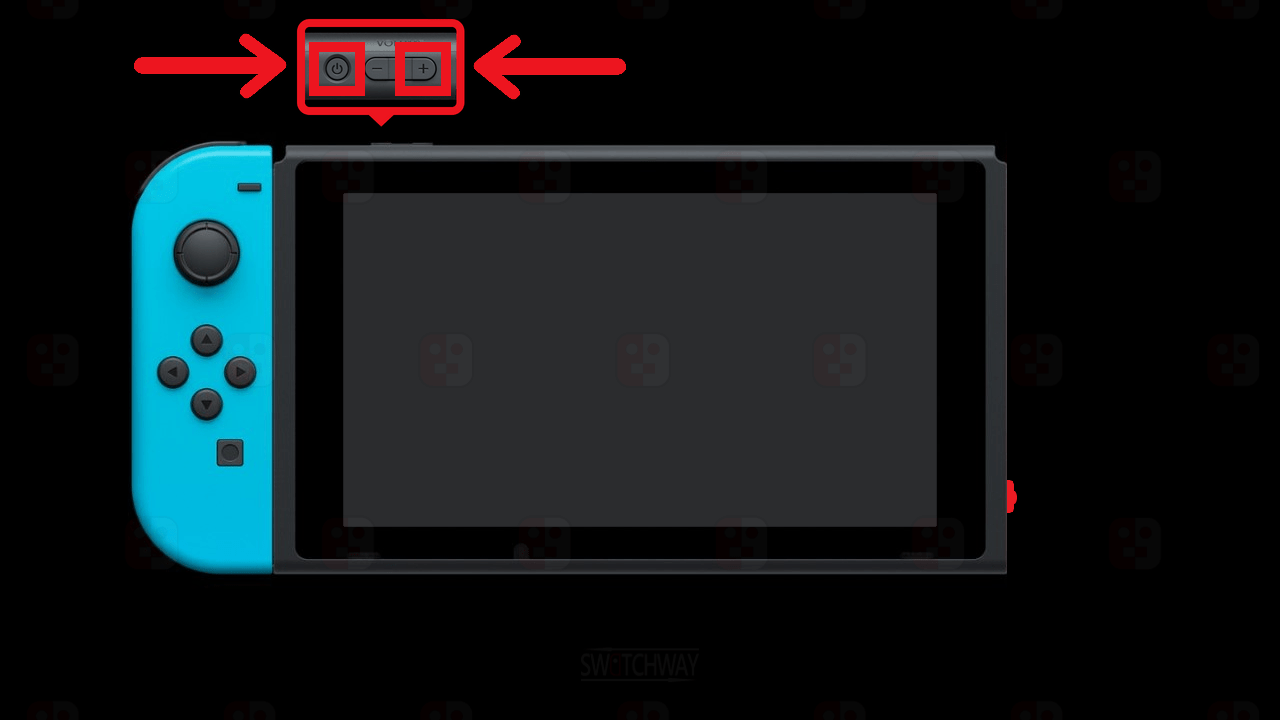
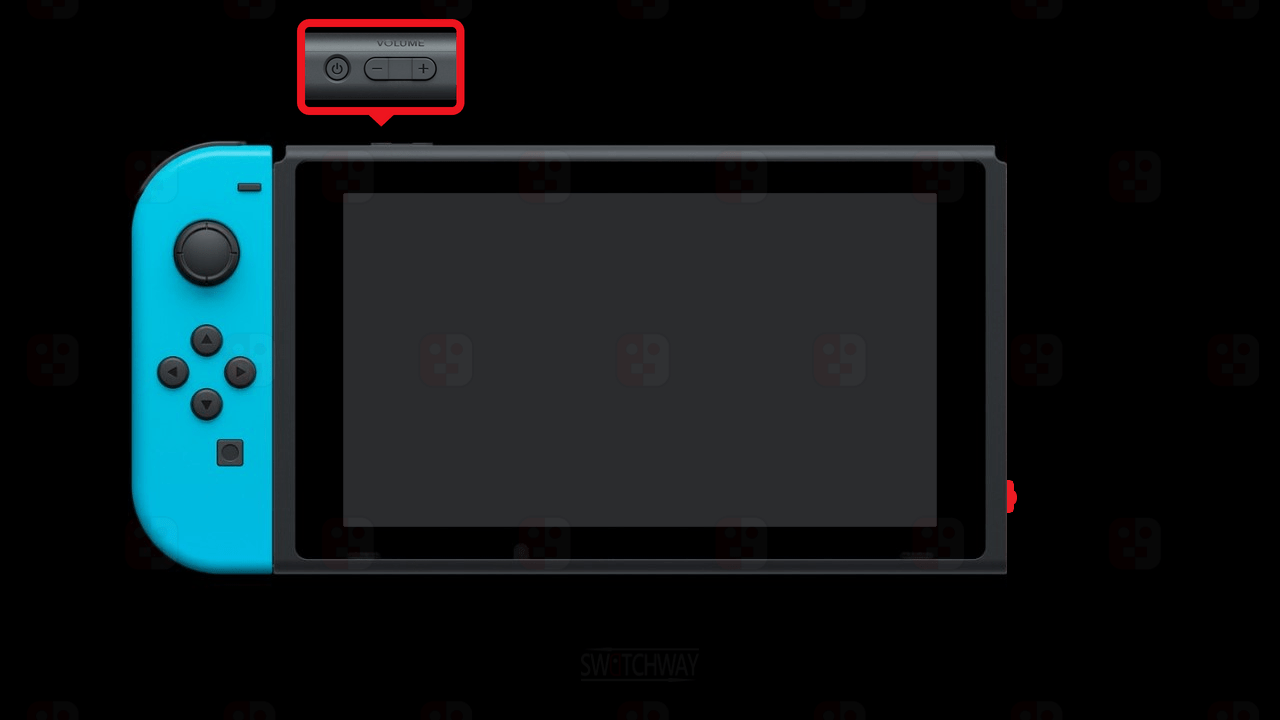
Press and hold the Volume + button for 2seconds, continue to hold, tap the Power button then let go of both buttons. Your screen should remain black and your Switch will be in RCM.
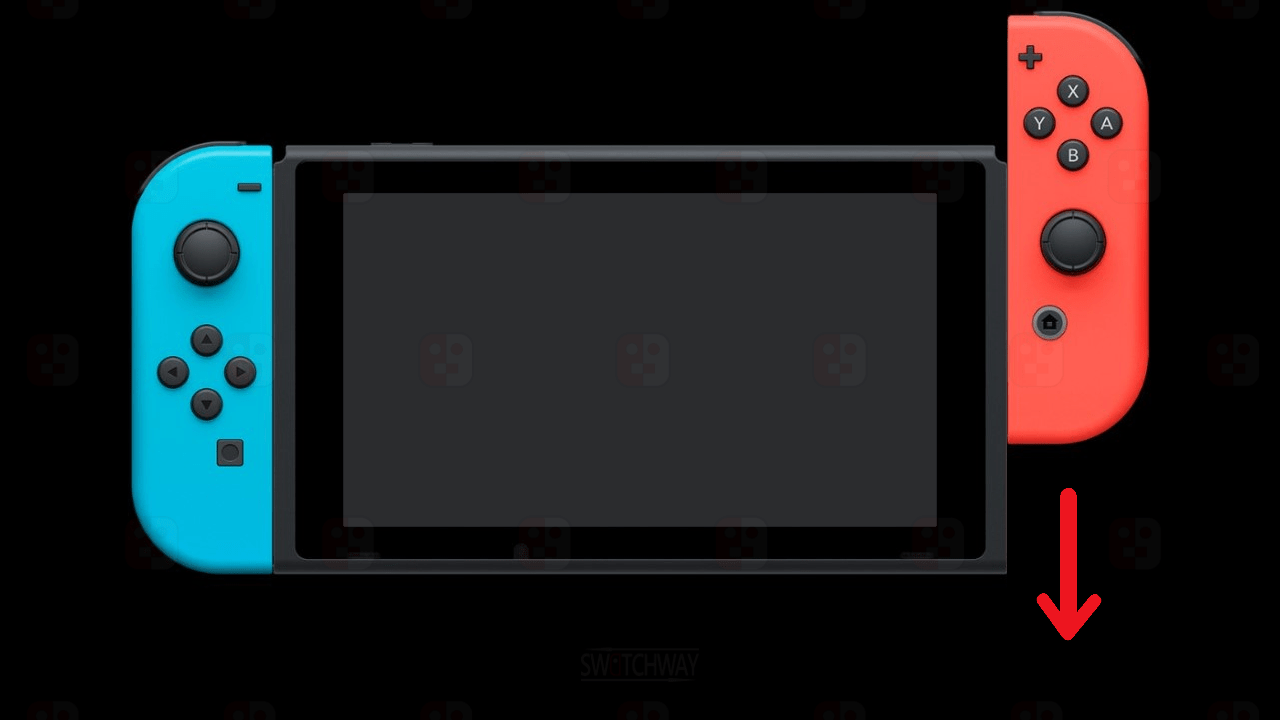
Remove the jig and reconnect the right joy-con.
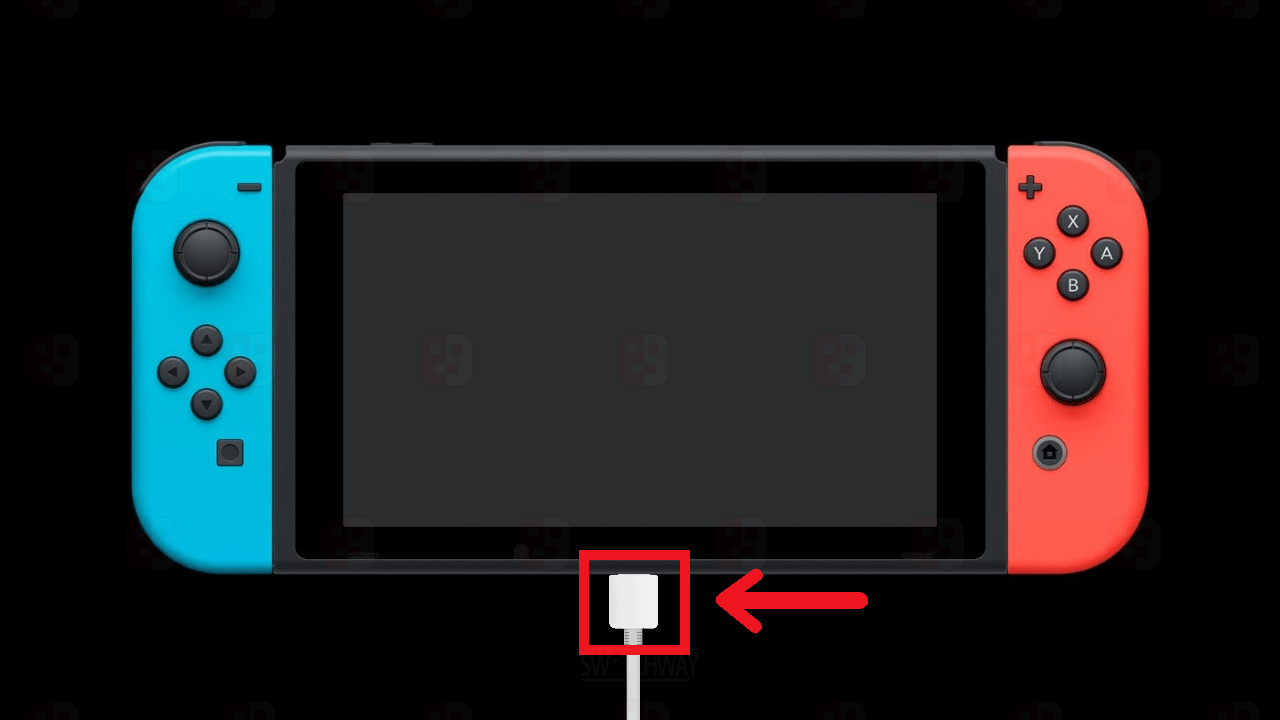
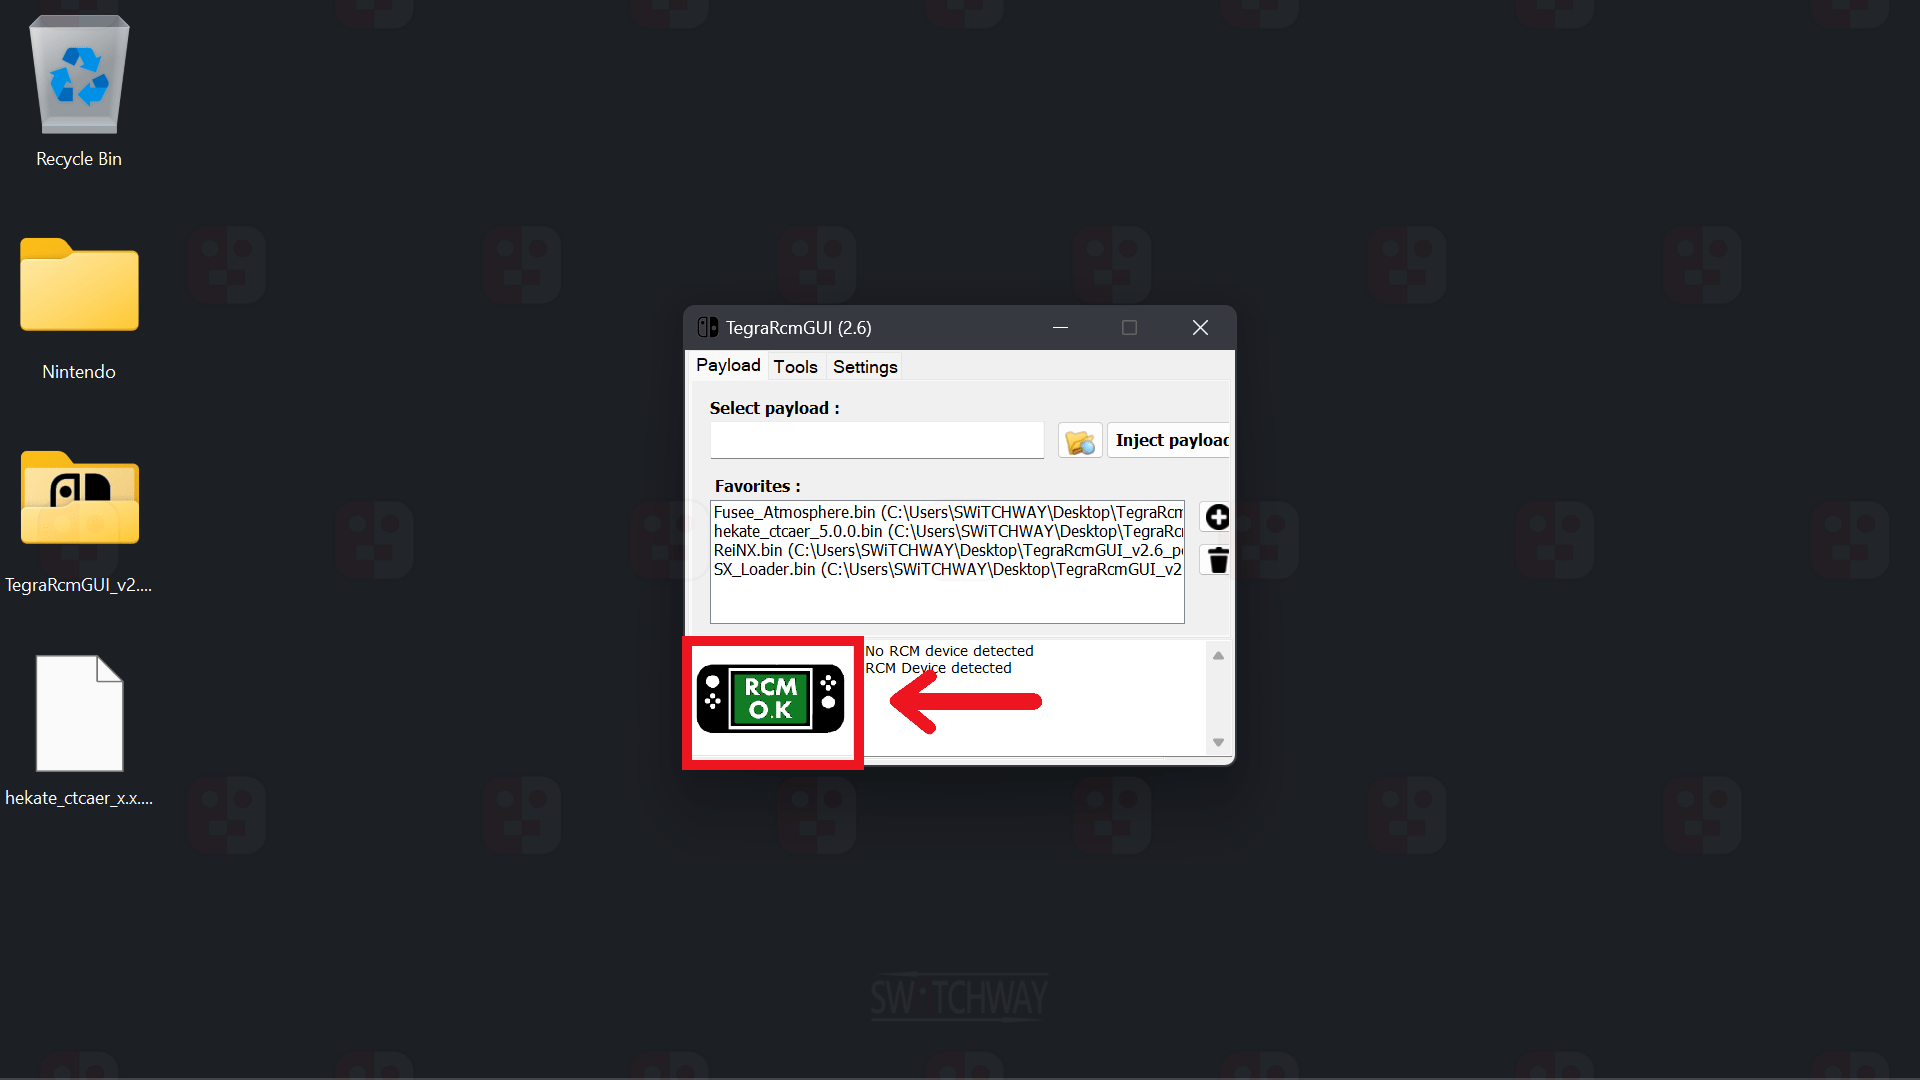
Connect your Switch to your PC using a USB cable, you will see RCM O.K in TegraRcmGUI.
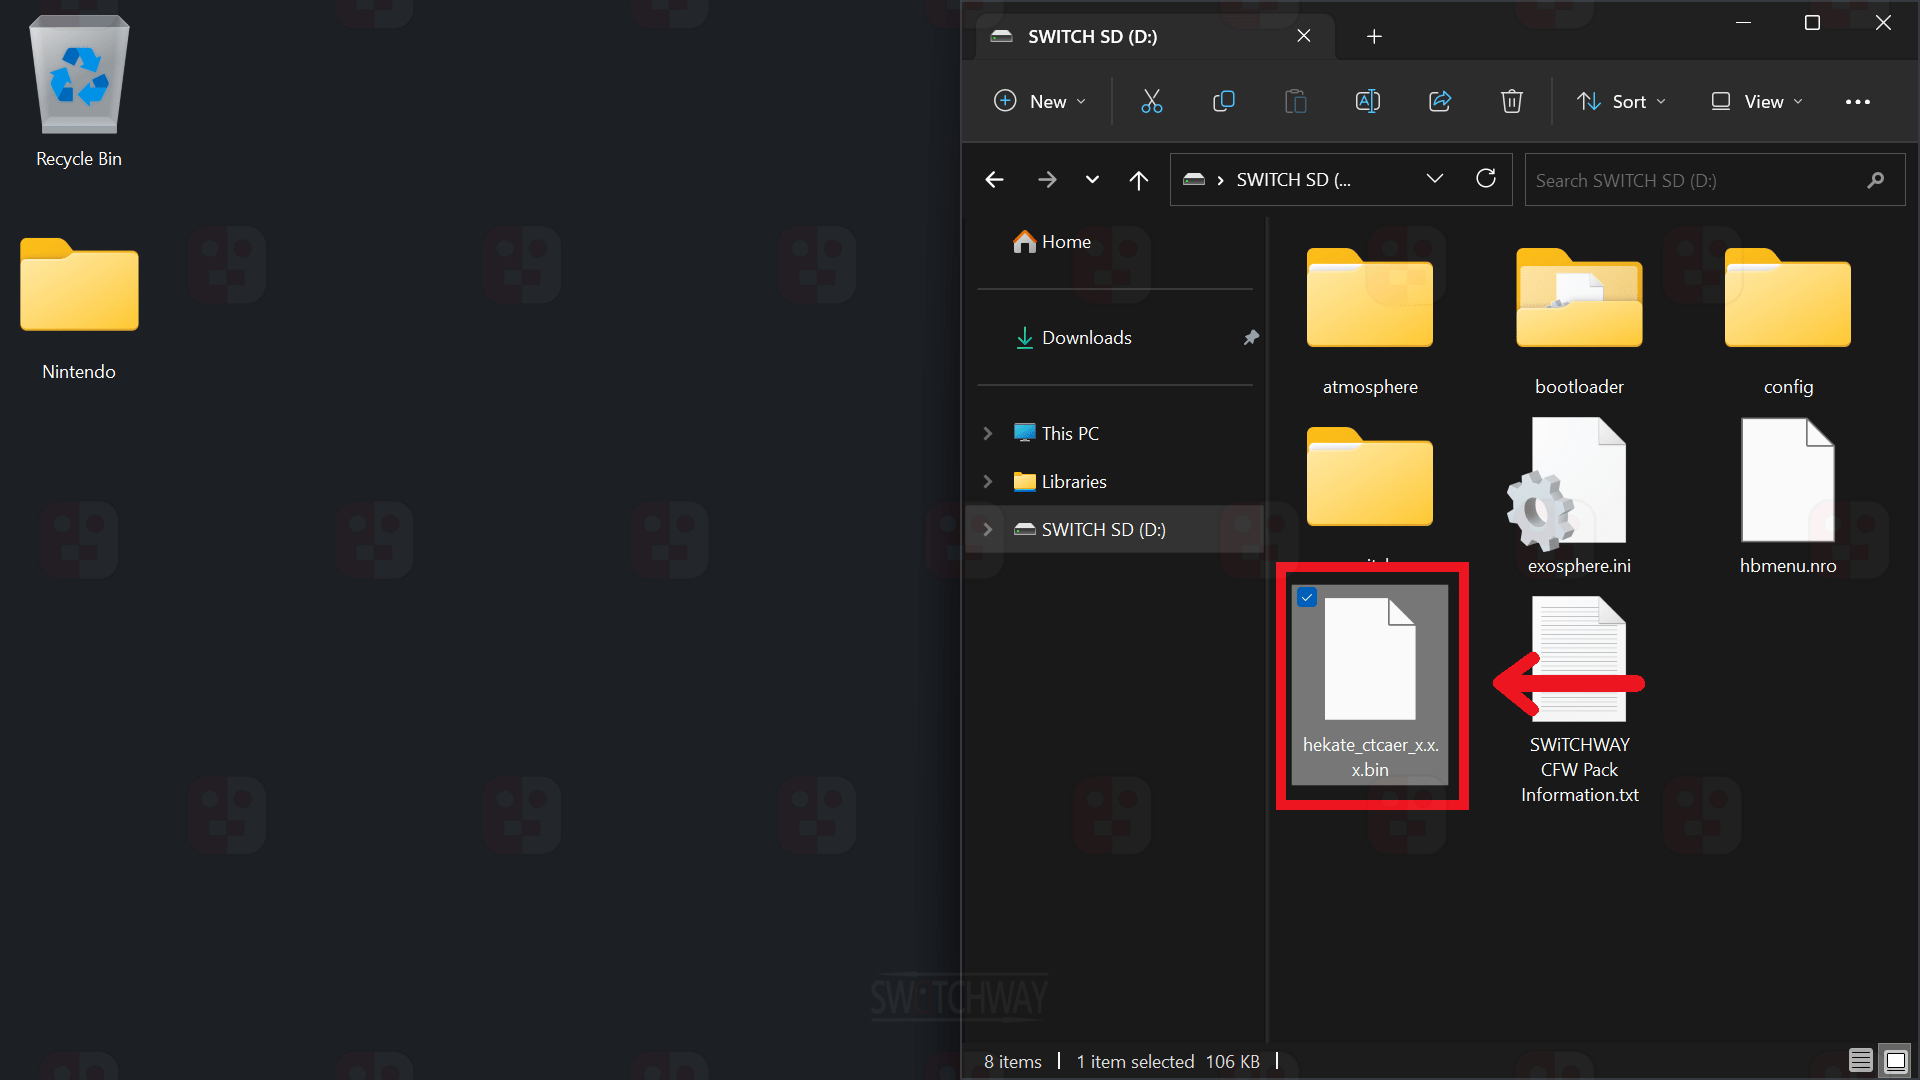
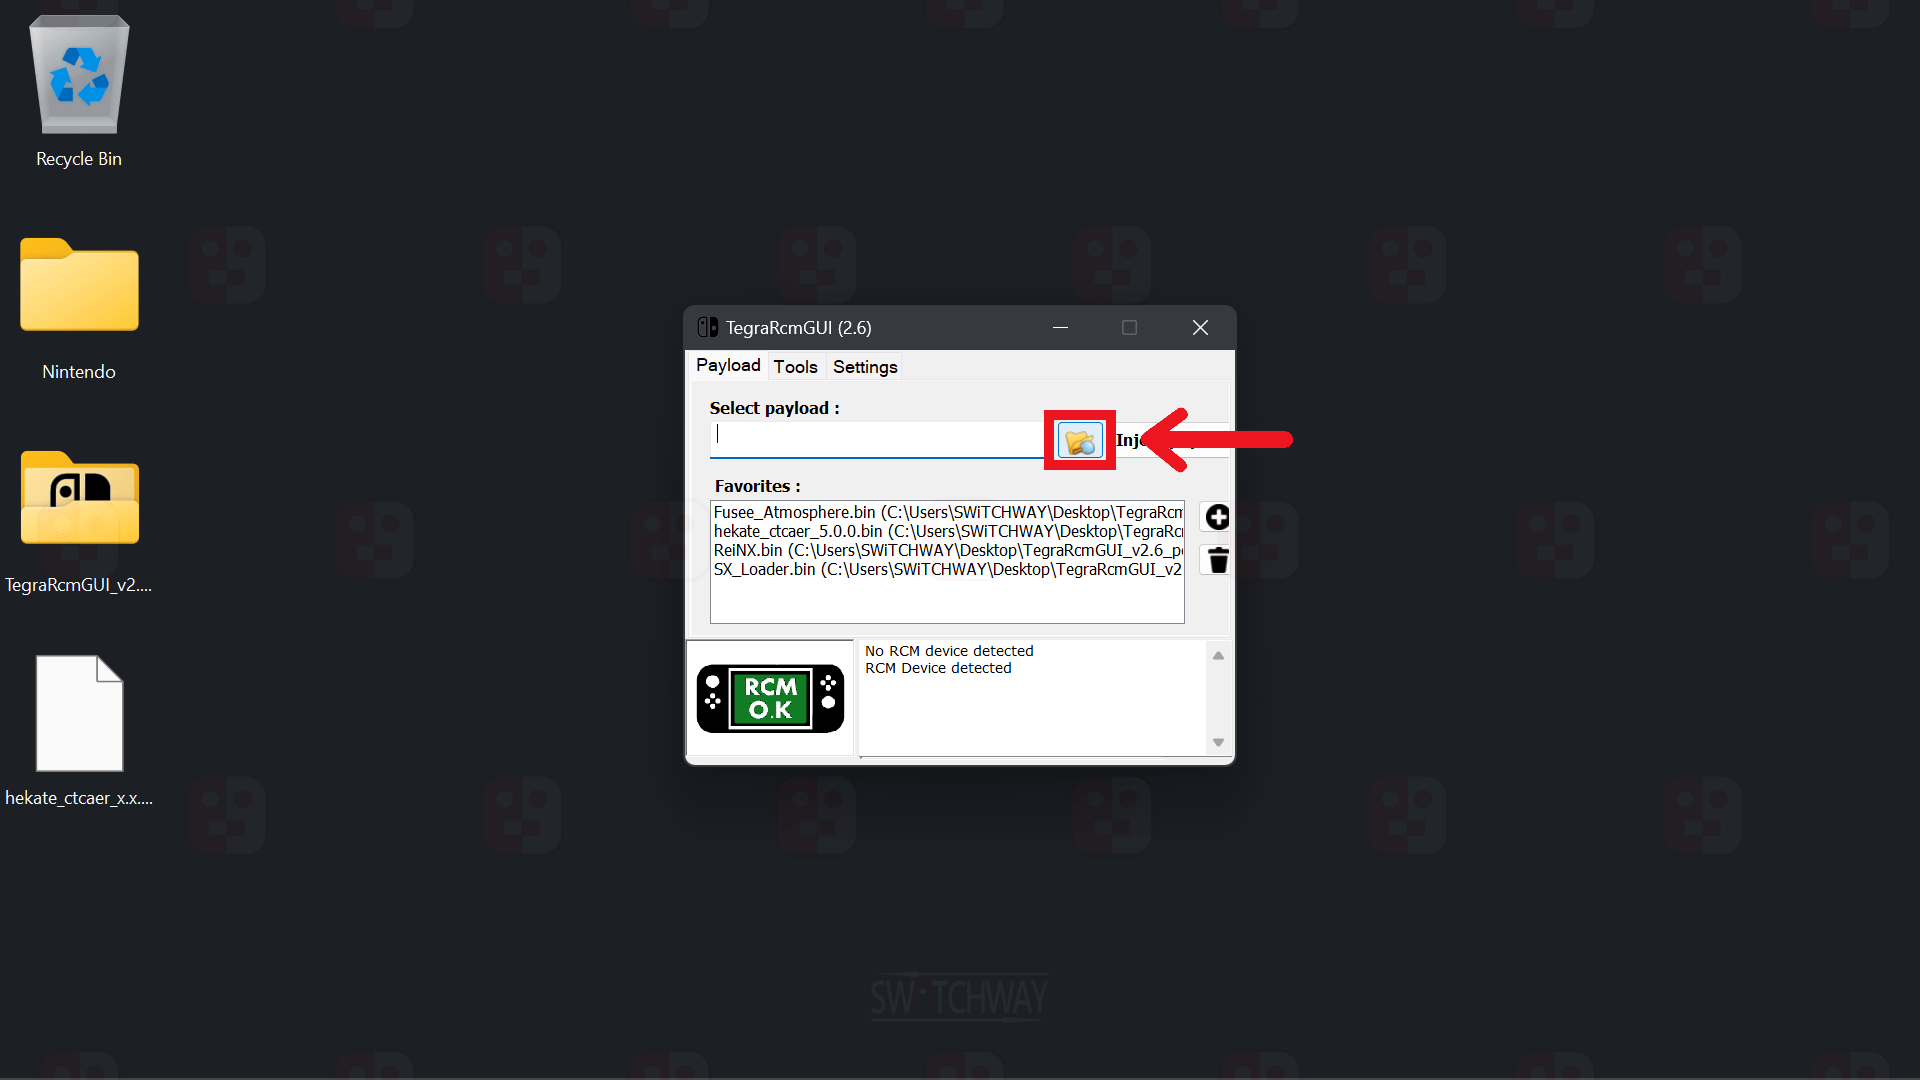
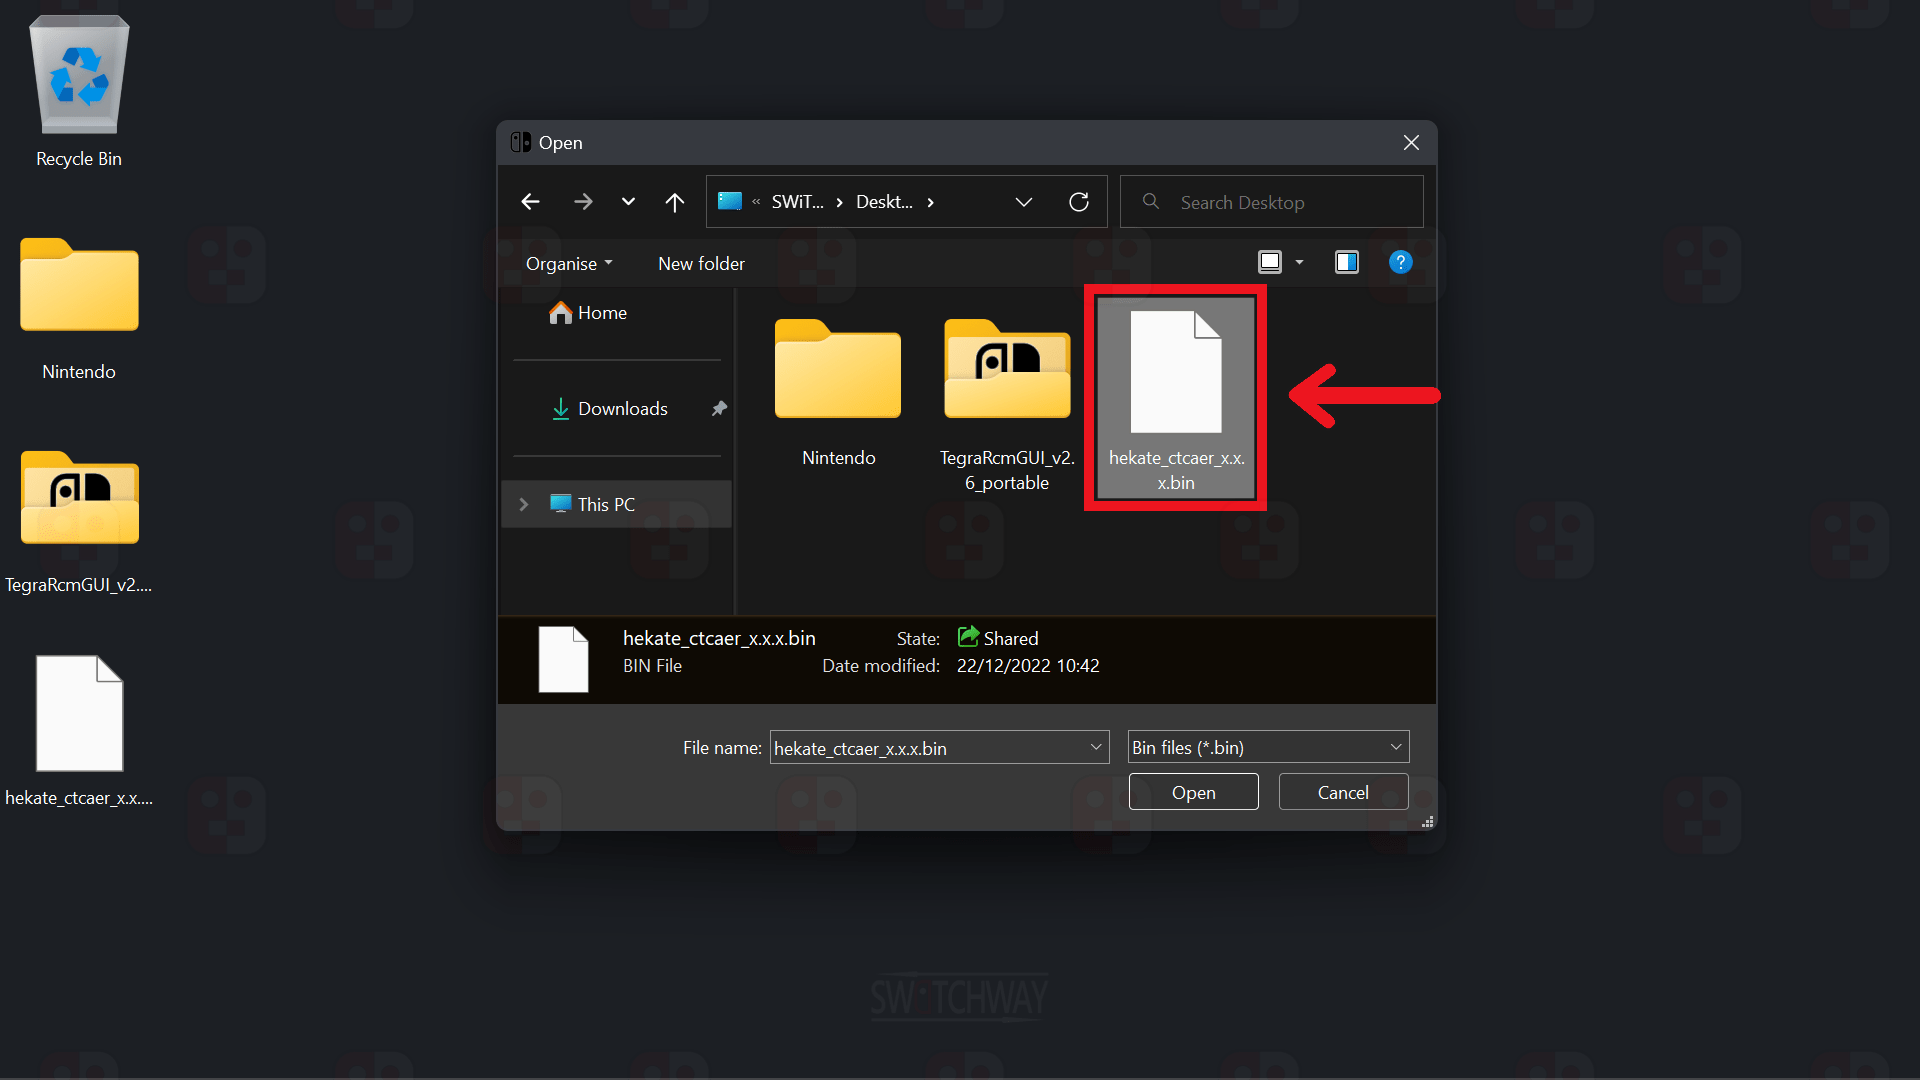
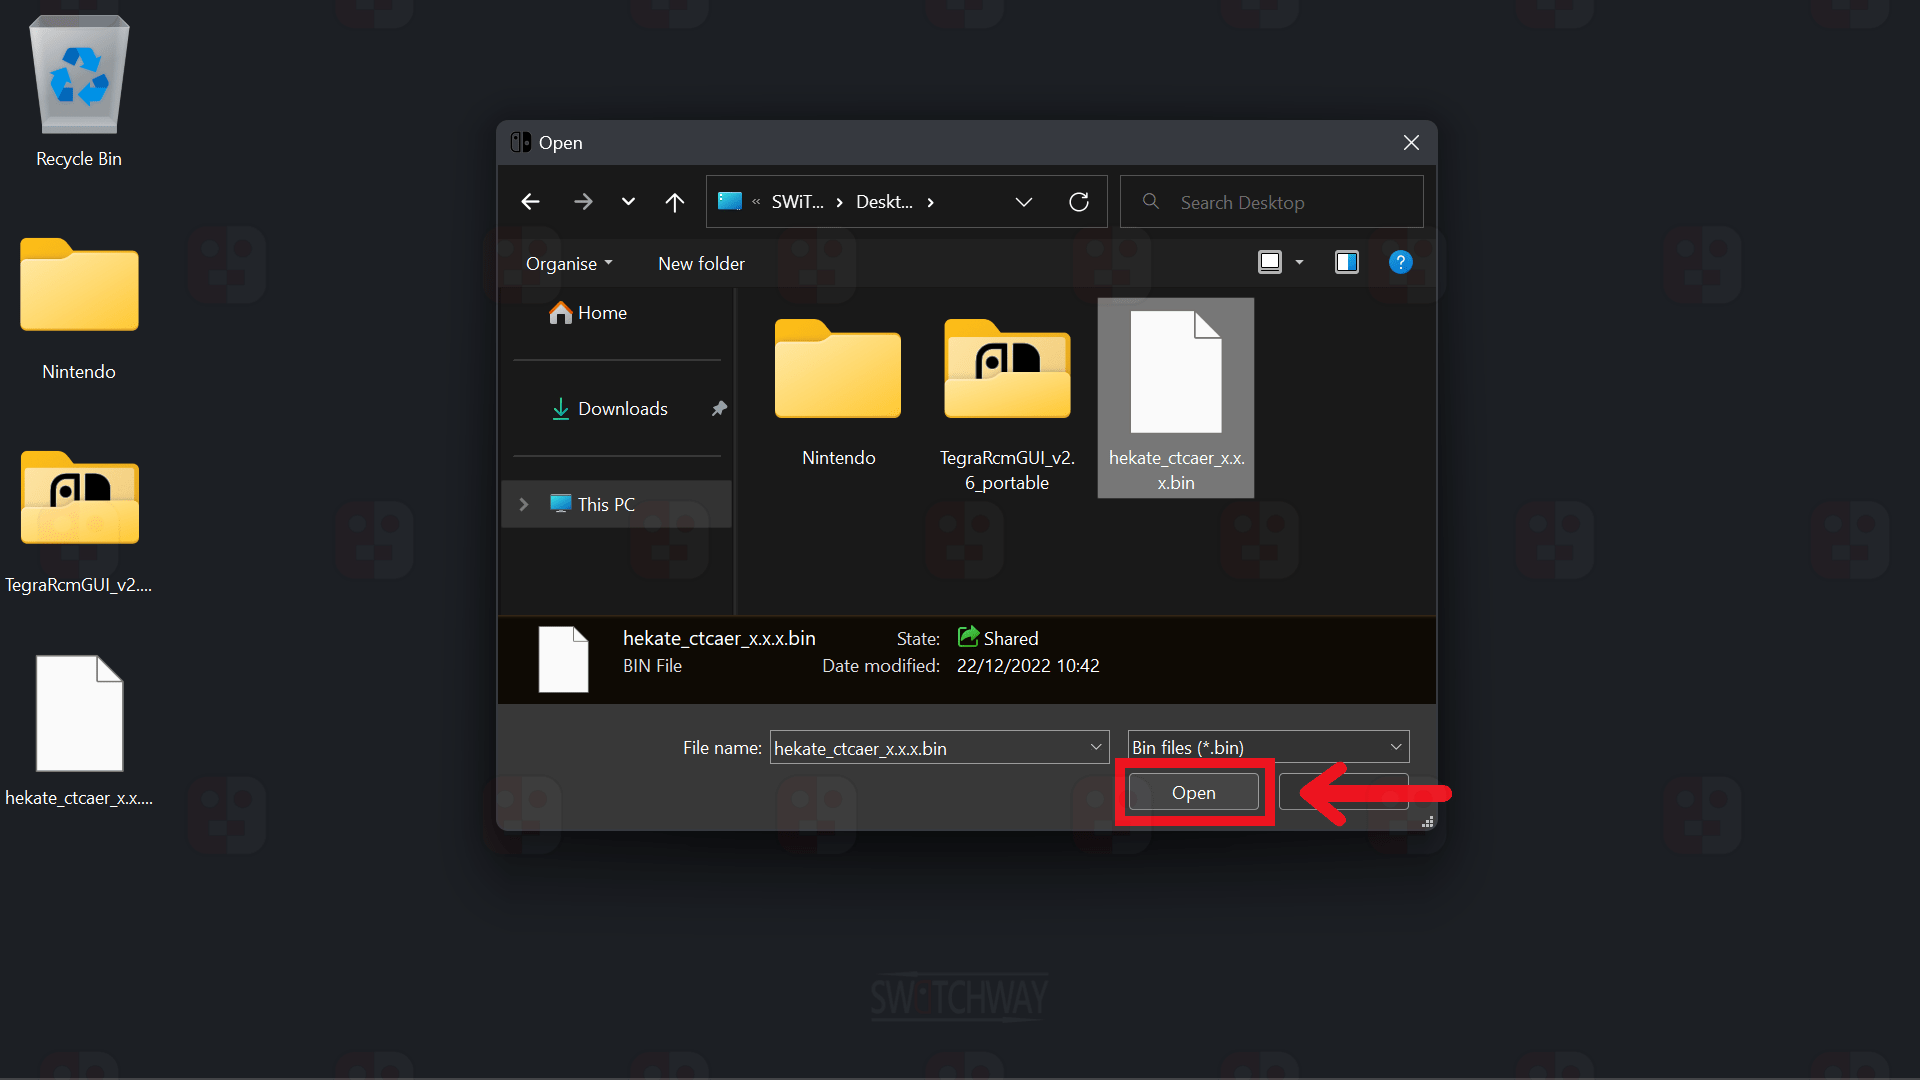
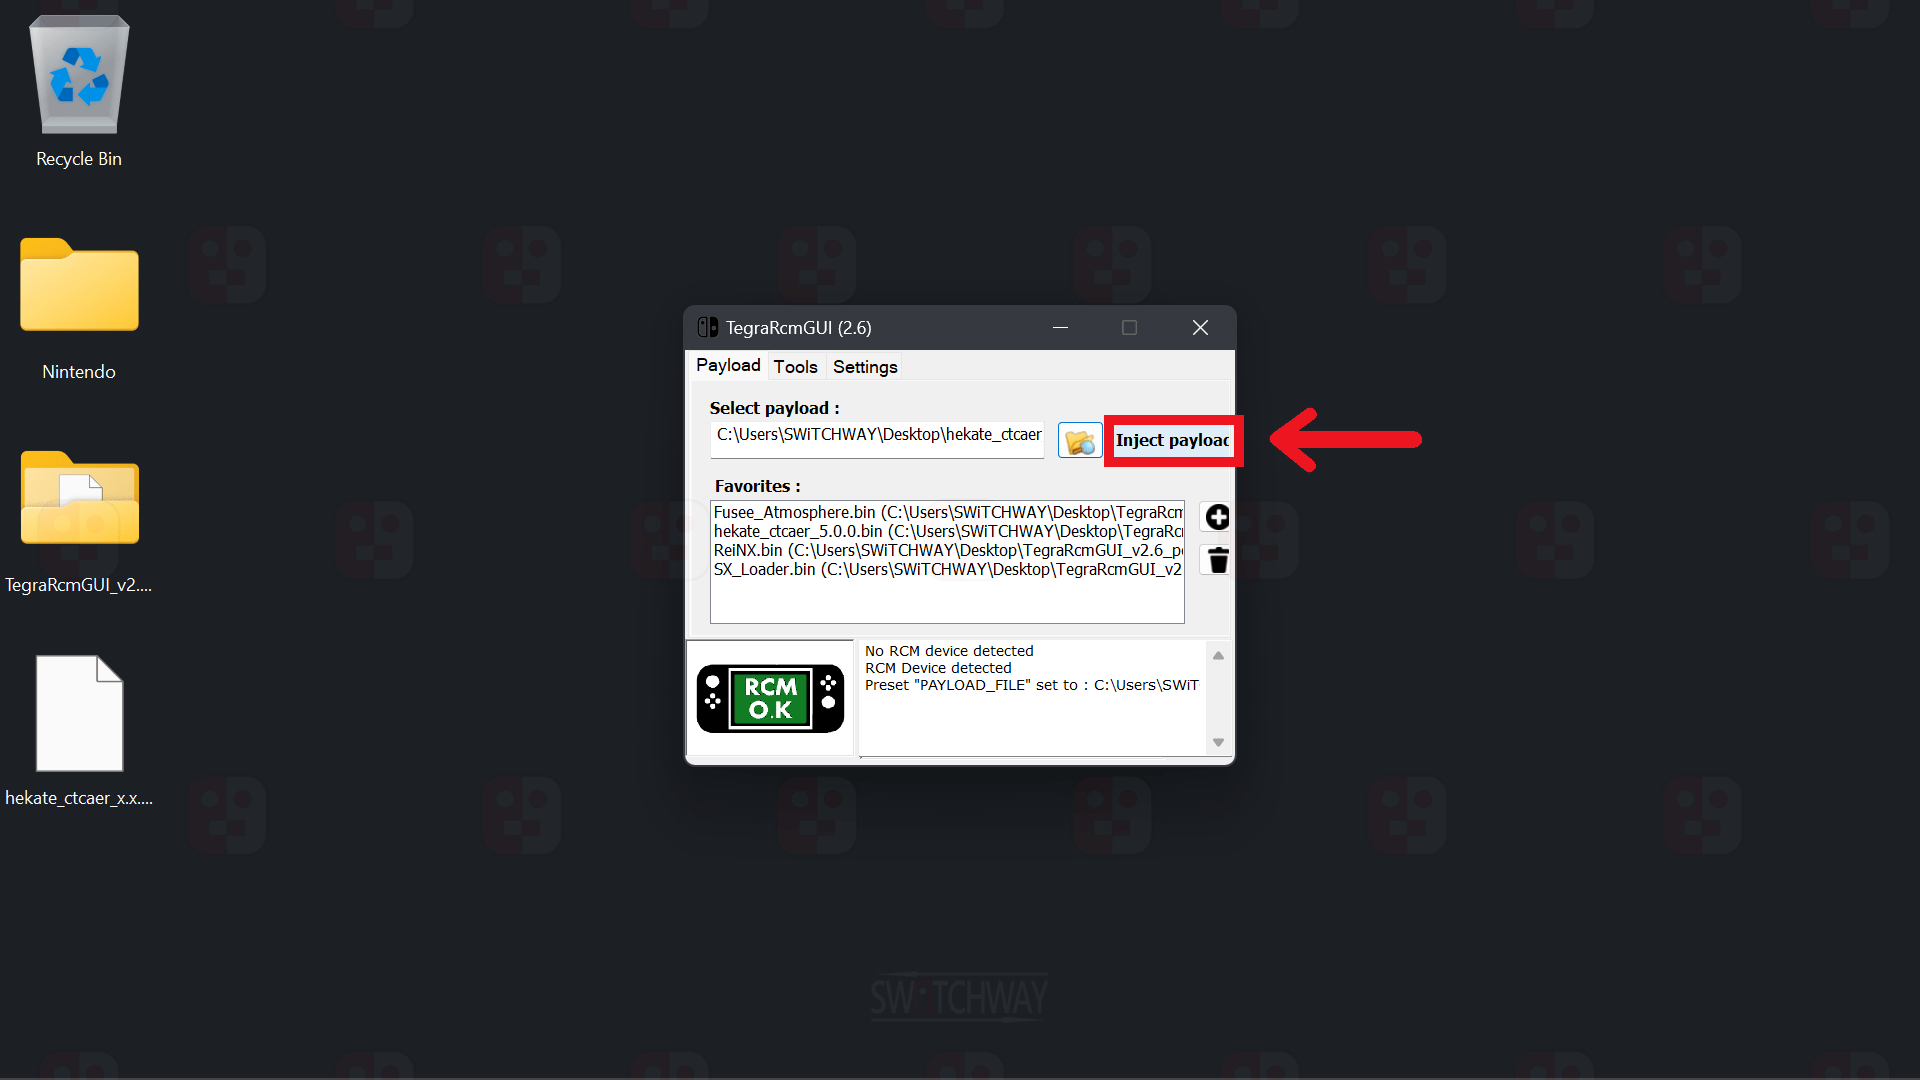
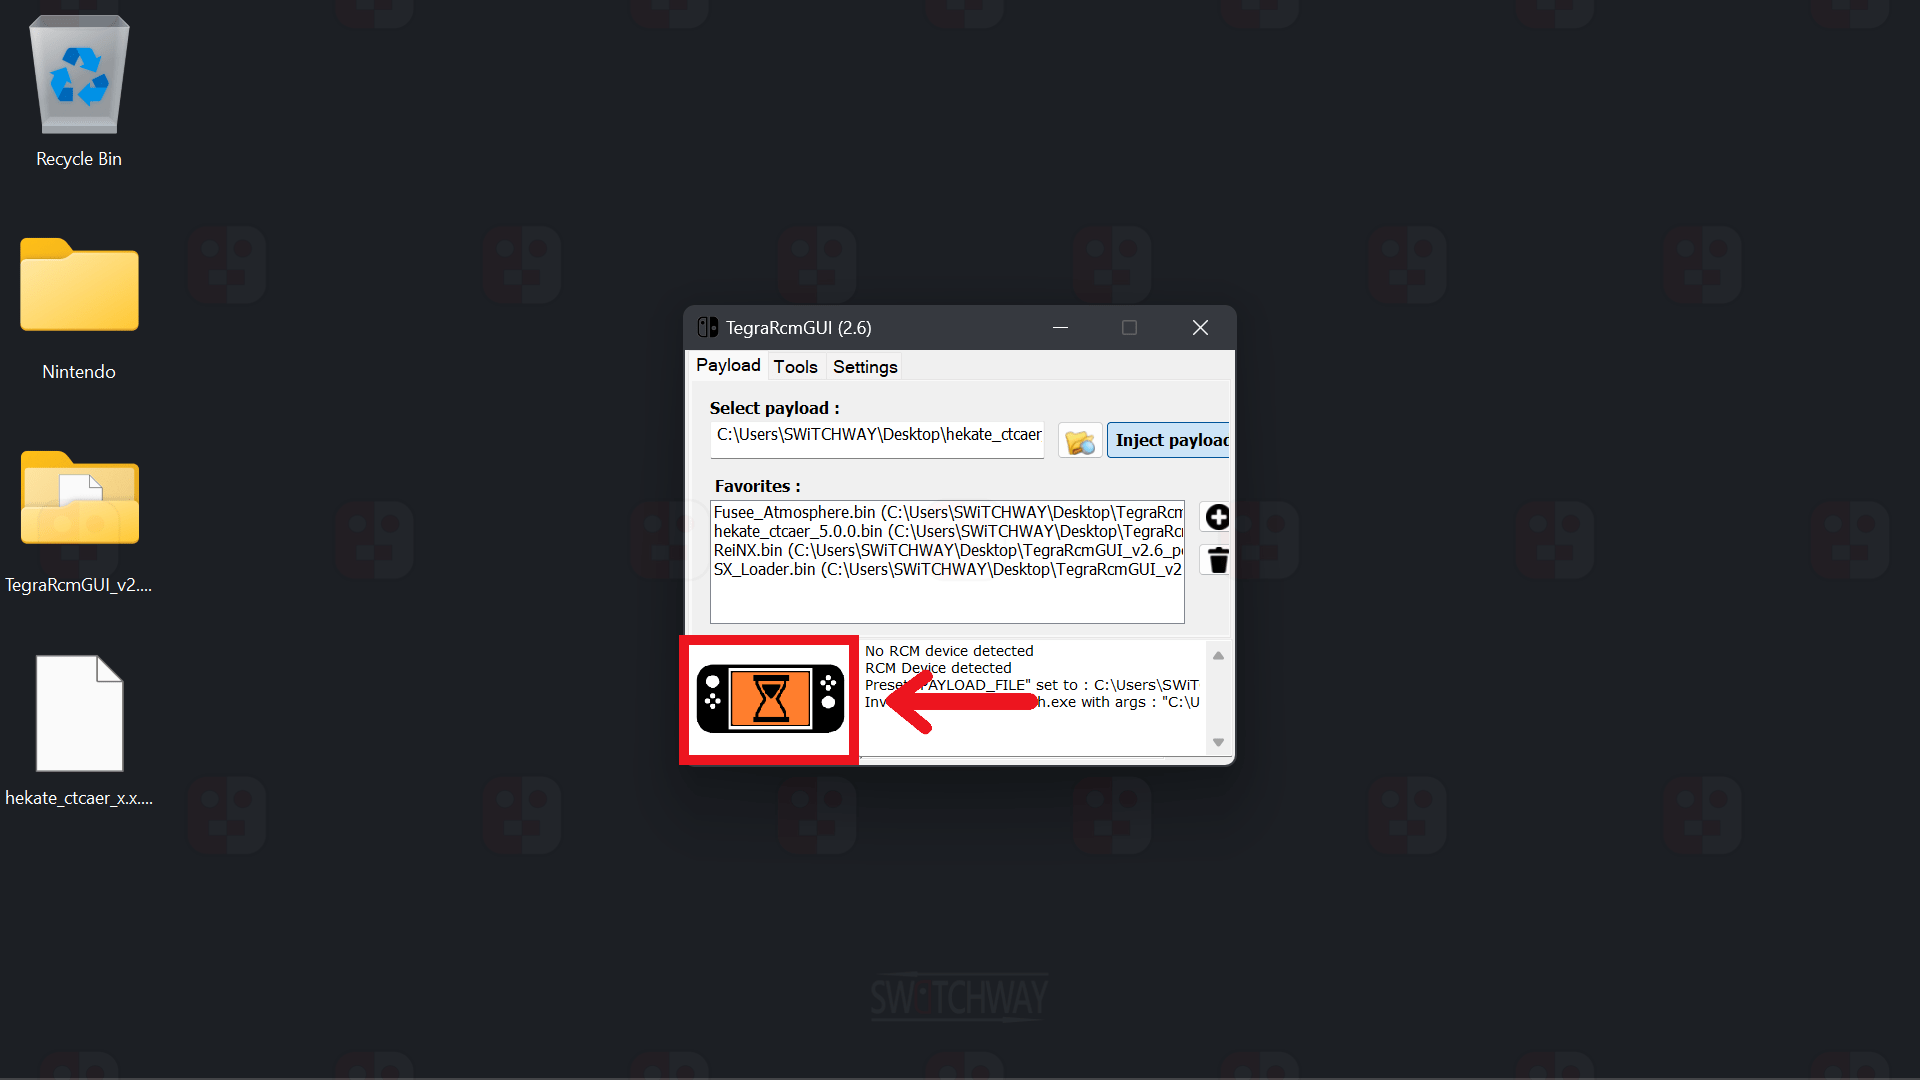
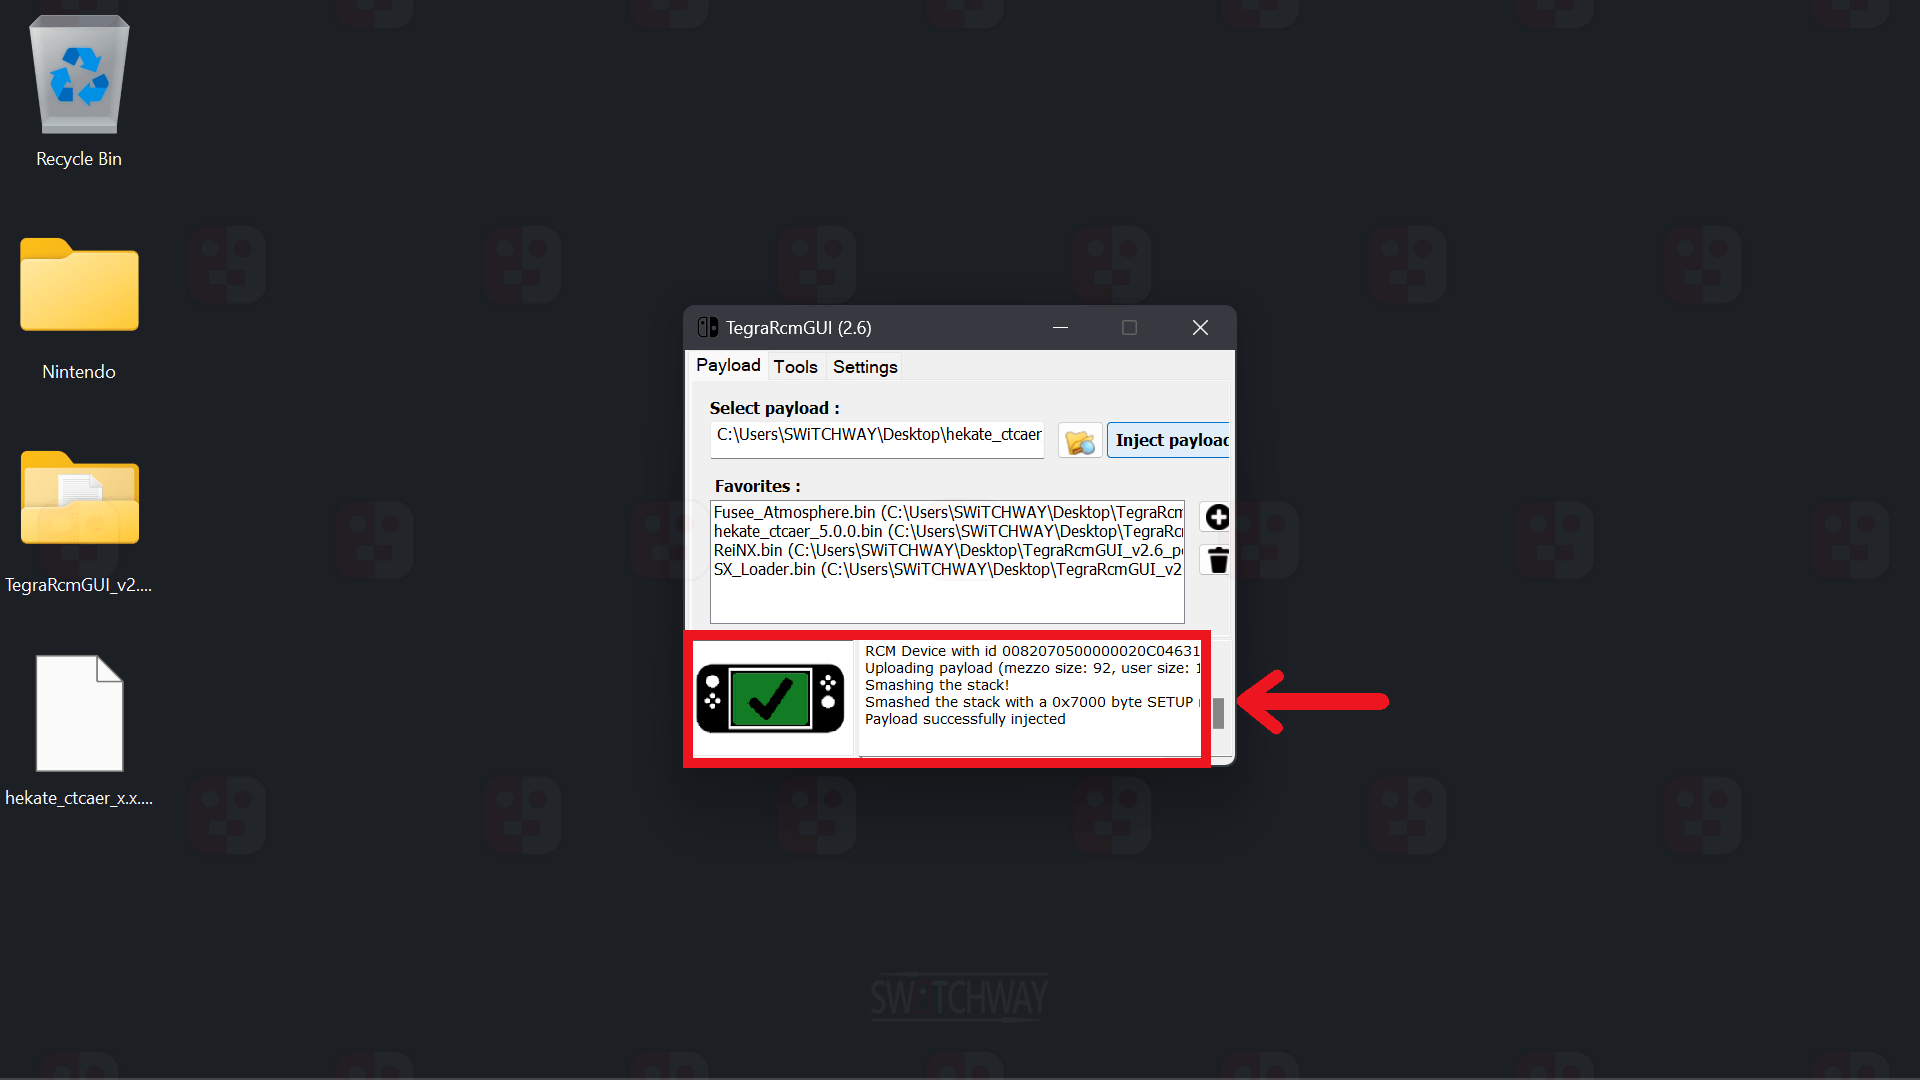
Click the folder icon in TegraRcmGUI and select the hekate_ctcaer_x.x.x.bin file on your desktop, then click on Inject Payload. Your Switch will boot into Hekate. Close TegraRcmGUI.
Backup NAND
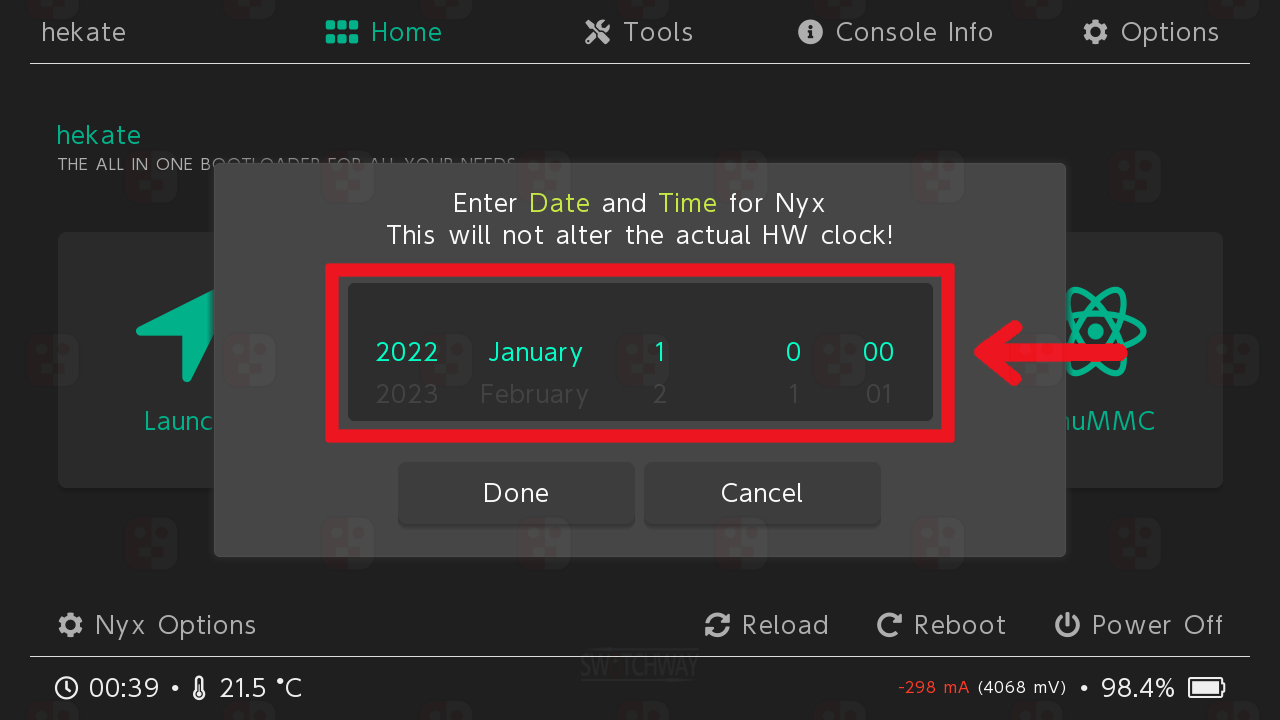
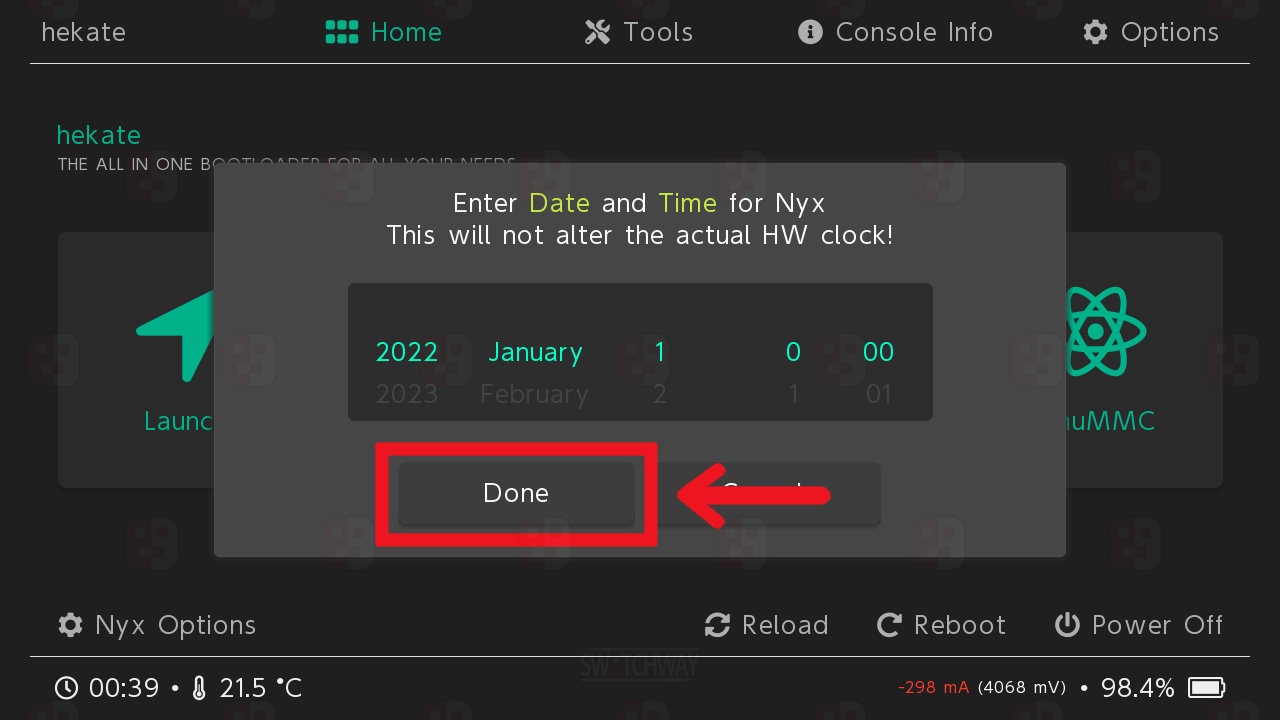
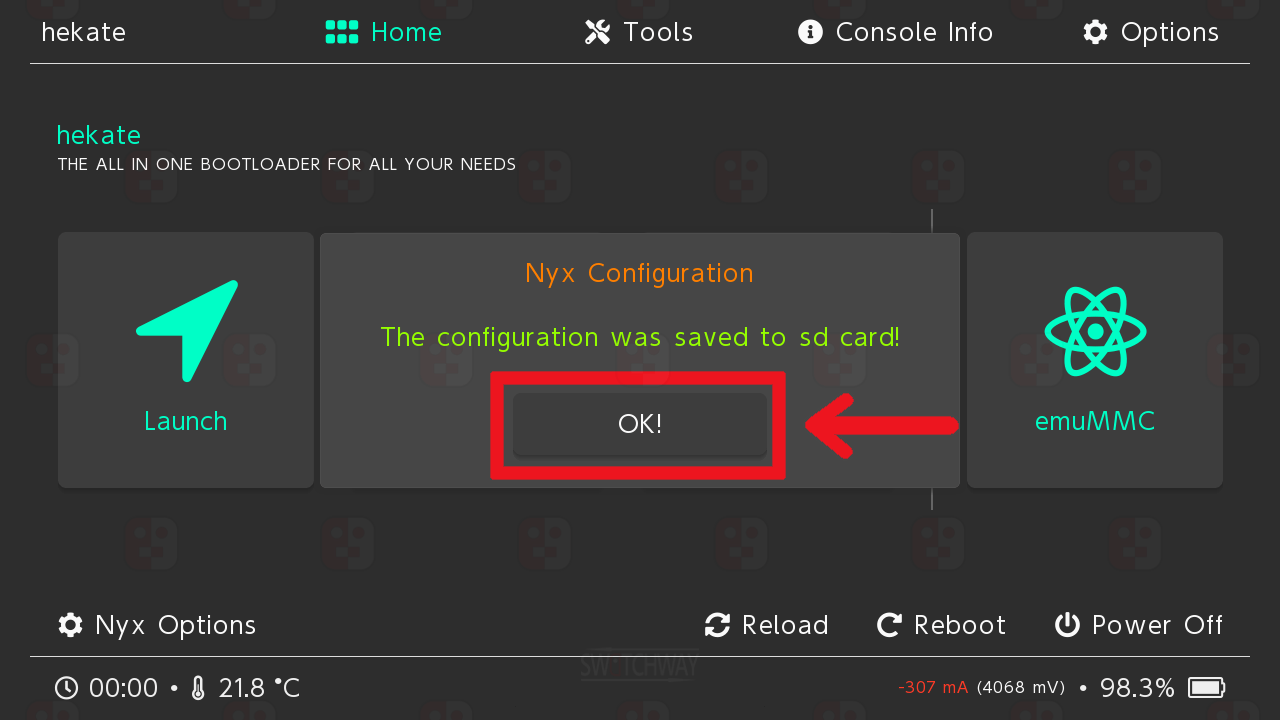
Set the Time/Date.
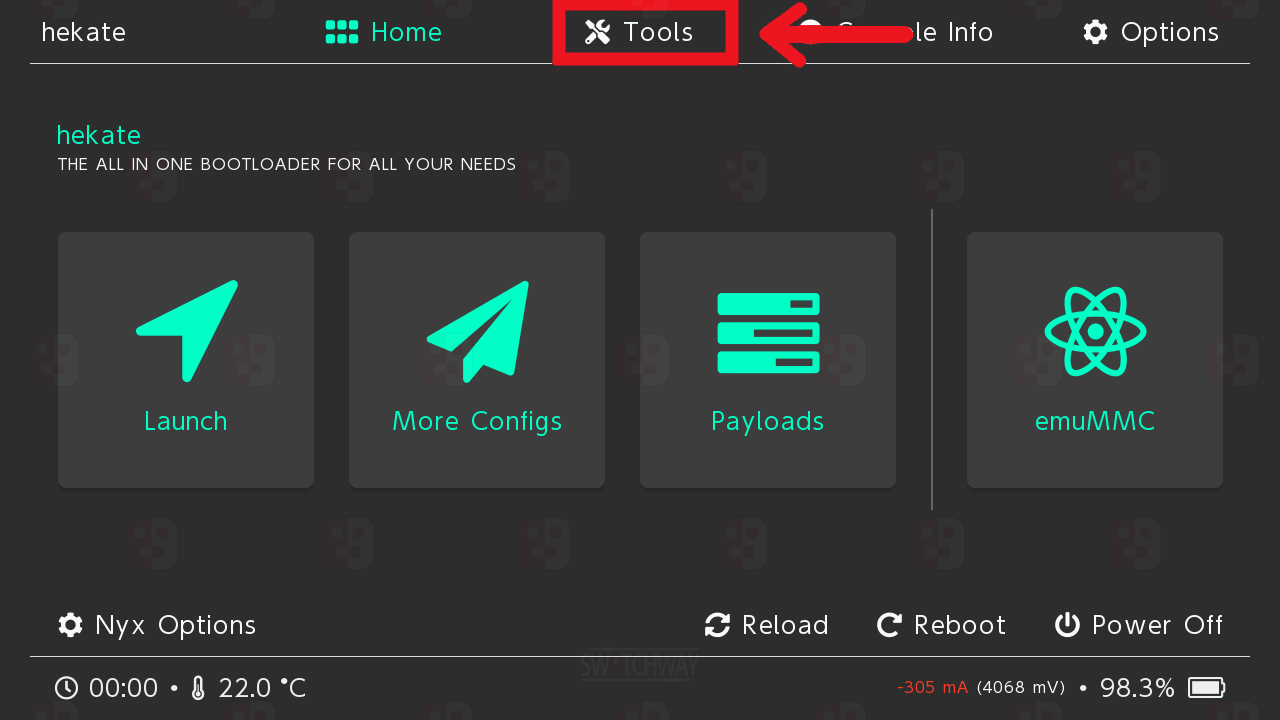
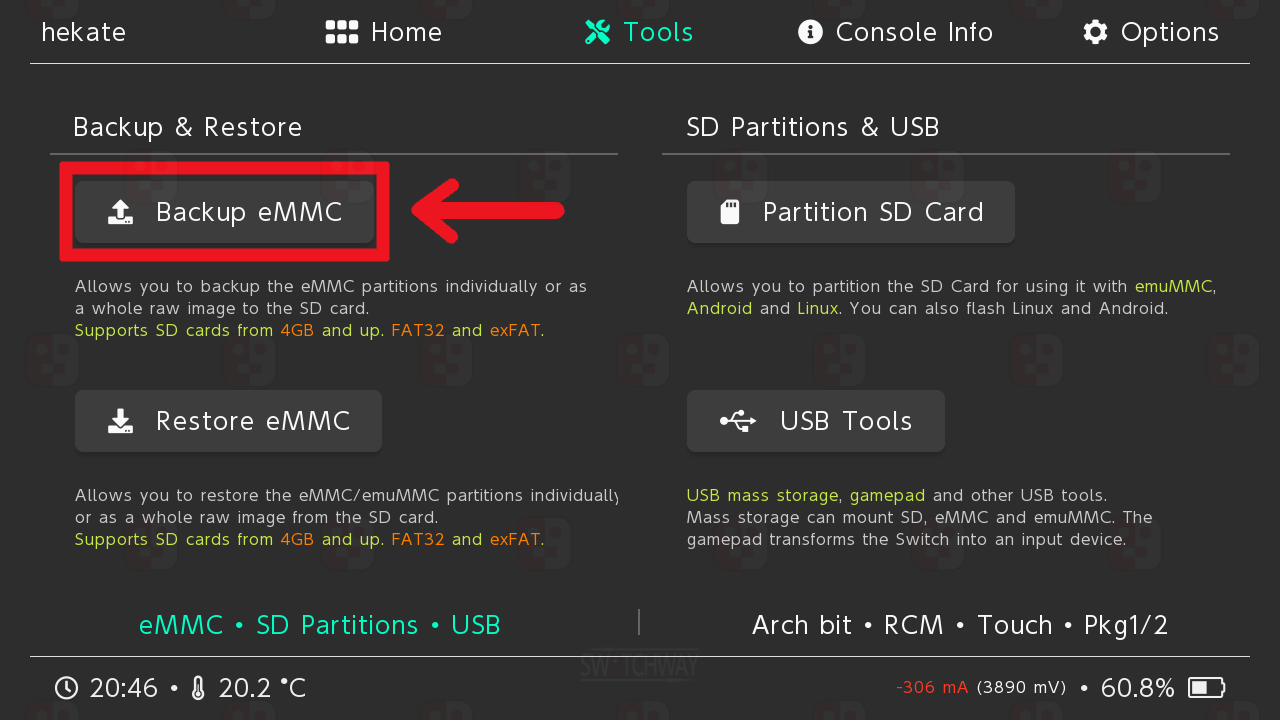
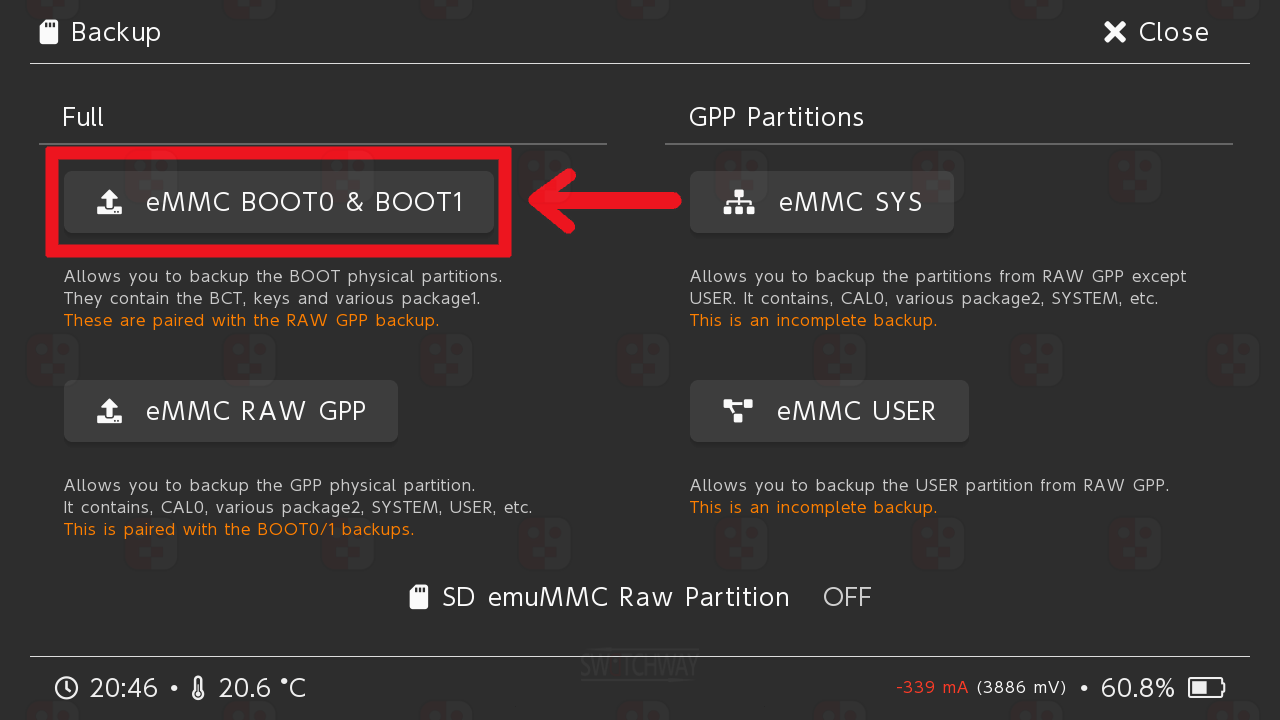
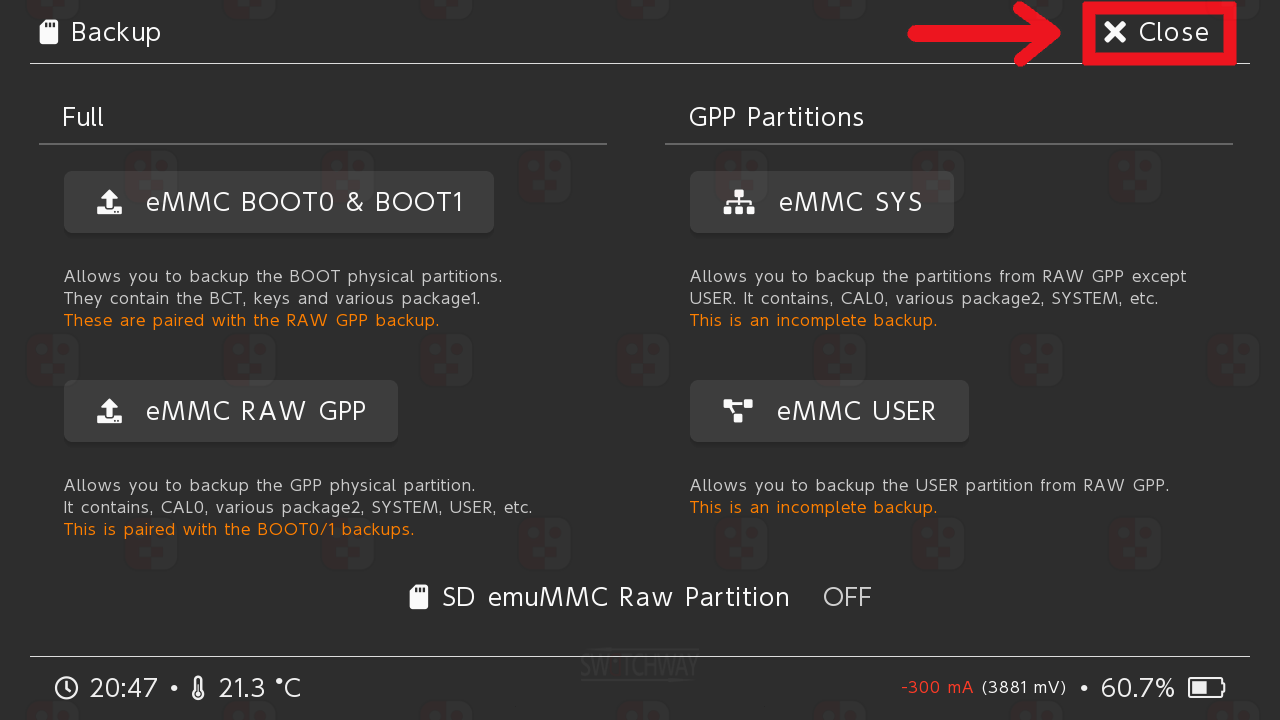
Select Tools > Backup eMMC > eMMC BOOT0 & BOOT1.
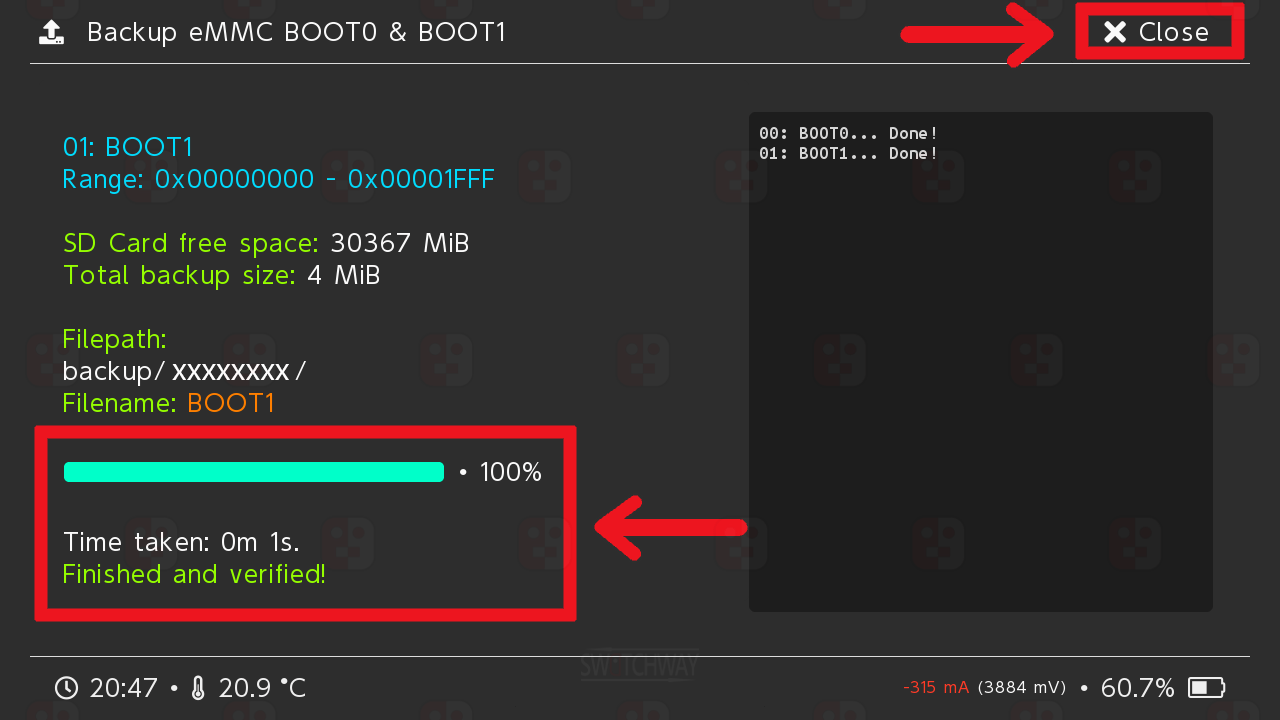
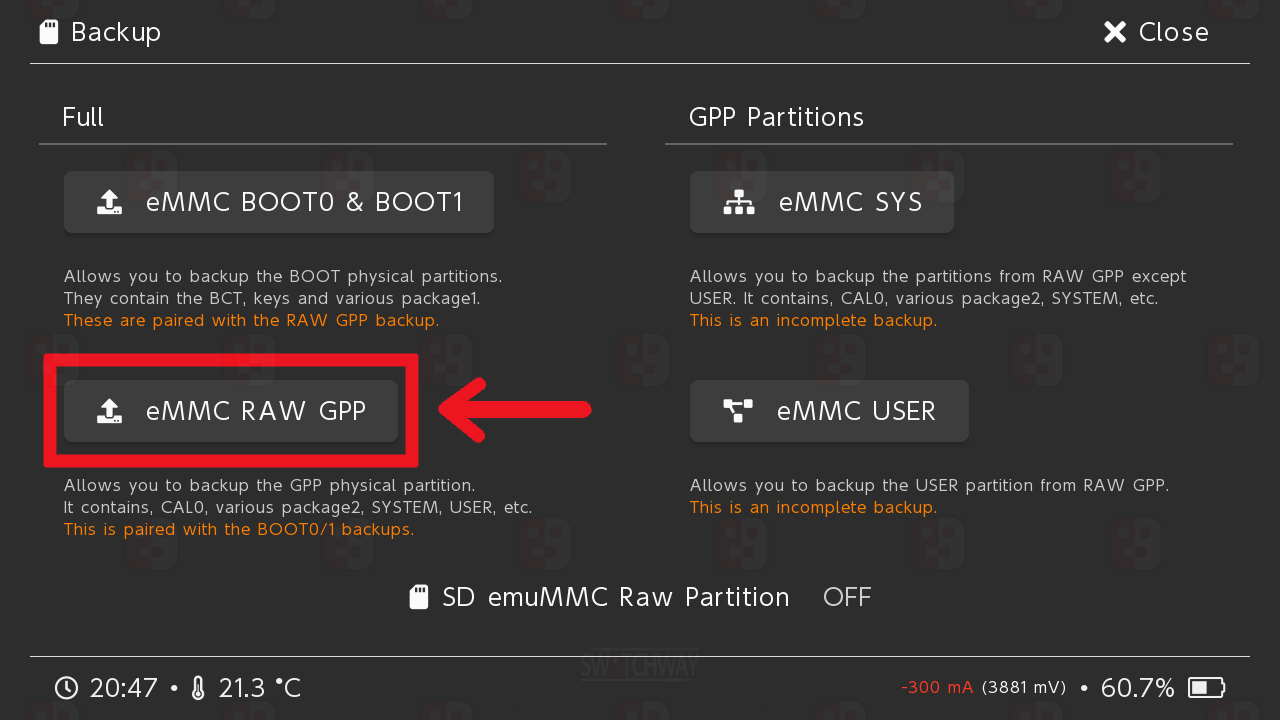
Once the backup finishes, select Close > eMMC RAW GPP.
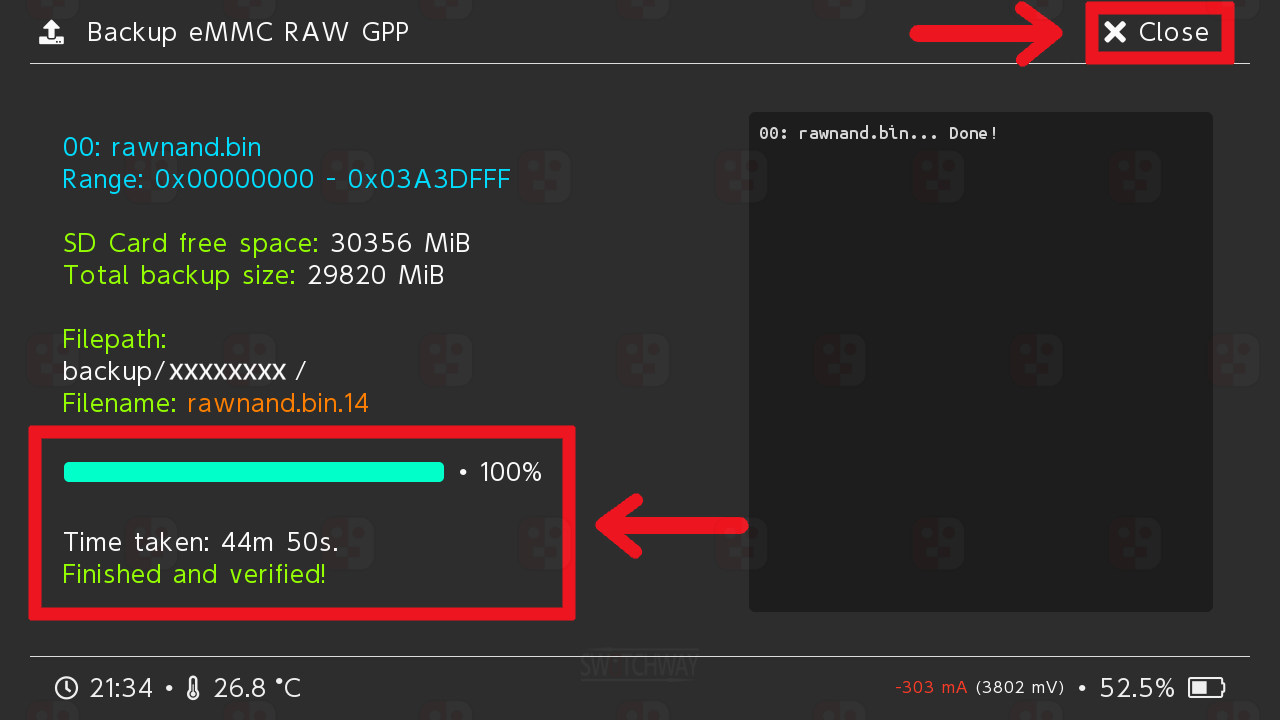
Once the backup finishes select Close > Close.
Store The Backup
Make sure your USB cable is still connected to your Switch and PC.
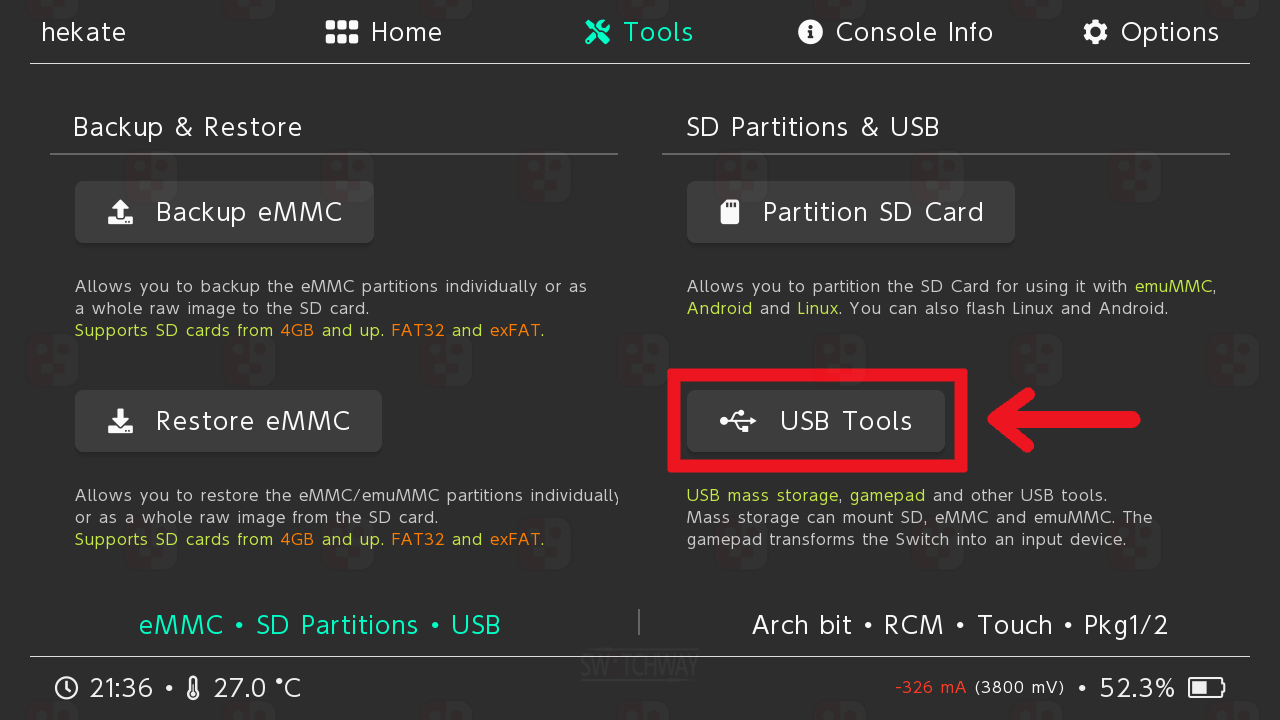
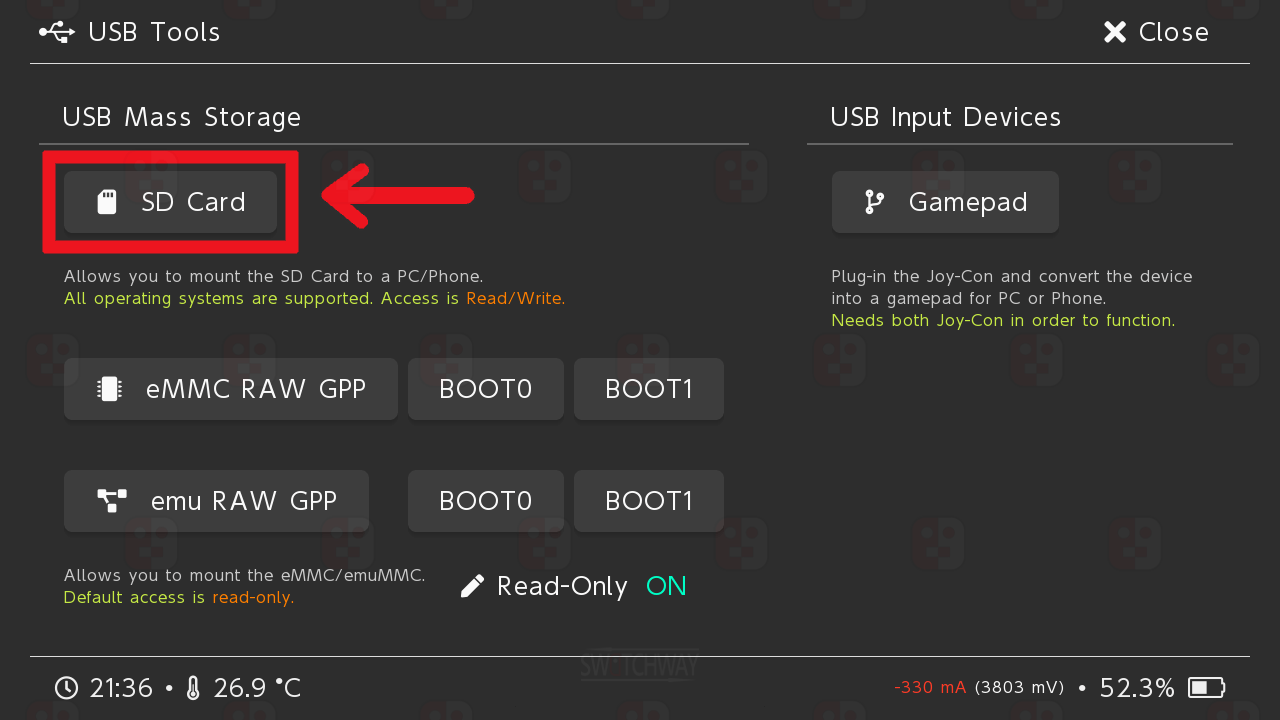
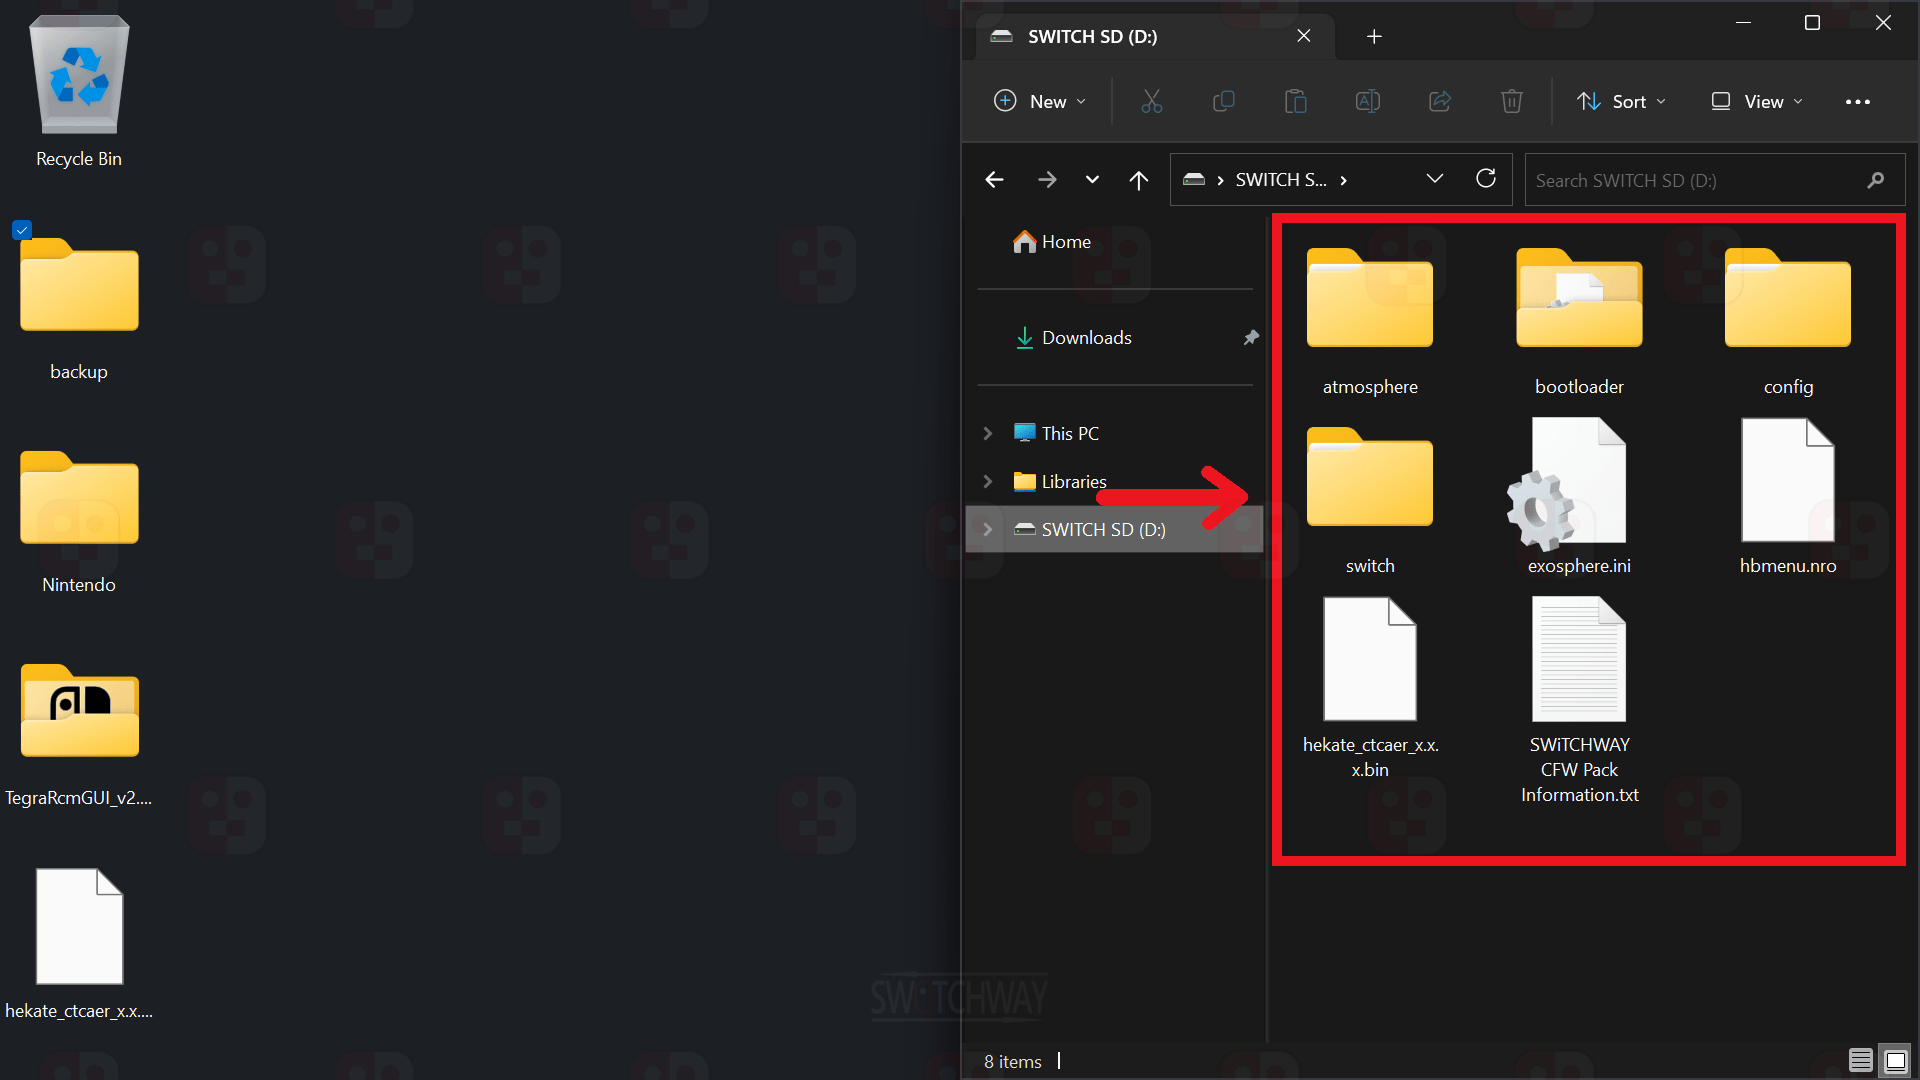
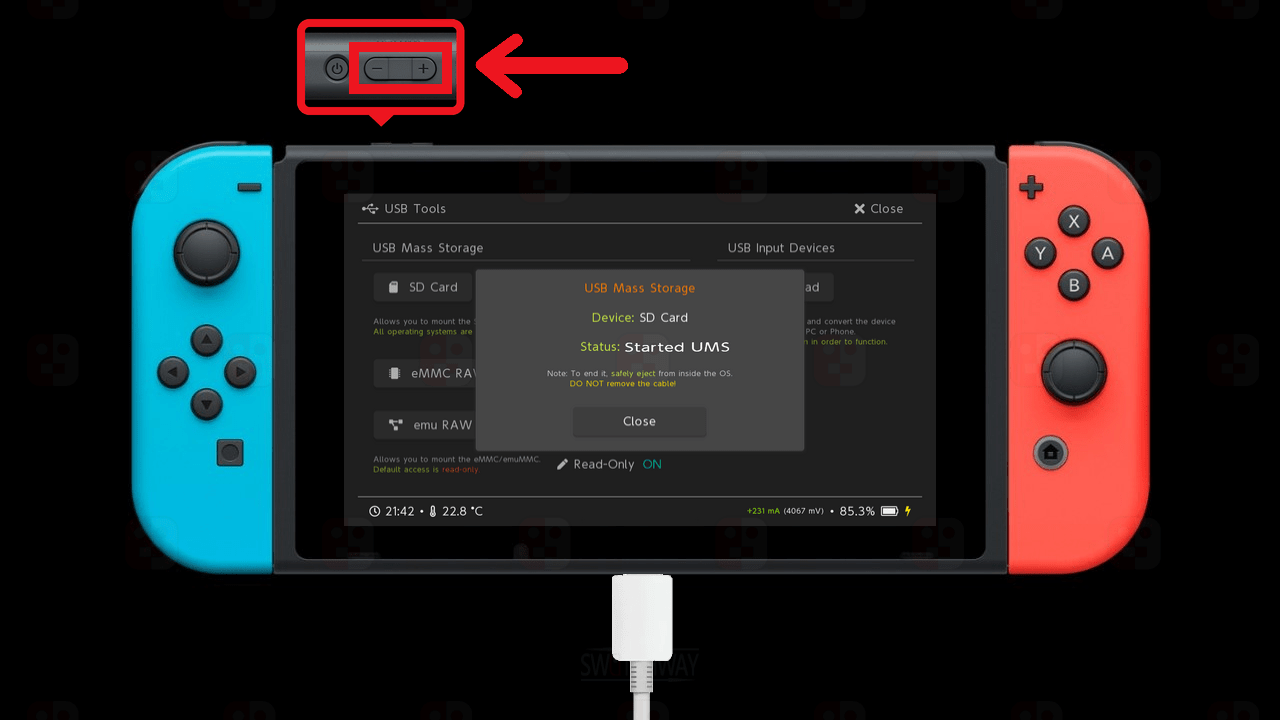
Select USB Tools >SD Card. This will allow you to access the Switch microSD card on your PC without powering off your Switch, or ejecting the microSD card.
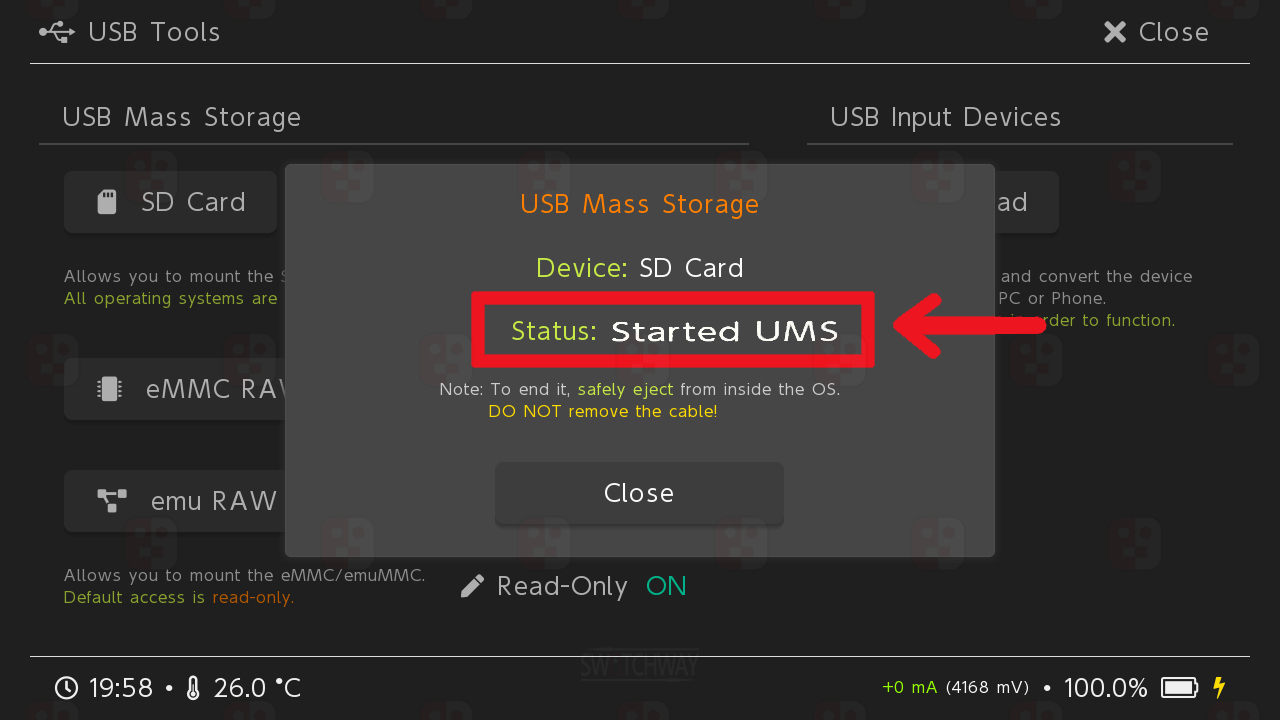
You should see a Status: Started UMS message in Hekate and you should be able to see your Switch microSD card on your PC in the file browser window as if you have inserted it into your PC.
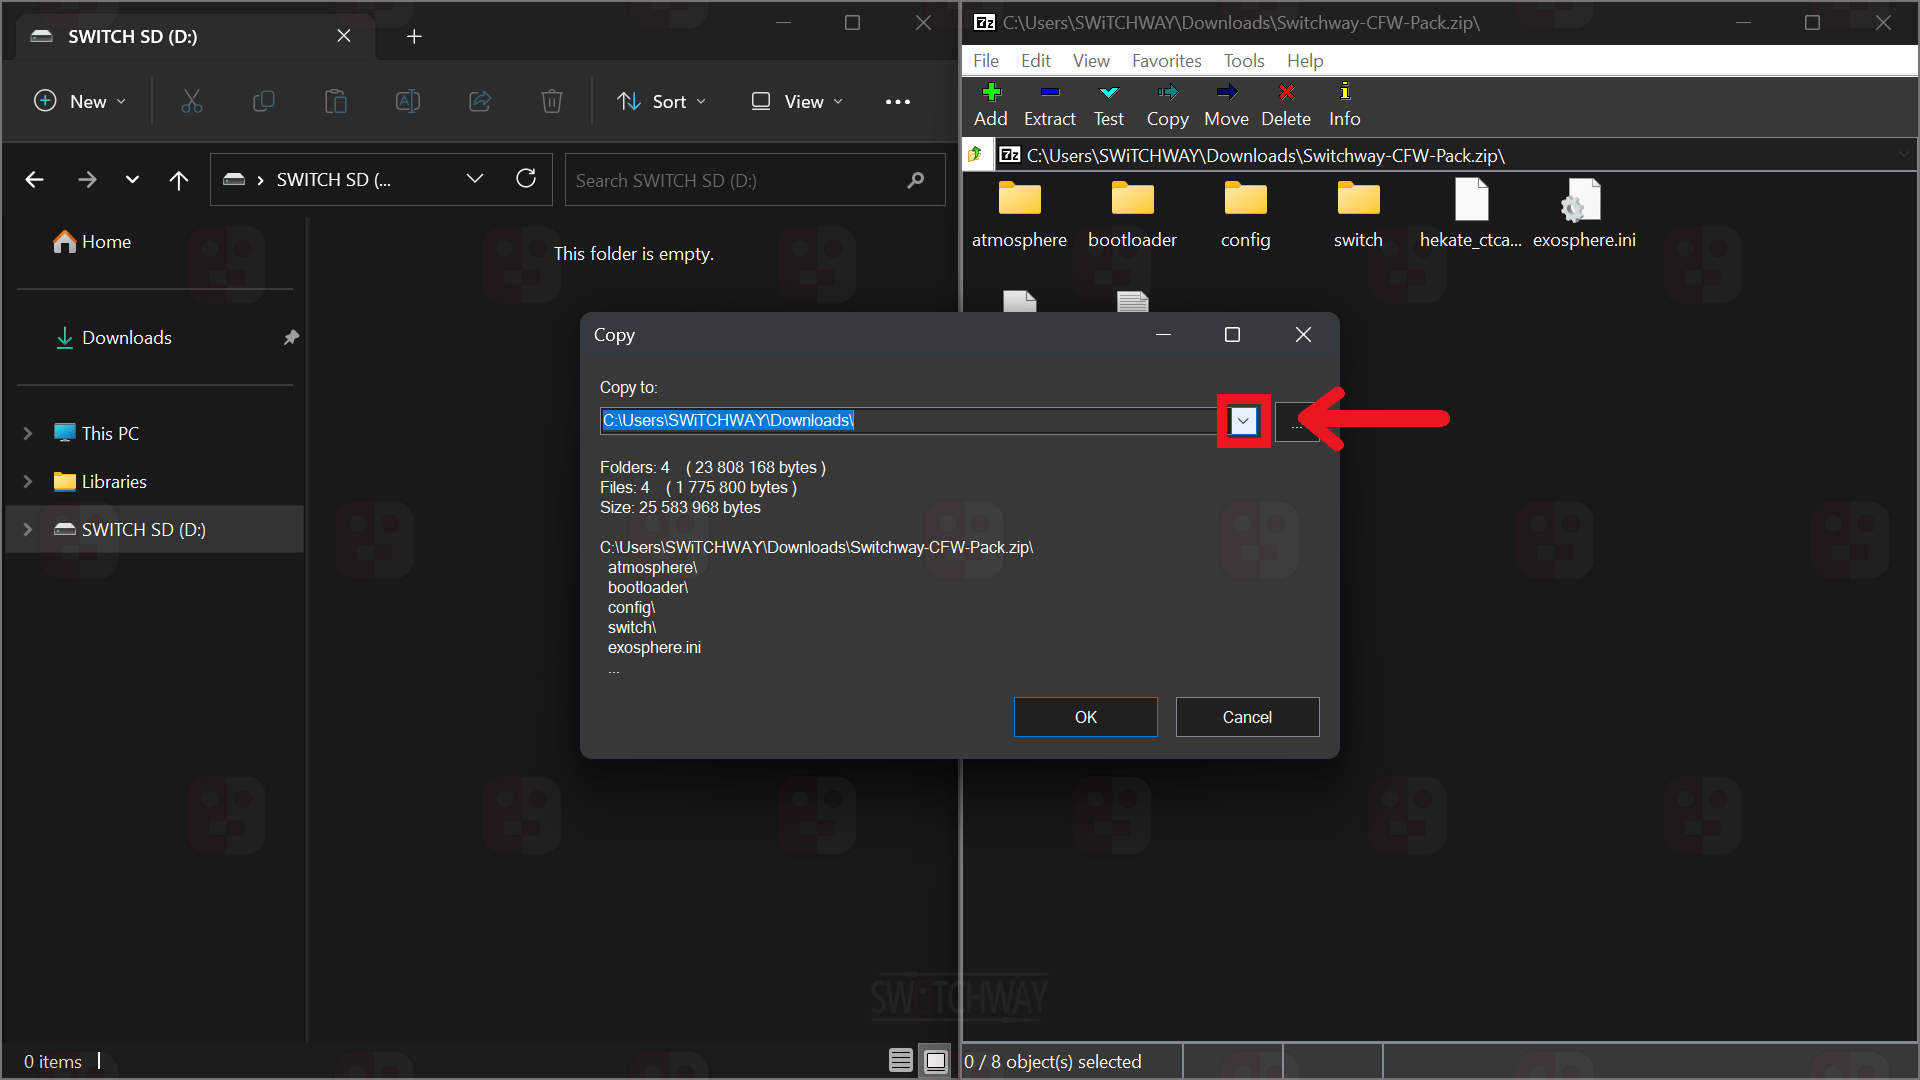
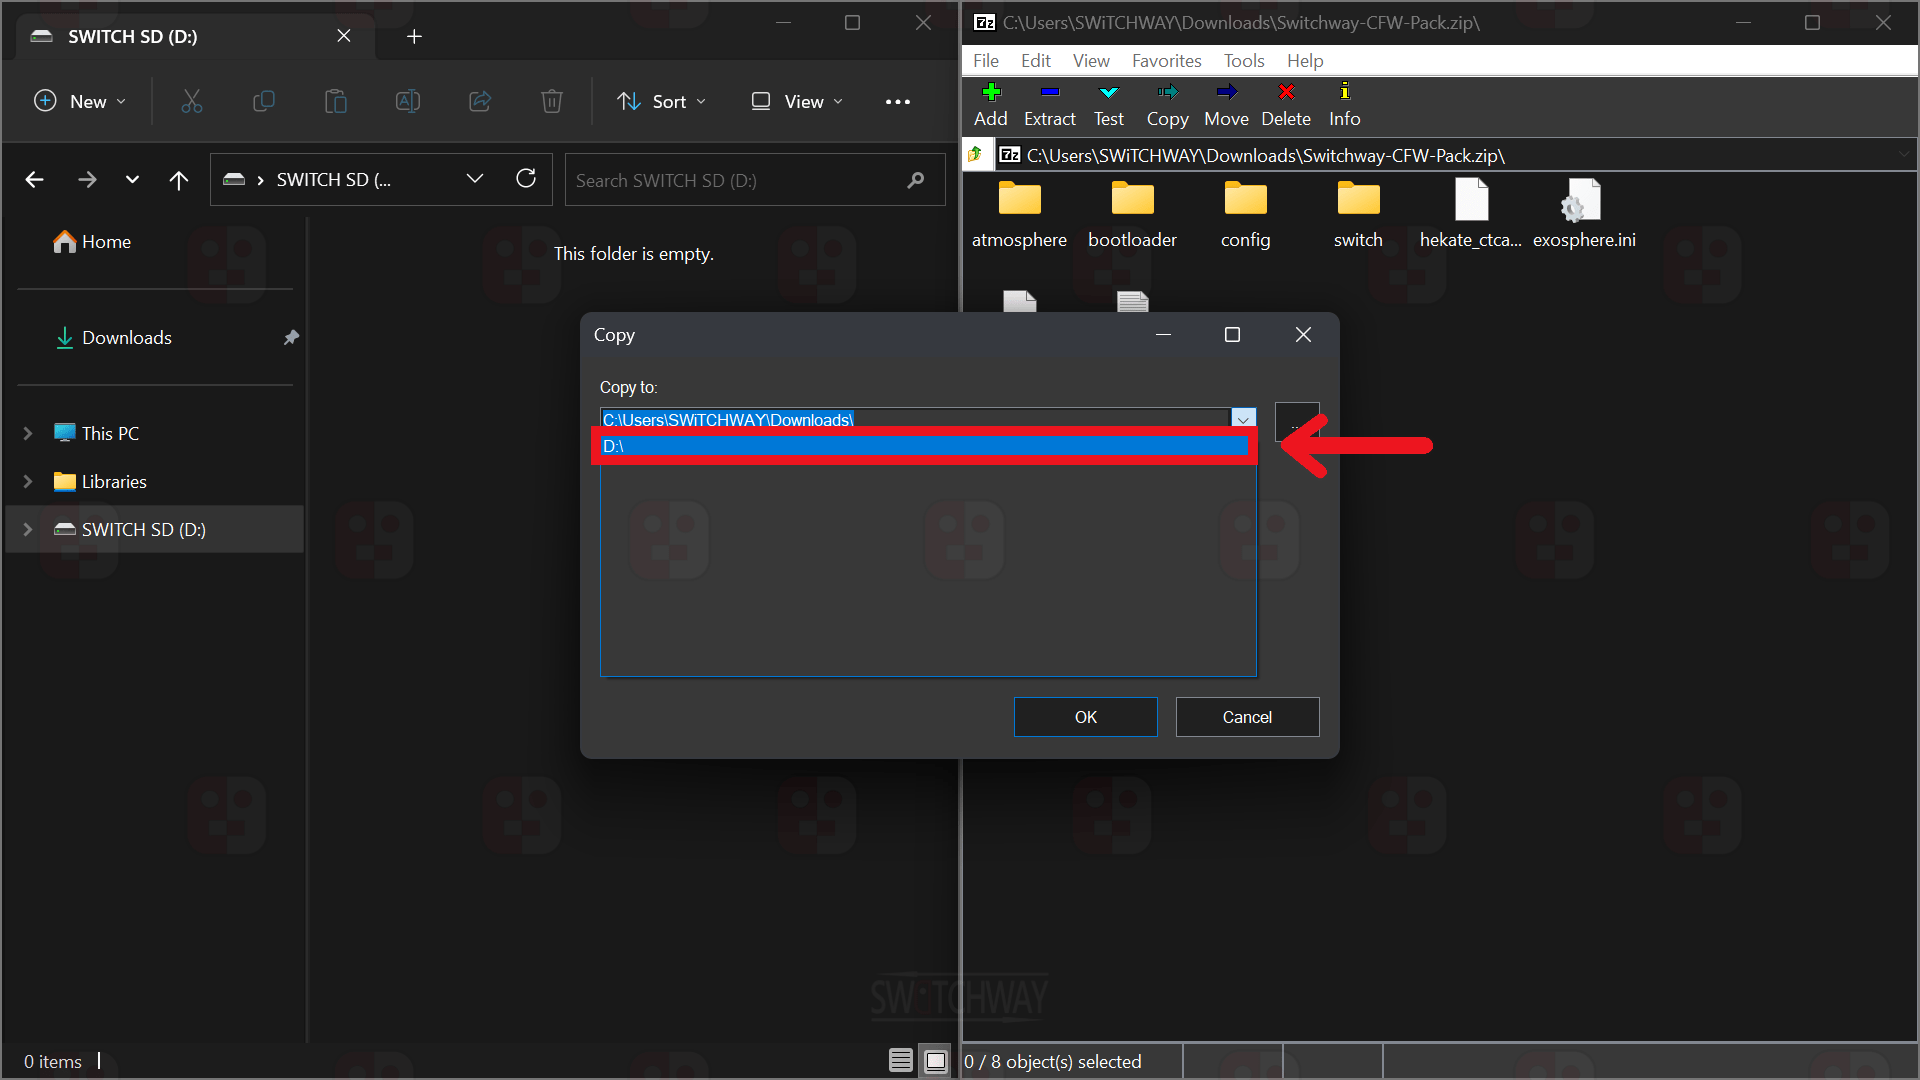
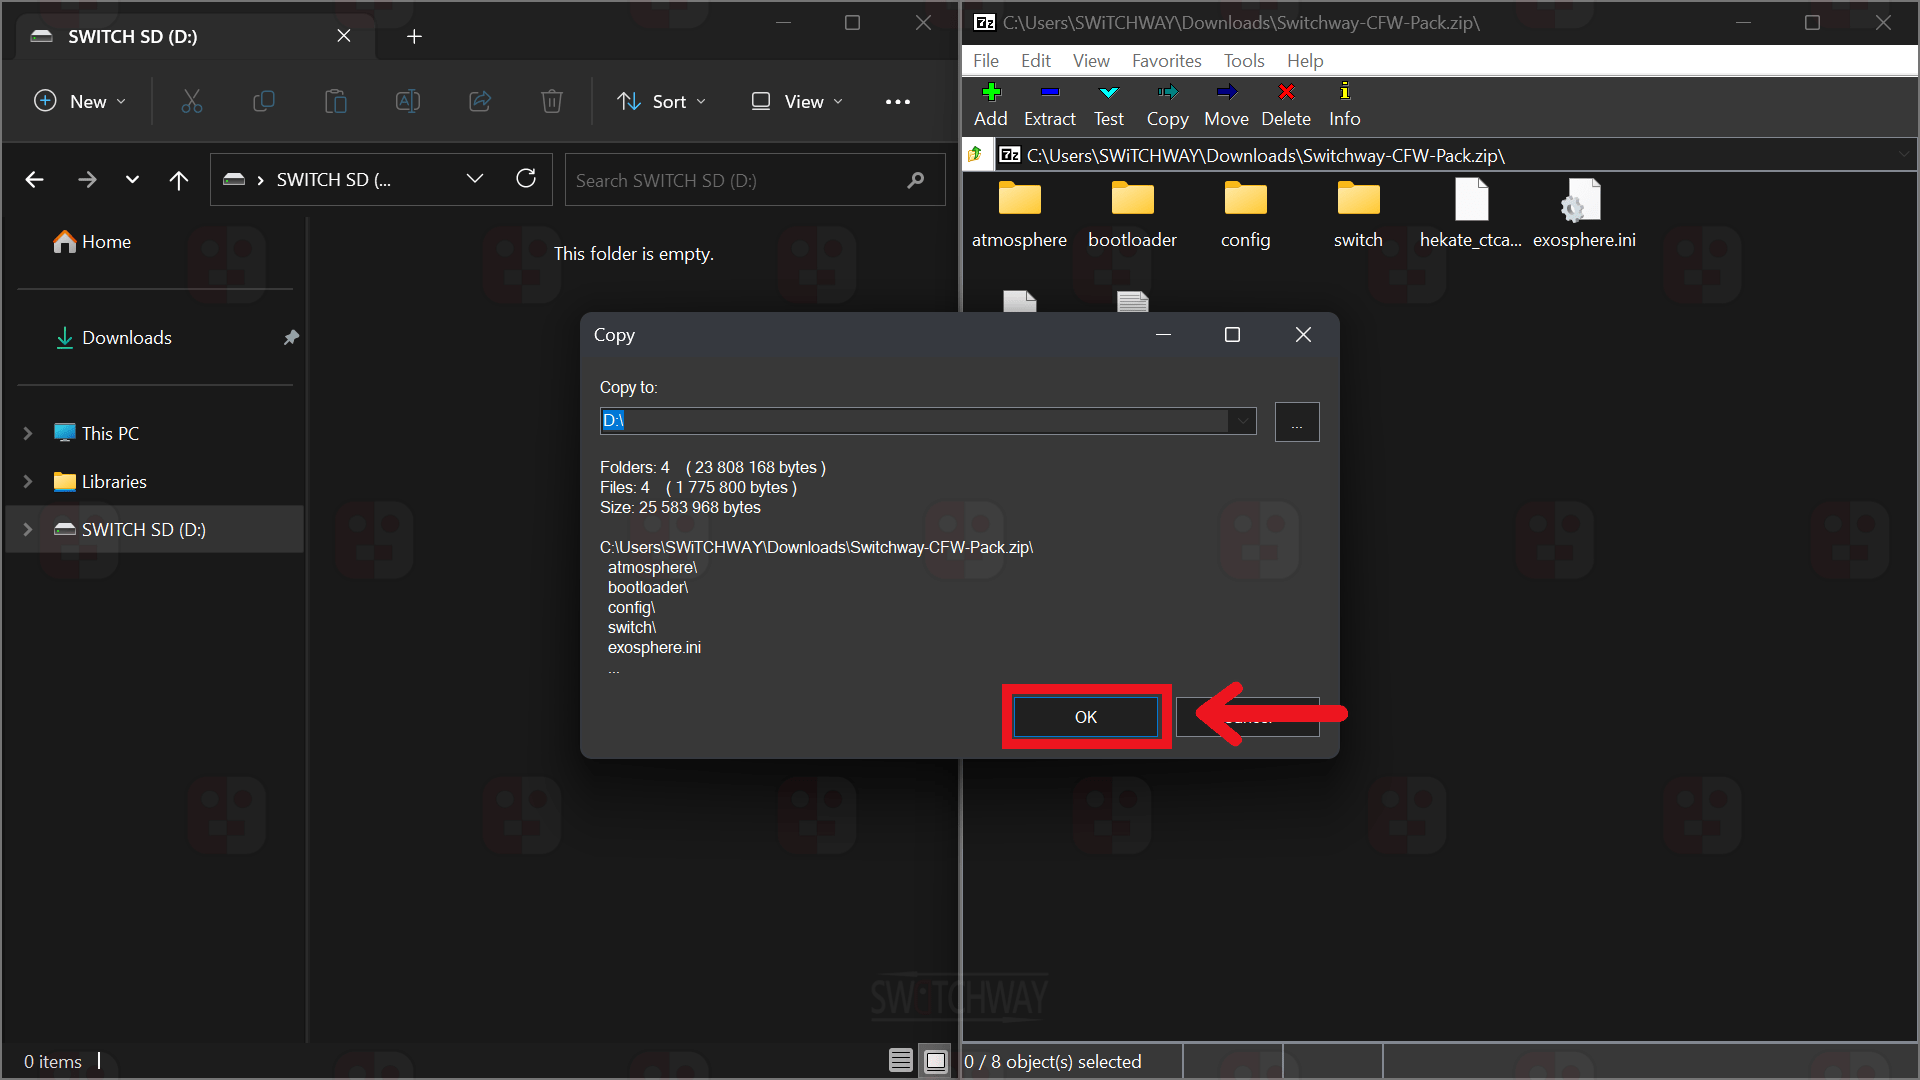
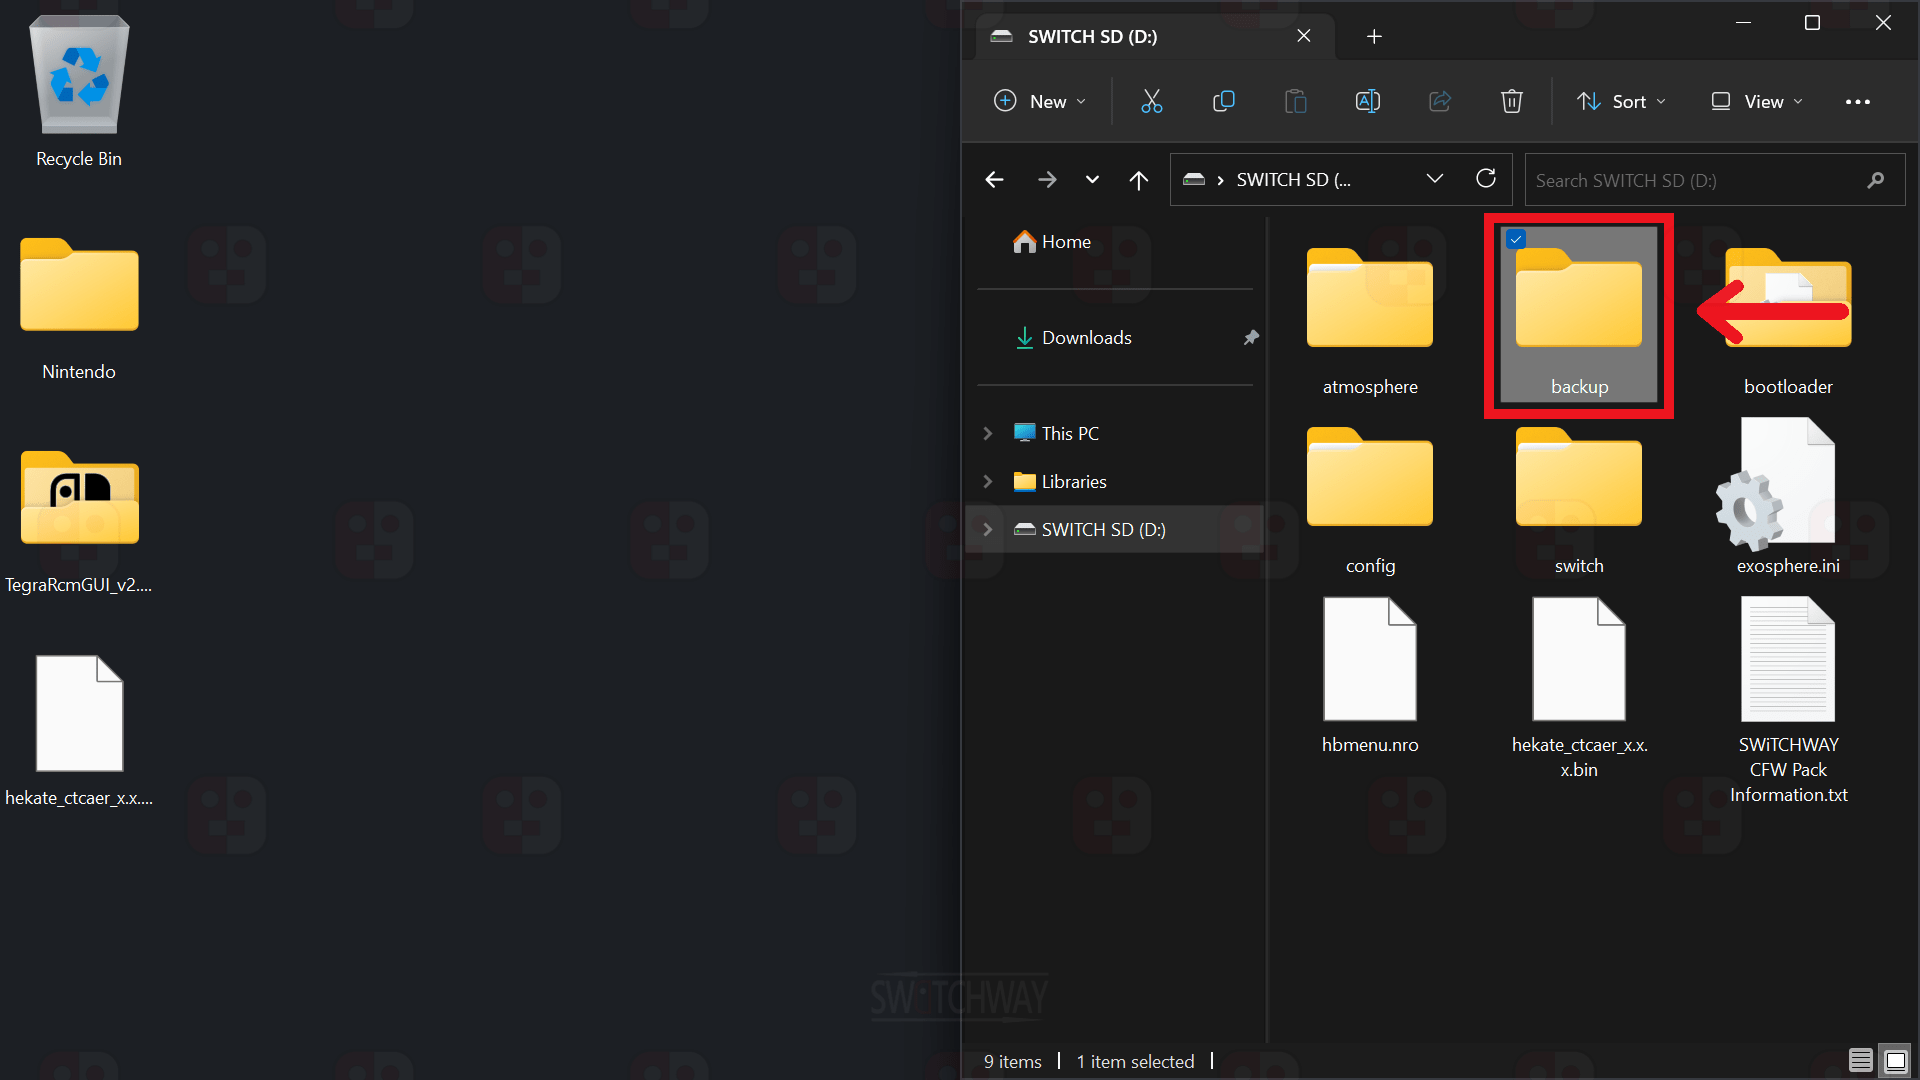
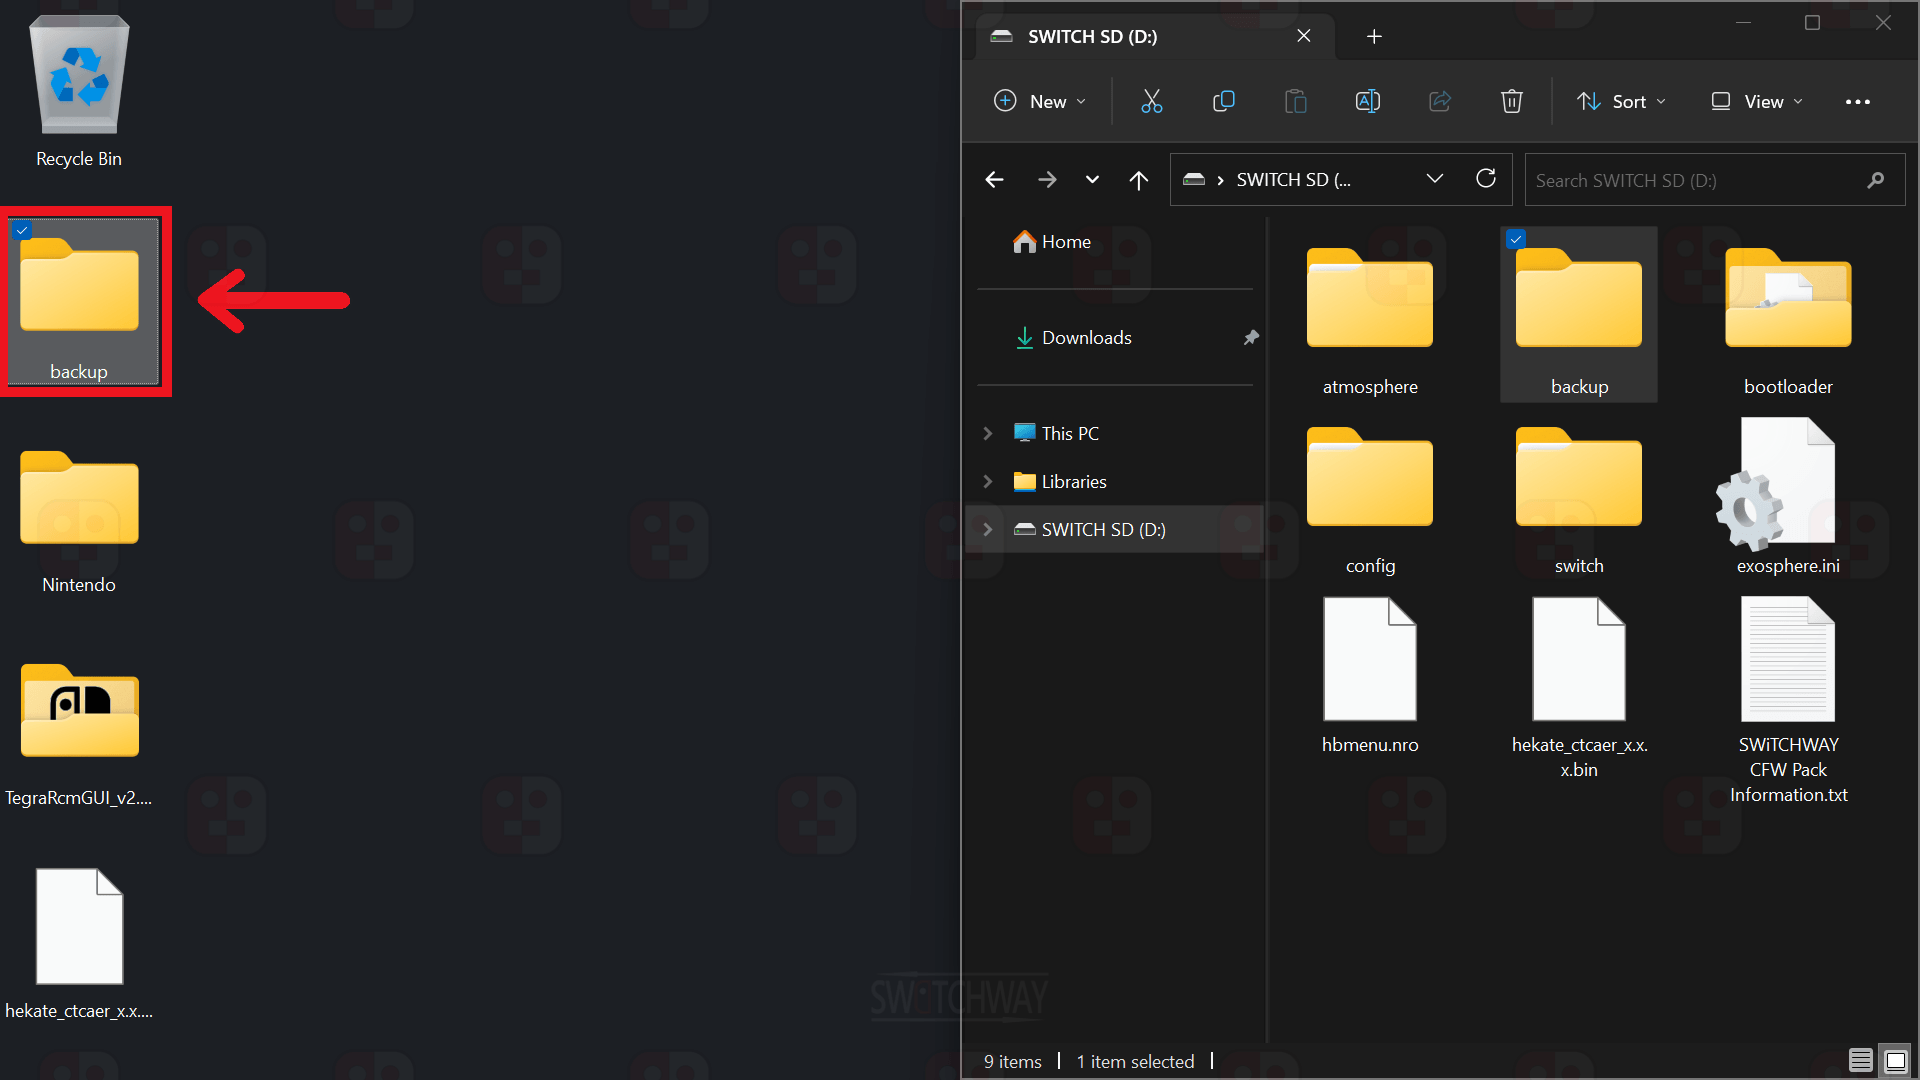
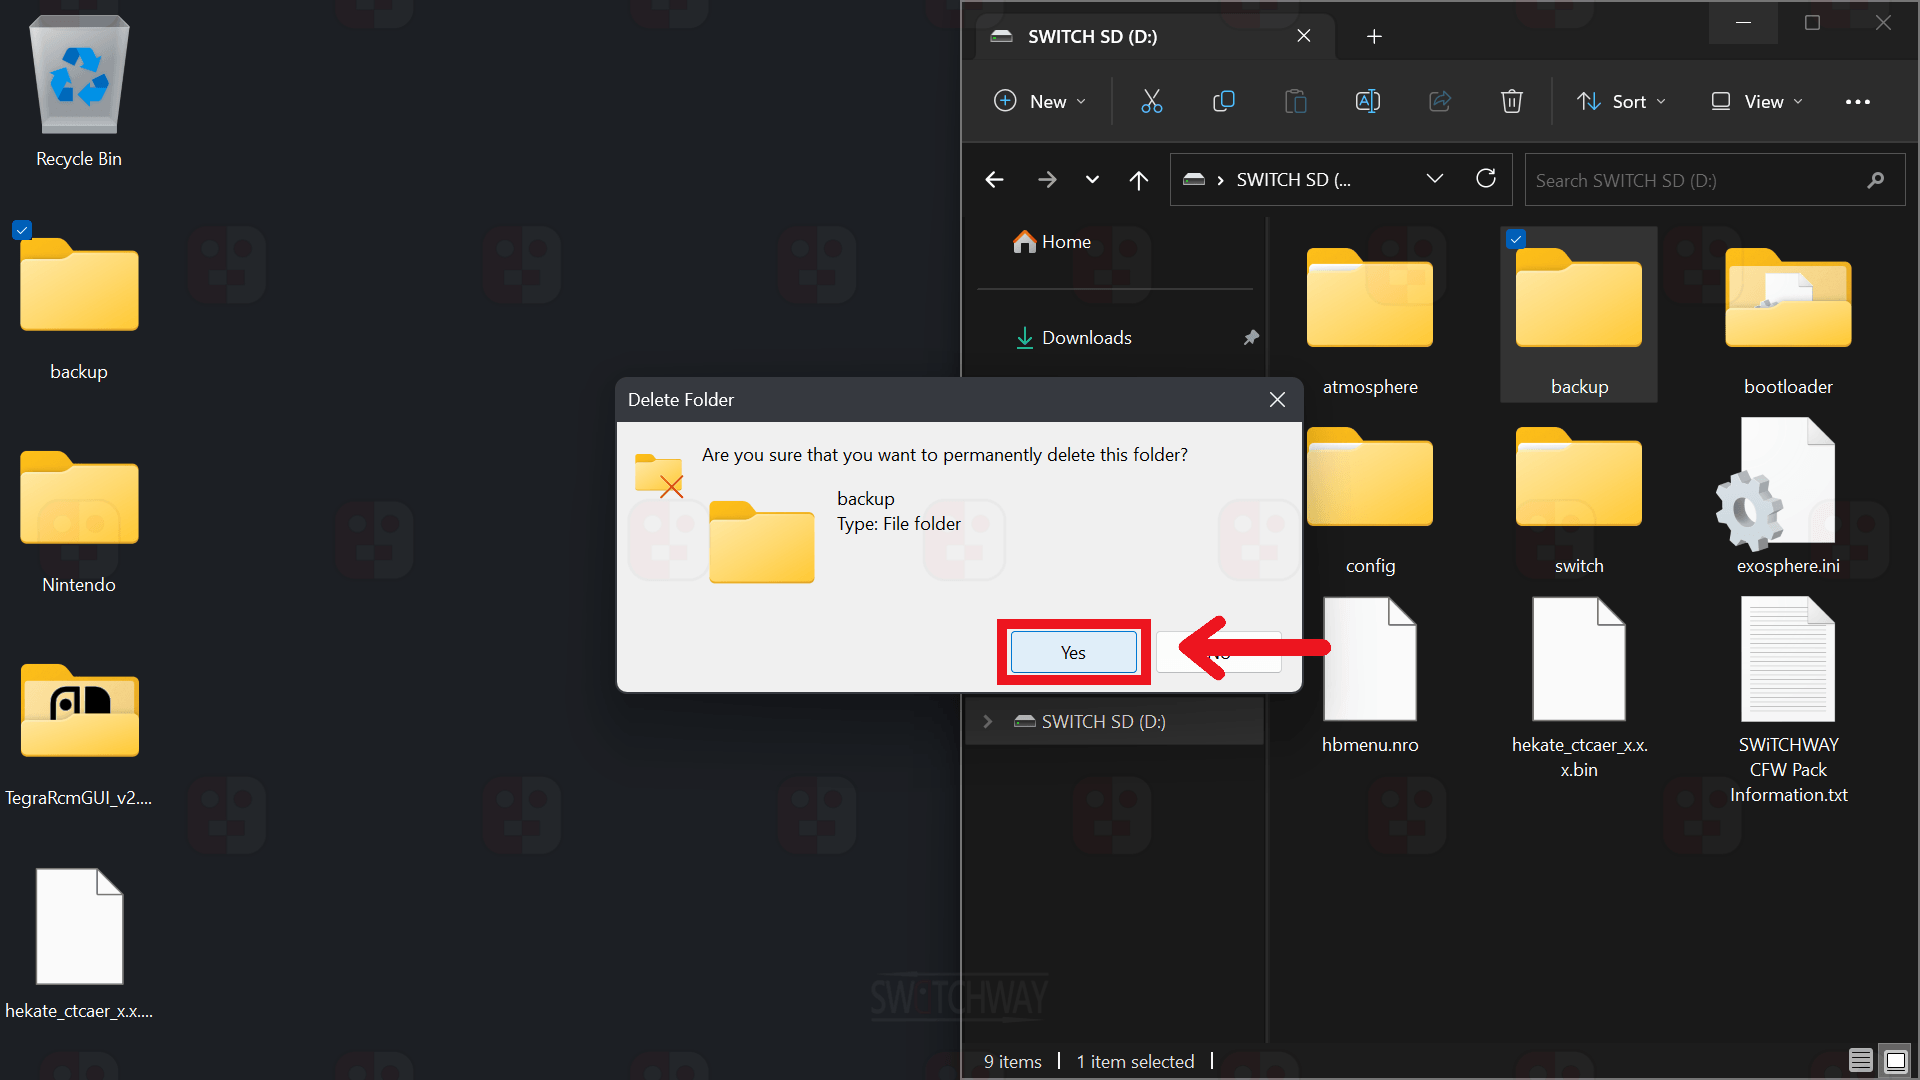
Copy the backup folder to your PC then delete it from your microSD card.
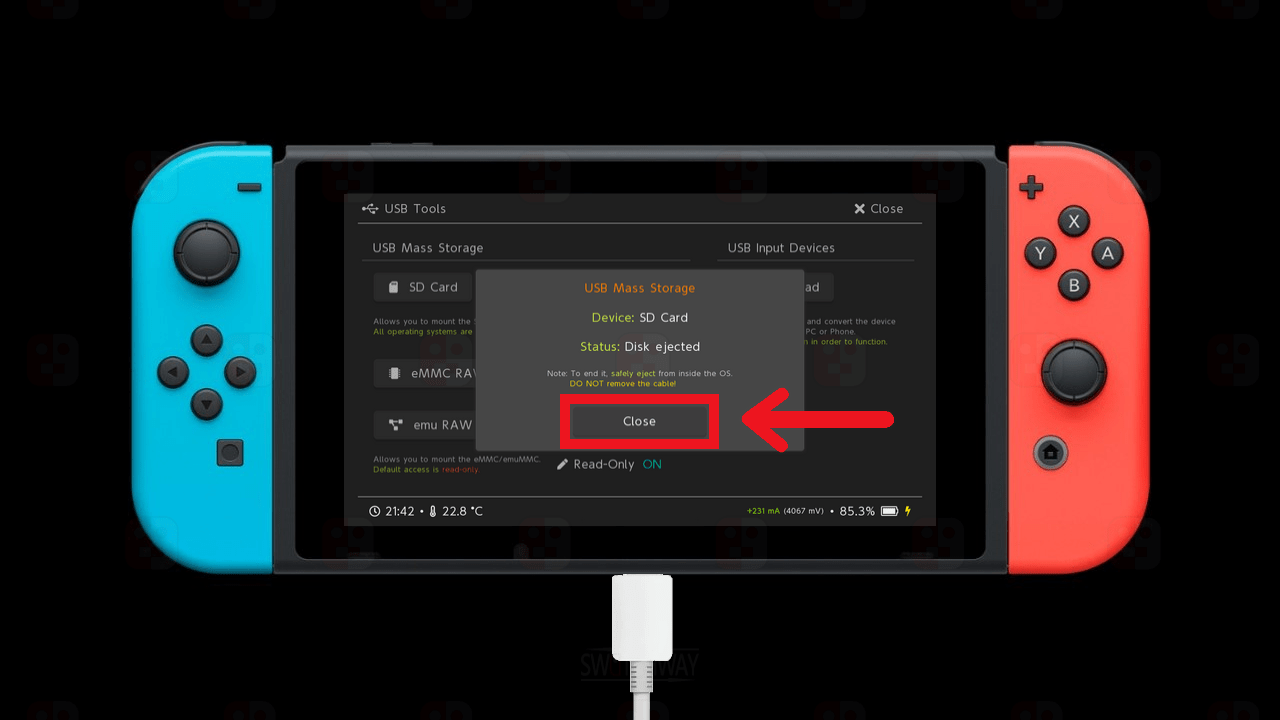
When you’re done transferring, press both Volume buttons together on your Switch to eject the connection from your PC, you should see the Status: Disk ejected inside Hekate > select Close.
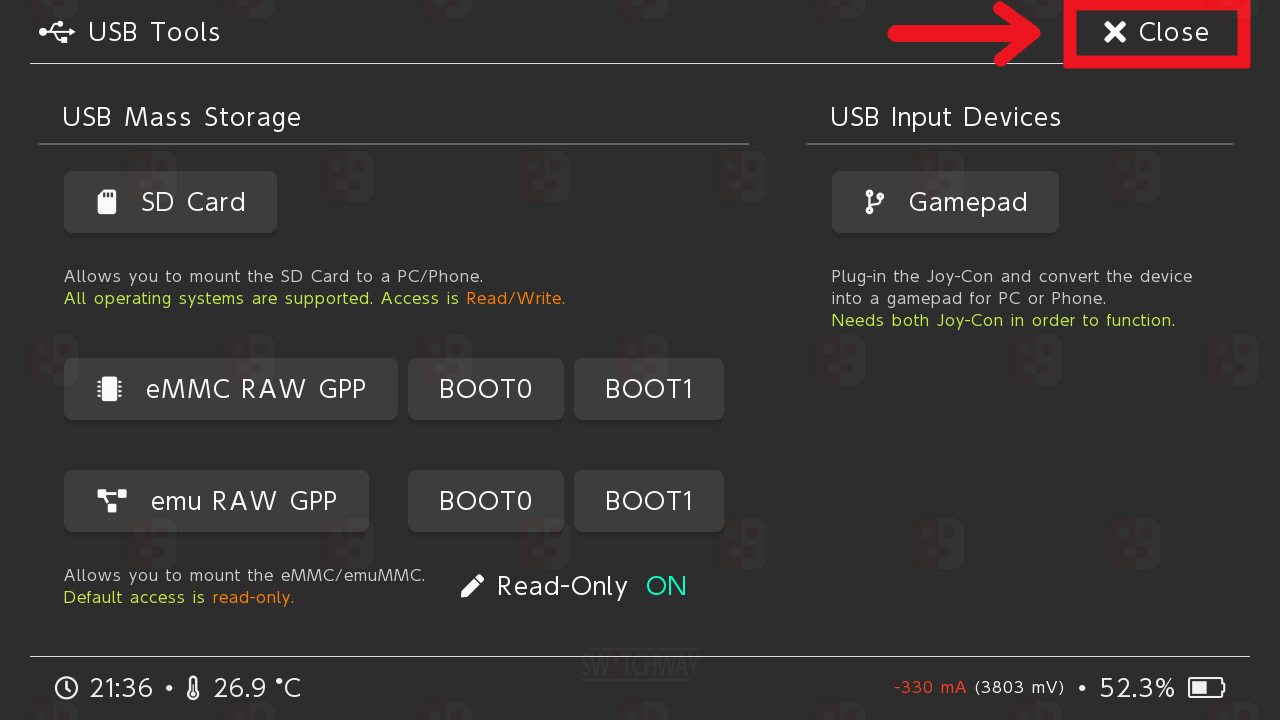
Select Close > Home.
Creating emuMMC
Go to STEP 32 if you don't want to use CFW on emuMMC.
Never allow your PC to format the emuMMC partition.
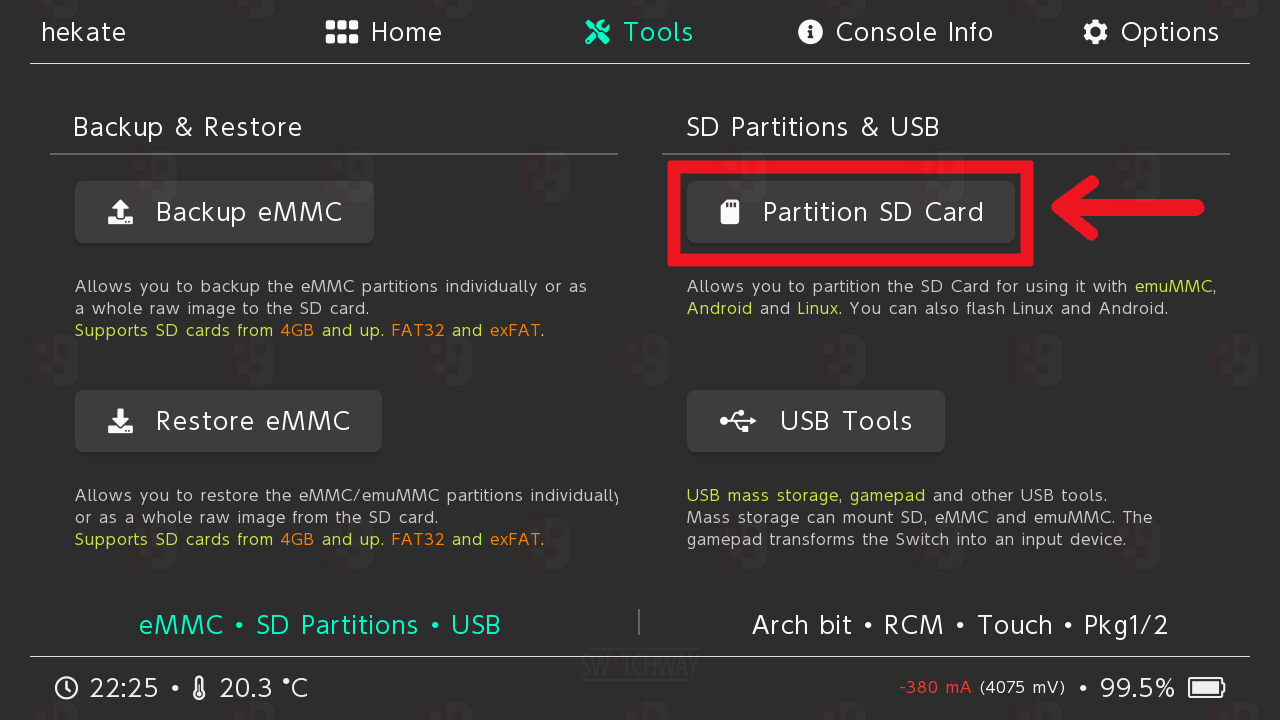
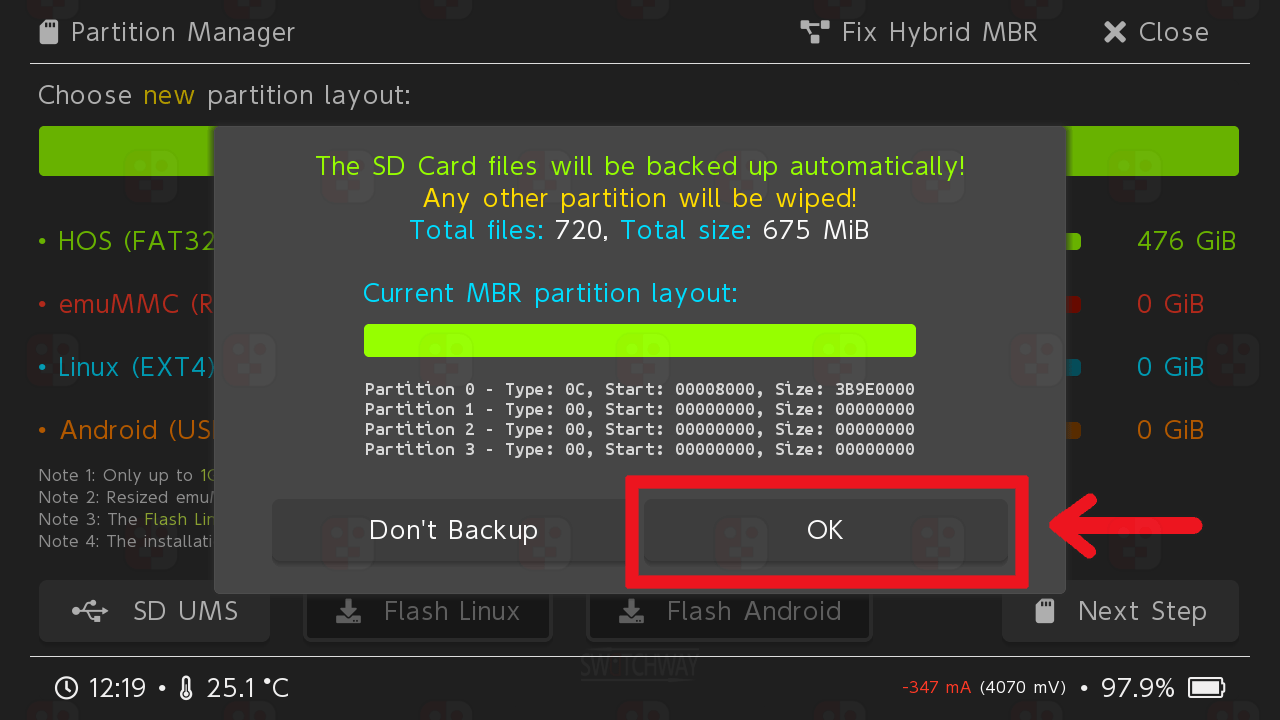
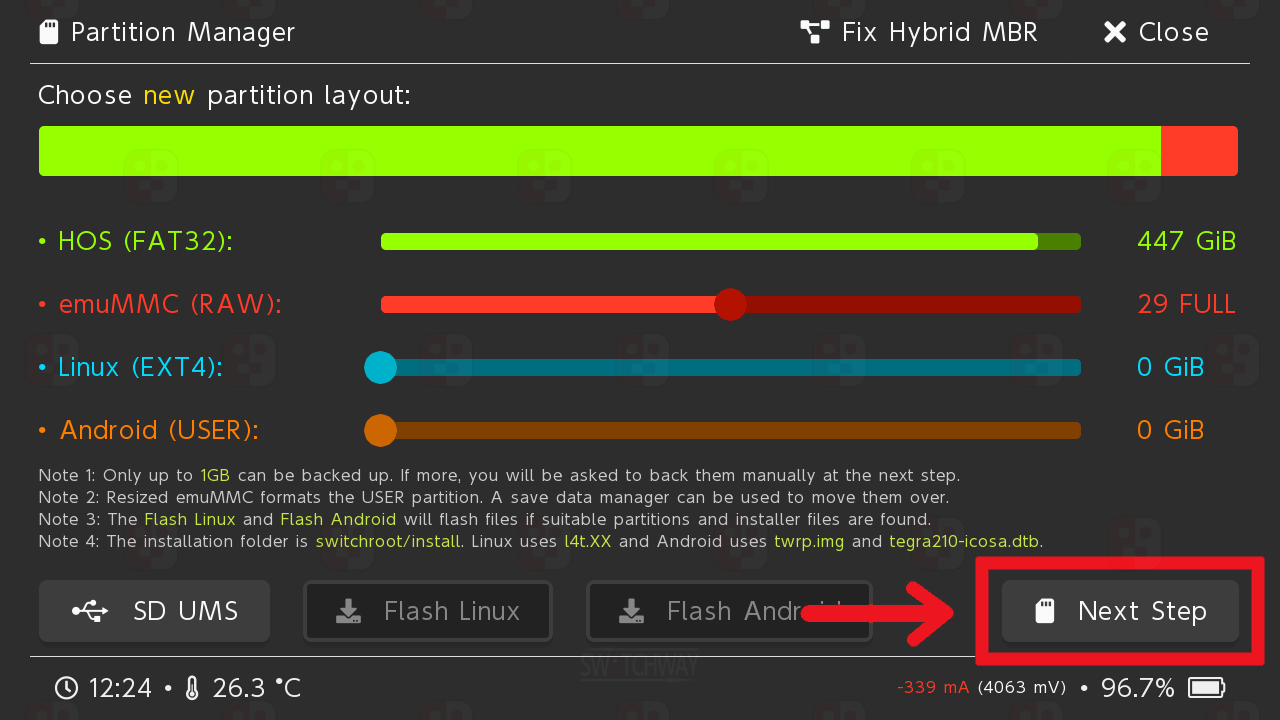
On the Hekate home screen, select Tools > Partition SD Card > OK.
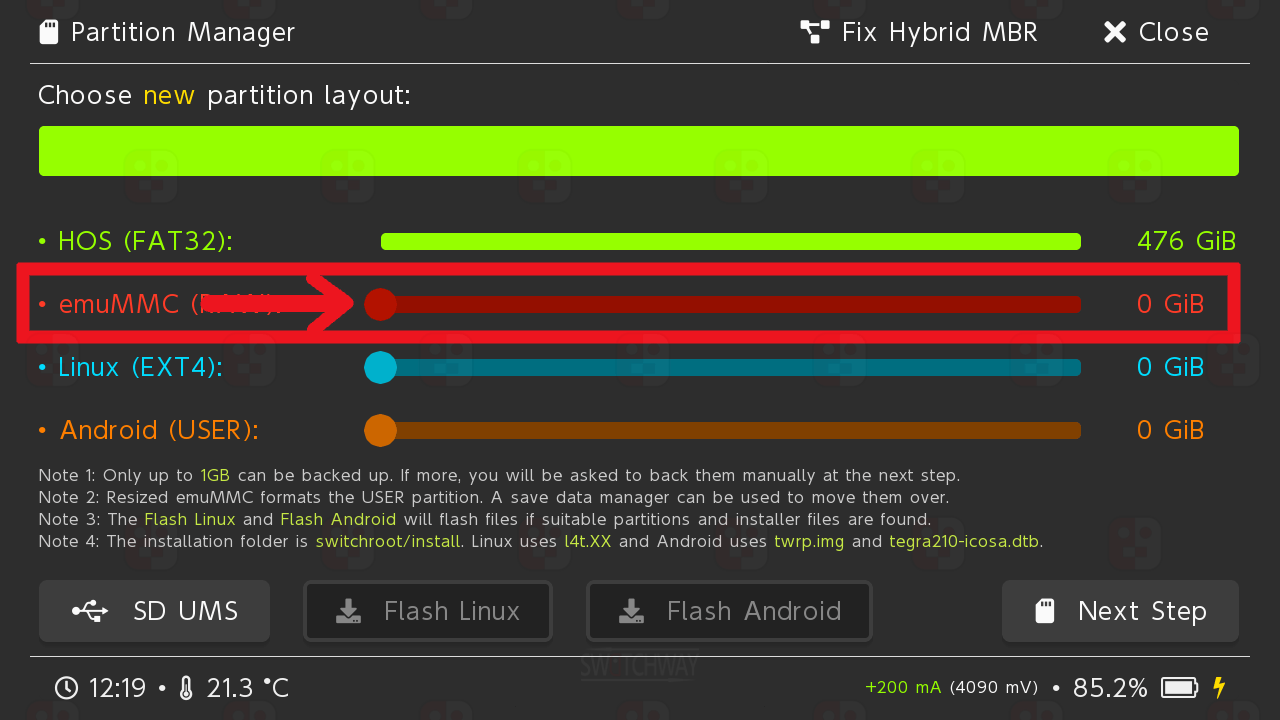
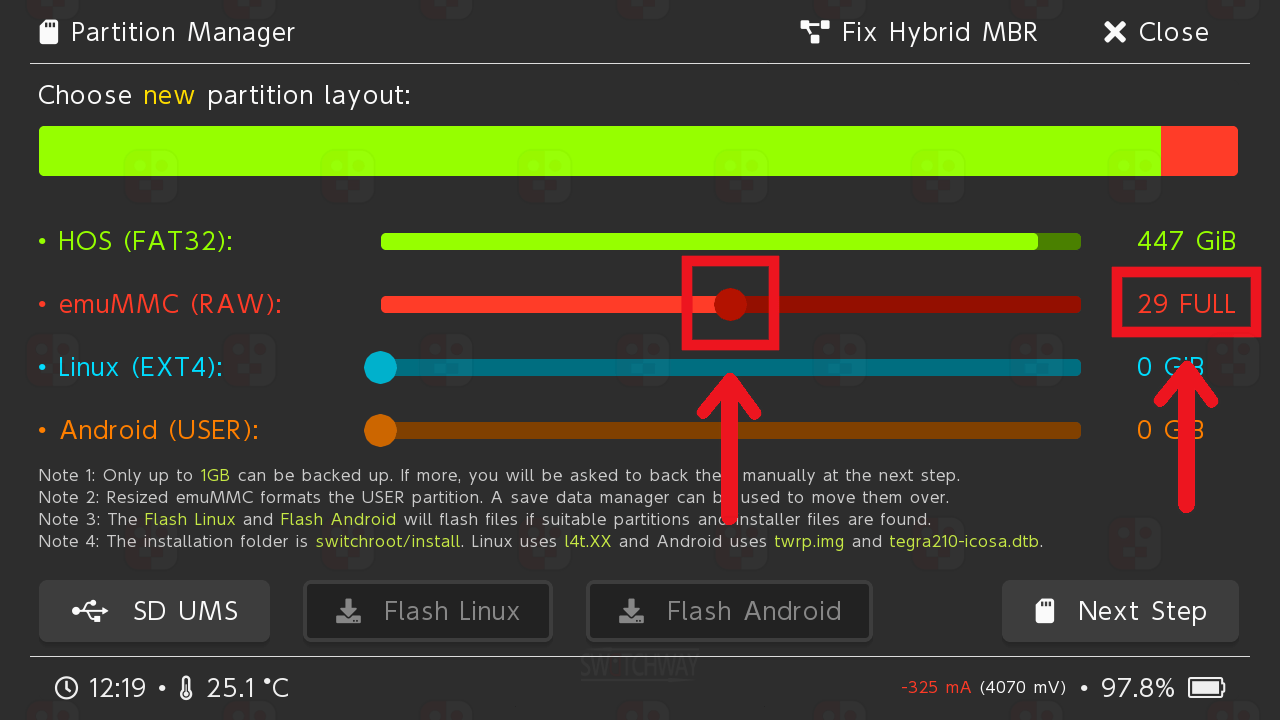
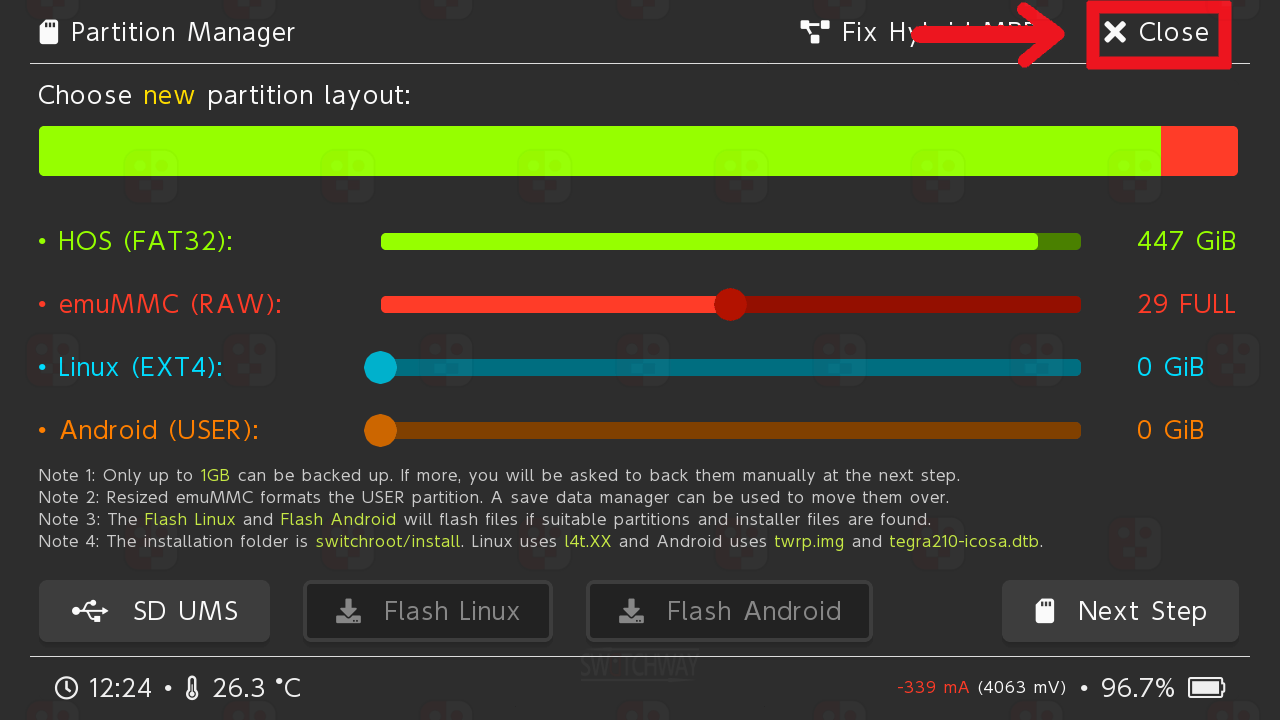
Drag the Red emuMMC (RAW) slider until it says 29 FULL (58 for OLED) on the right hand side.
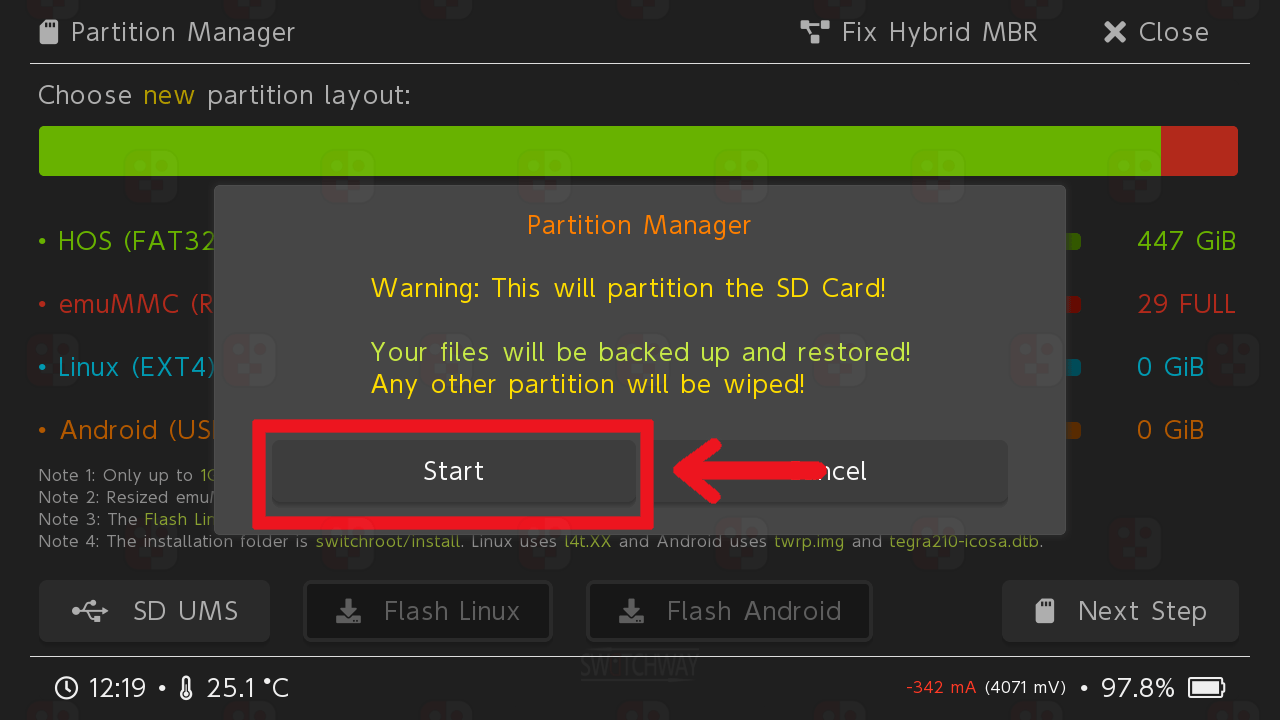
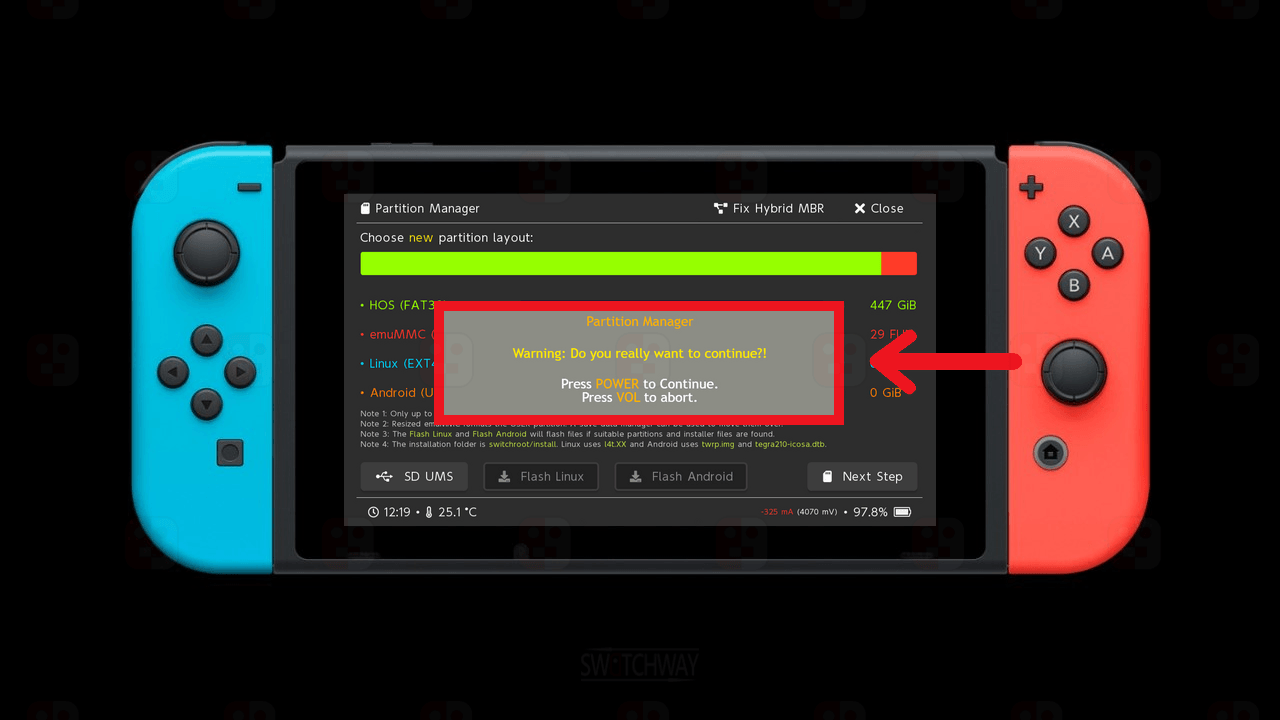
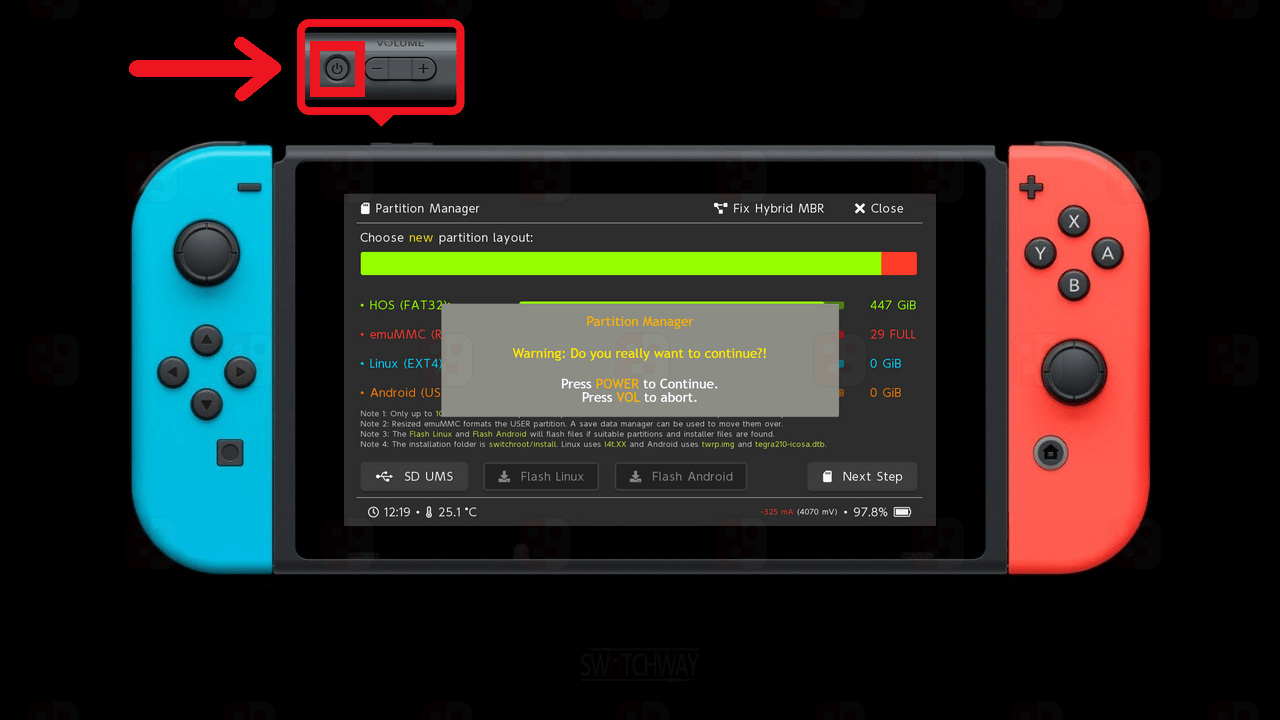
Select Next Step > Start on the Partition Manager screen, then tap the Power Button to confirm.
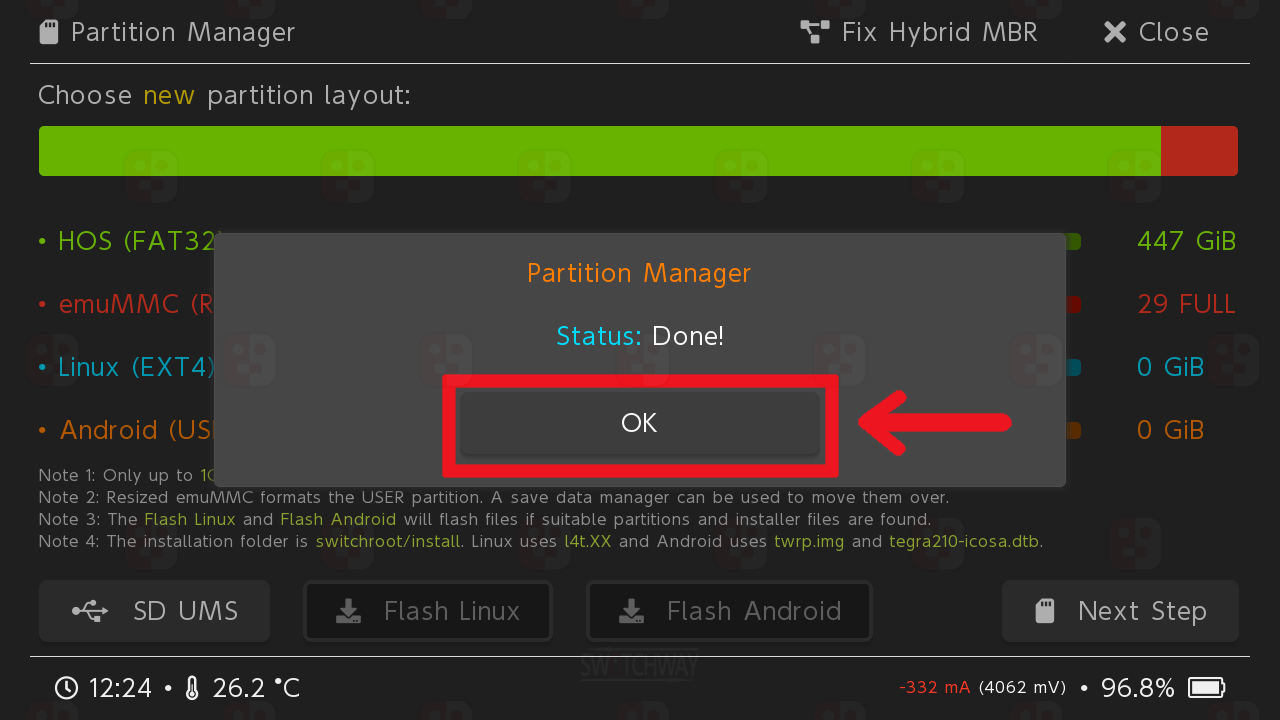
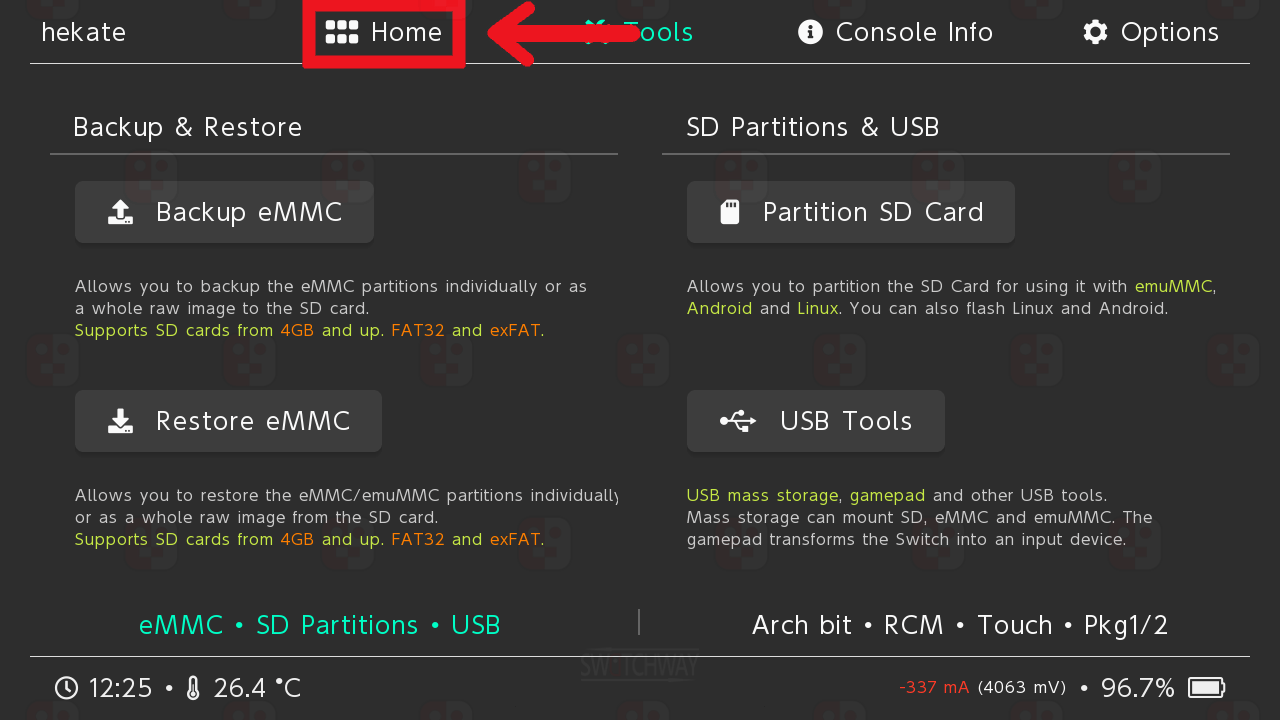
Once Hekate finishes partitioning your microSD card, select OK > Close > Home.
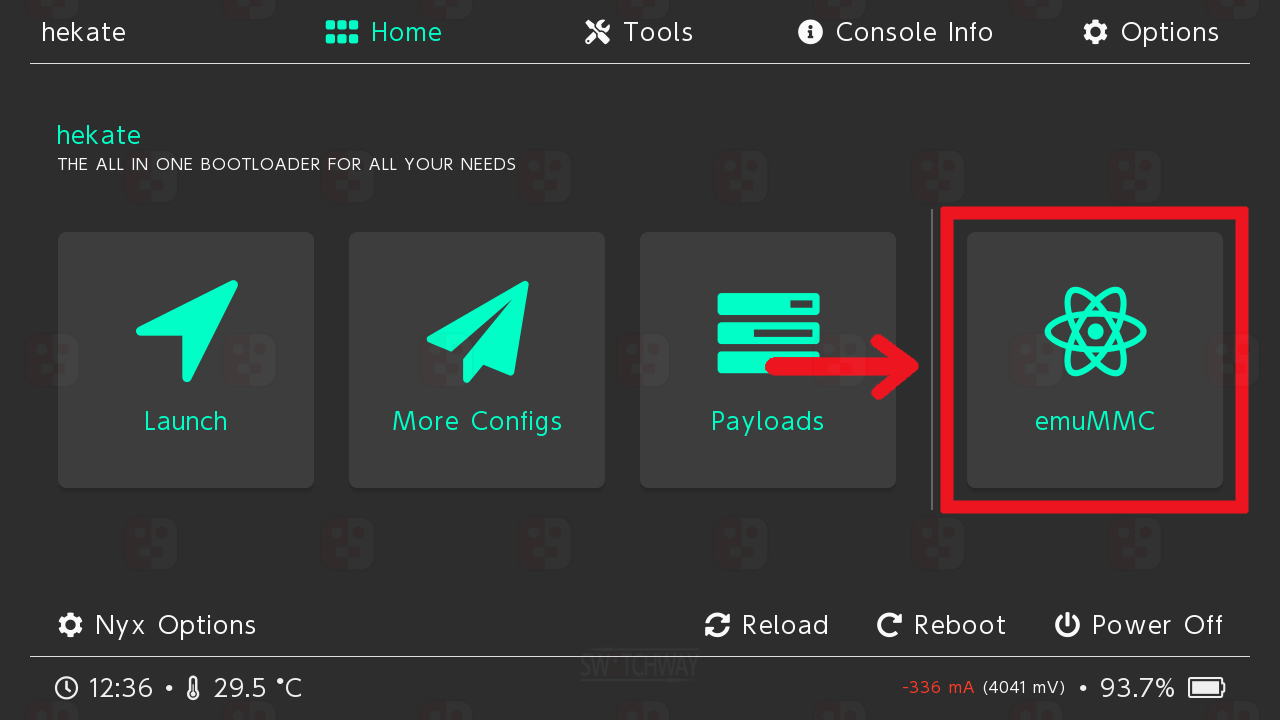
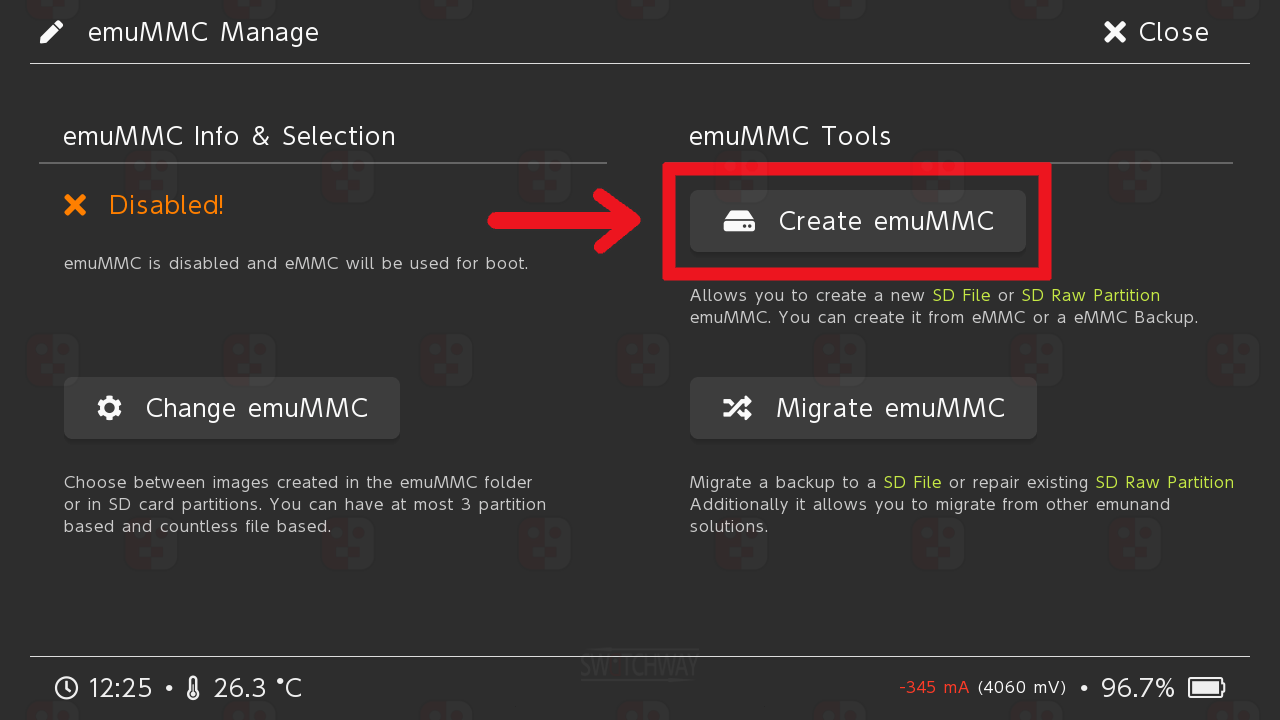
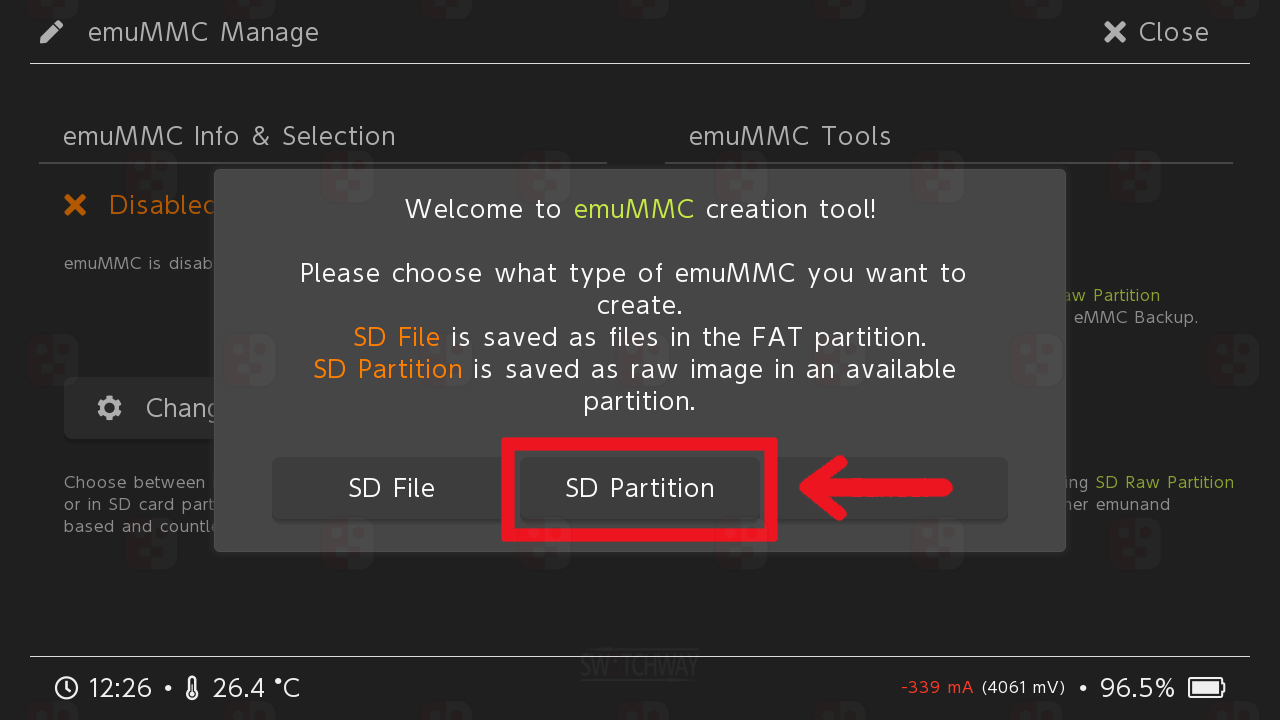
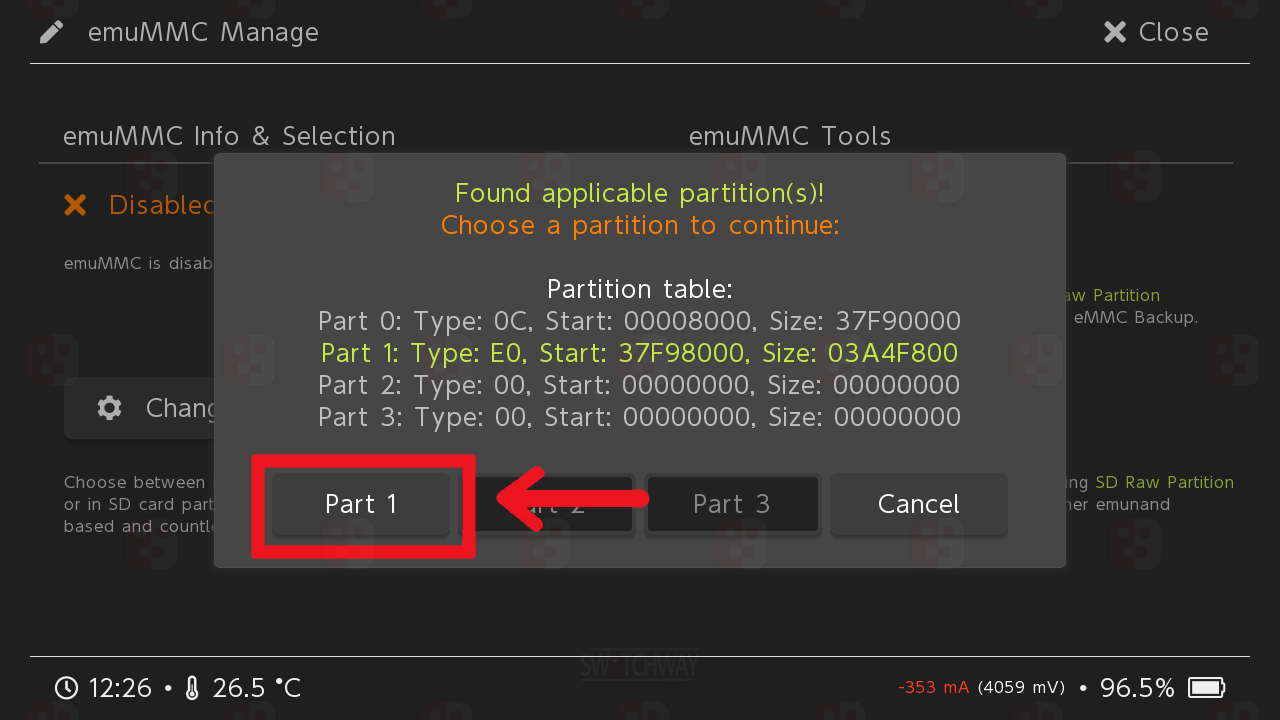
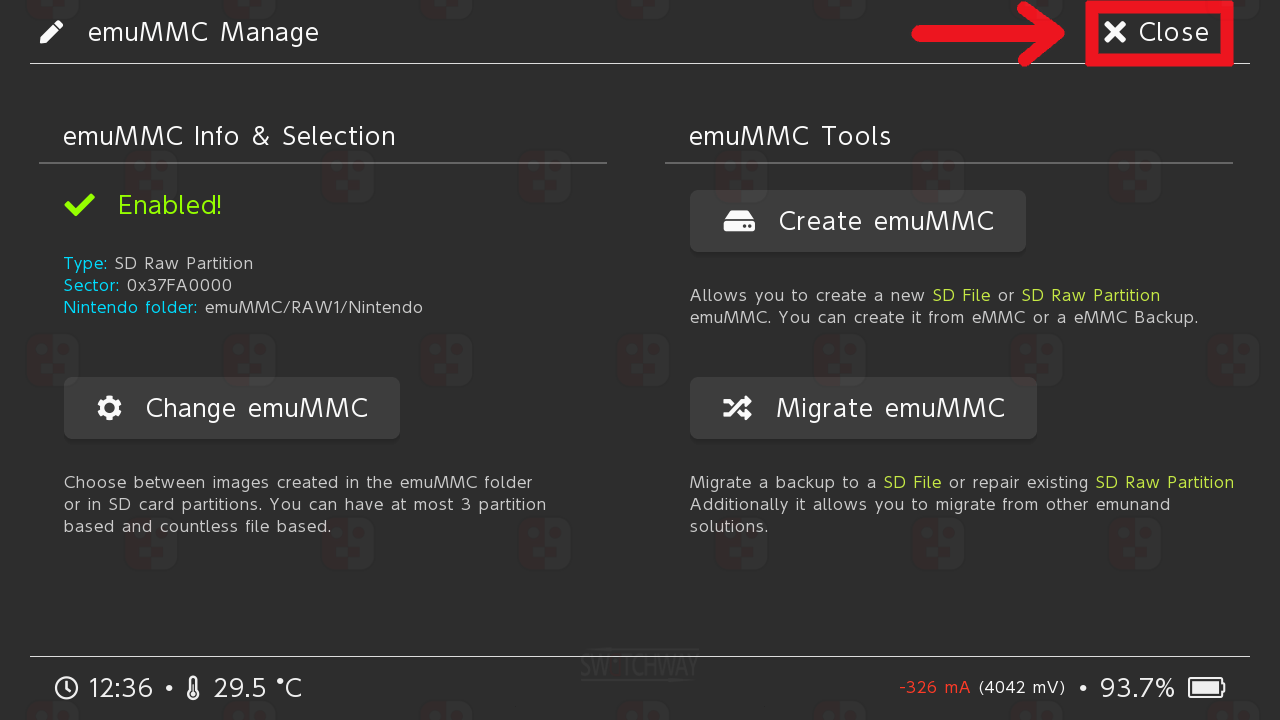
Back on the Hekate home screen, select emuMMC >Create emuMMC>SD Partition > Part 1.
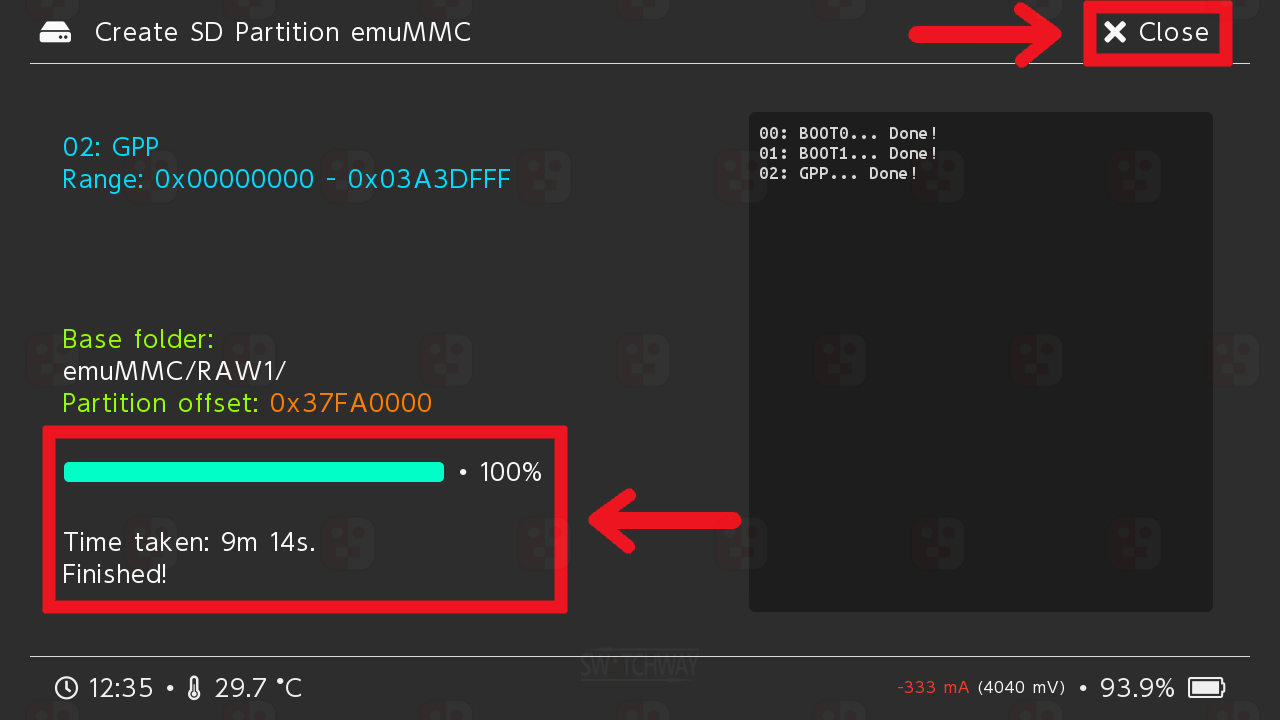
When it is finished select Close > Close.
First Boot Into Atmosphere
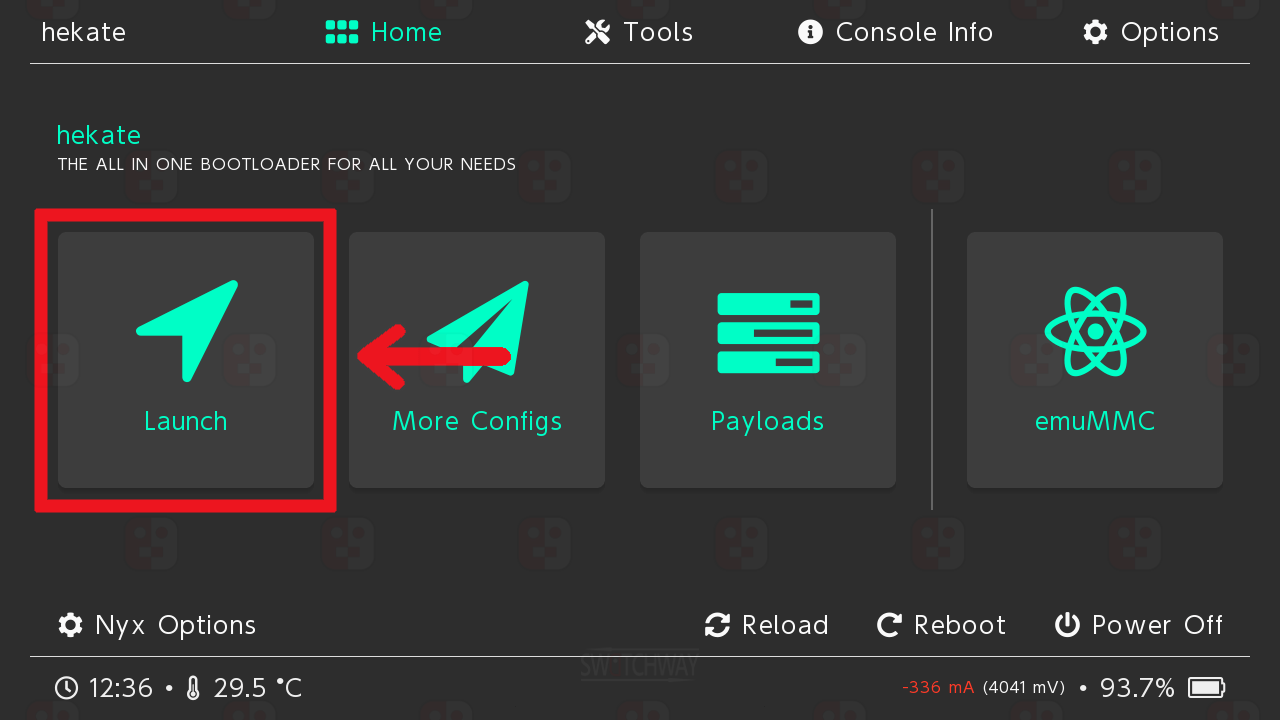
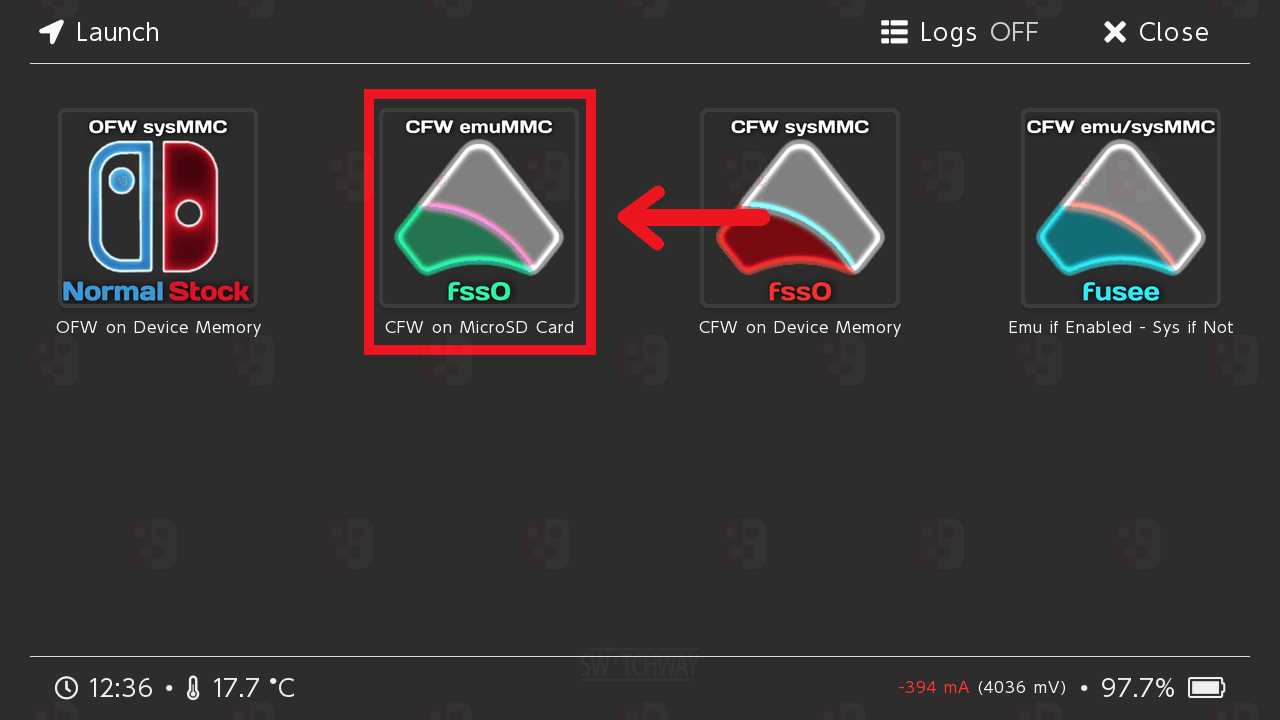
On the Hekate home screen, select Launch > choose one of the options below:
Atmosphere CFW on emuMMC: CFW emuMMC fss0 (CFW on MicroSD Card). This will boot into Atmosphere on emuMMC.
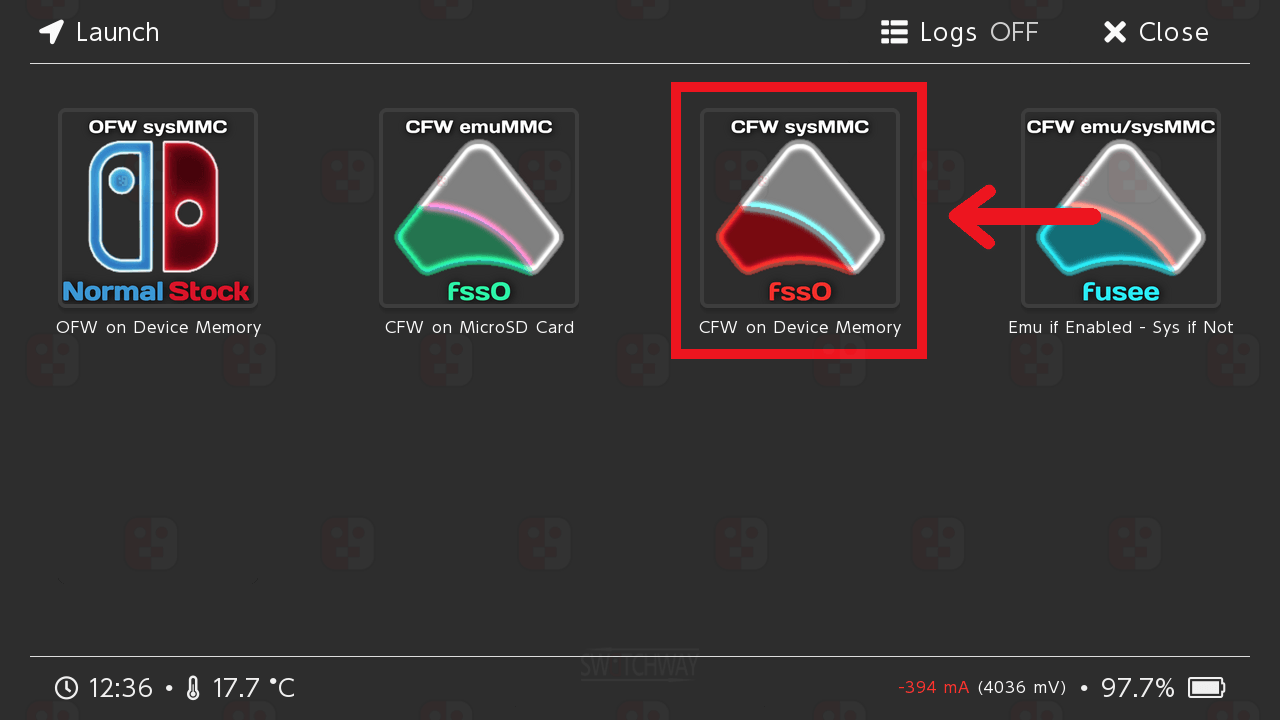
Atmosphere CFW on sysMMC: CFW sysMMC fss0 (CFW on Device Memory). This will boot into Atmosphere on sysMMC.
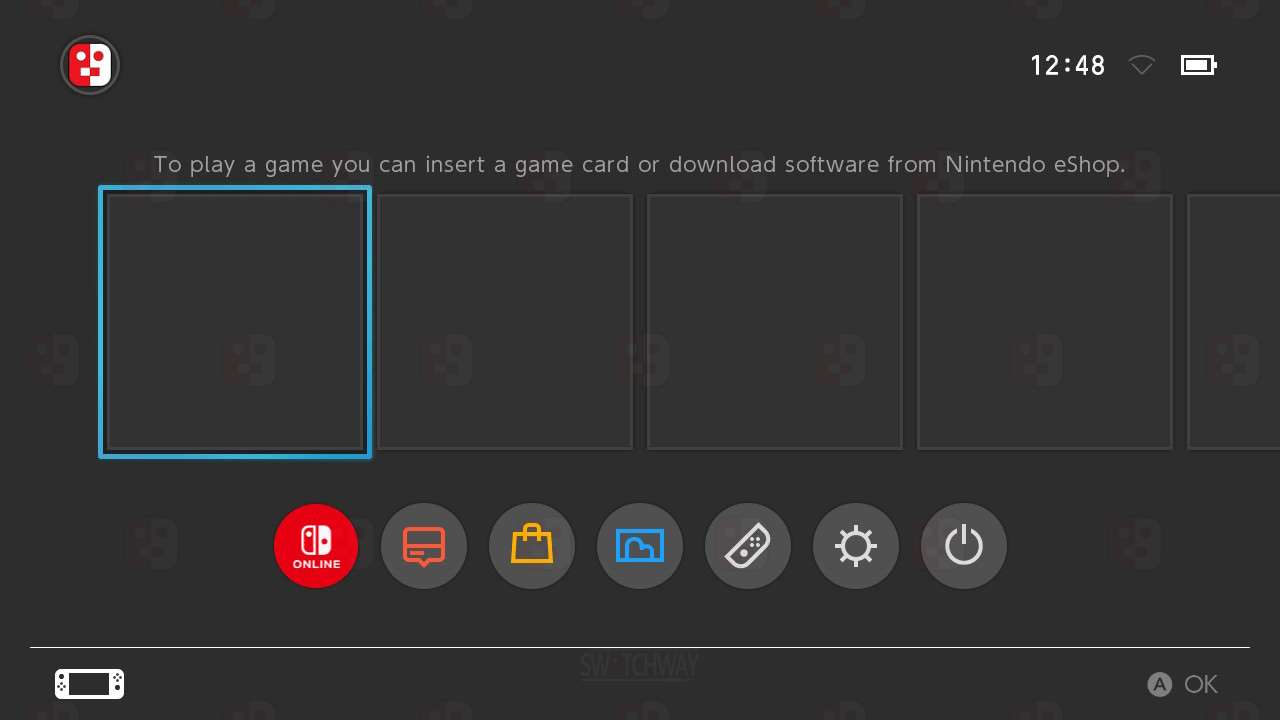
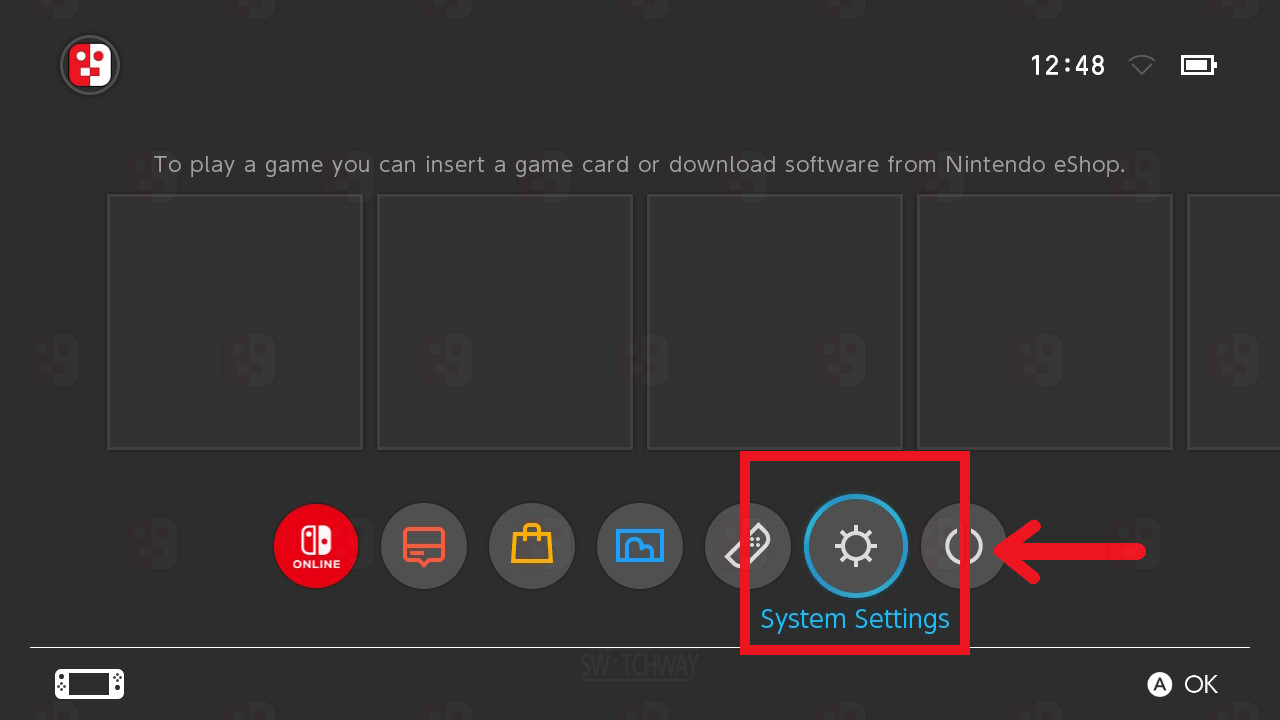
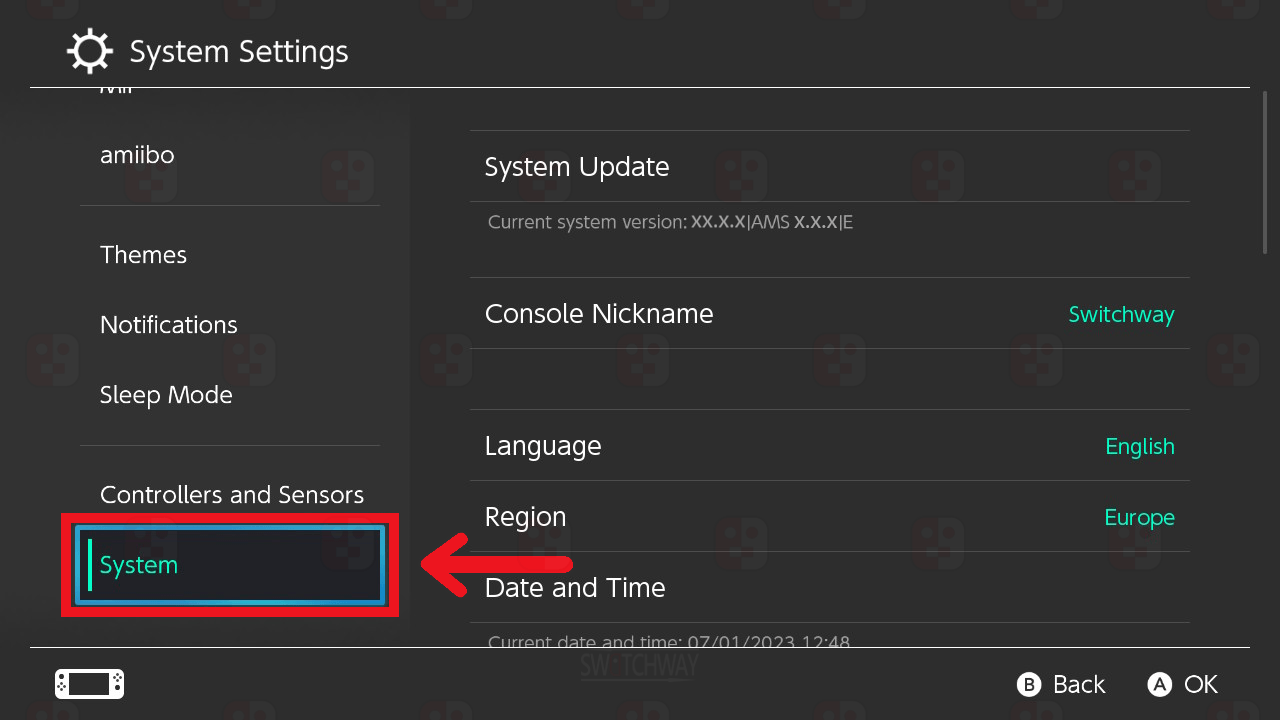
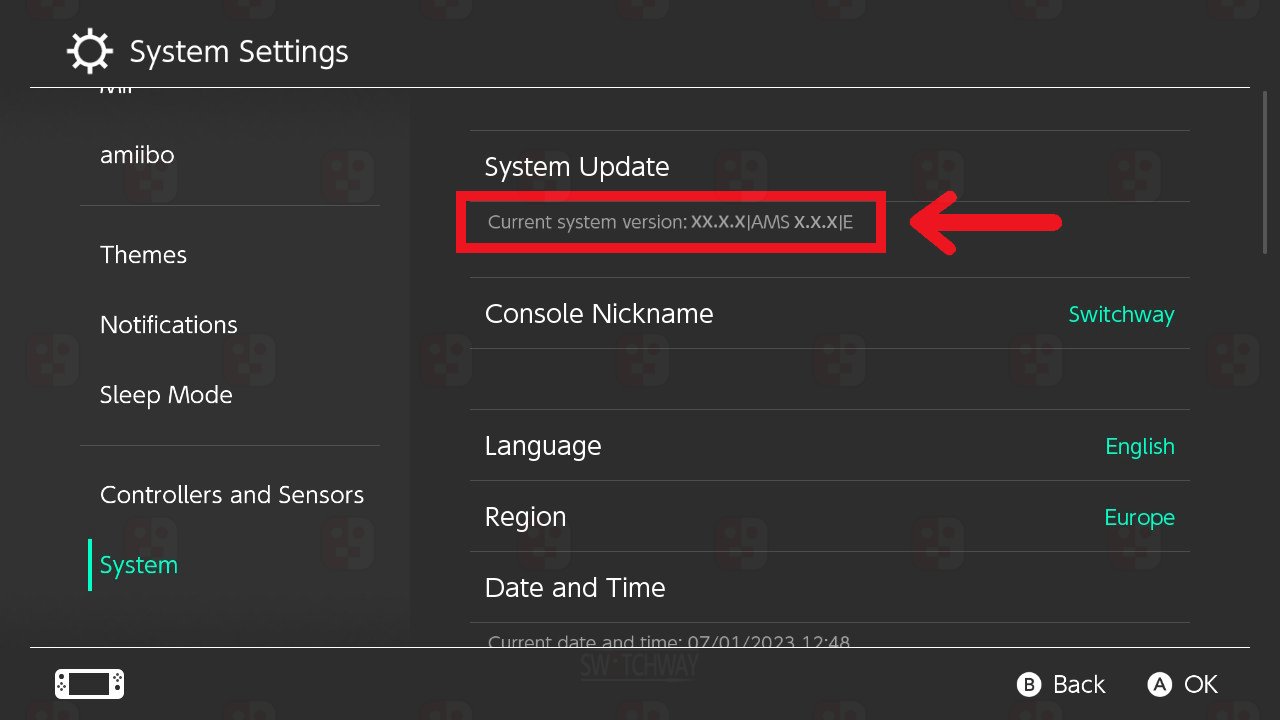
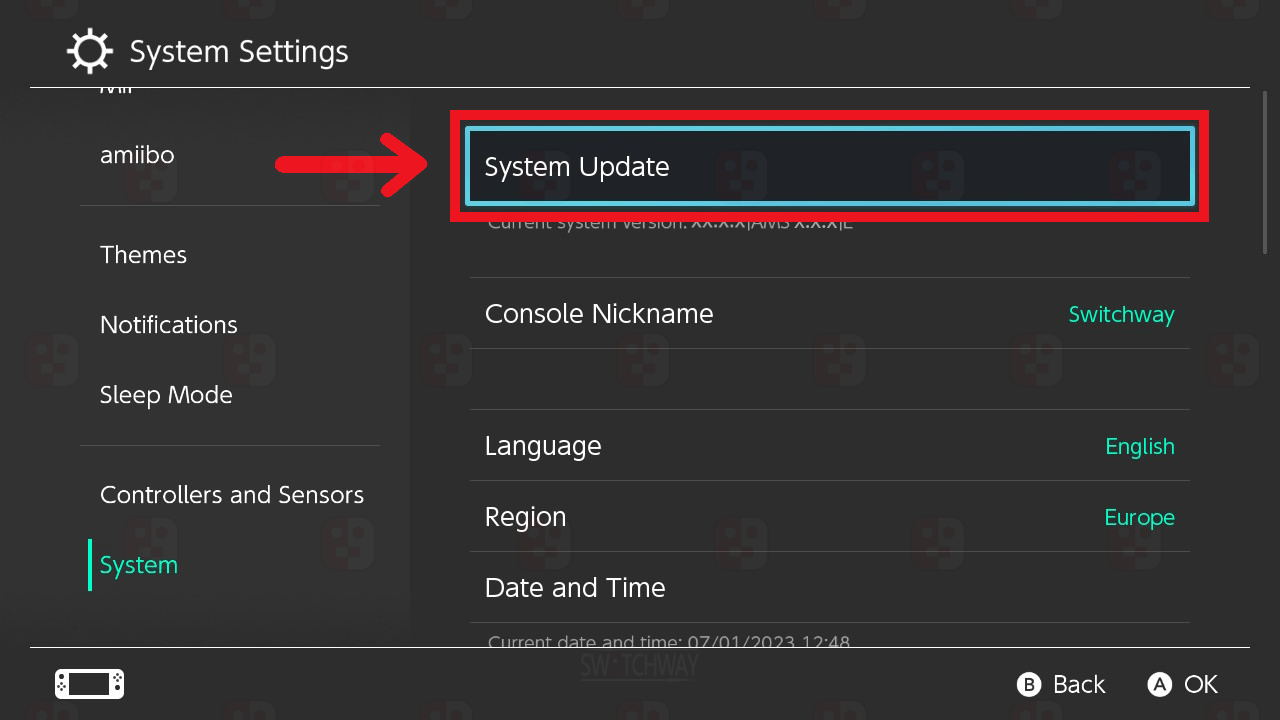
Open System Settings > System. It will show:
Current system version: xx.x.x|AMS 1.7.0|E (or) S.
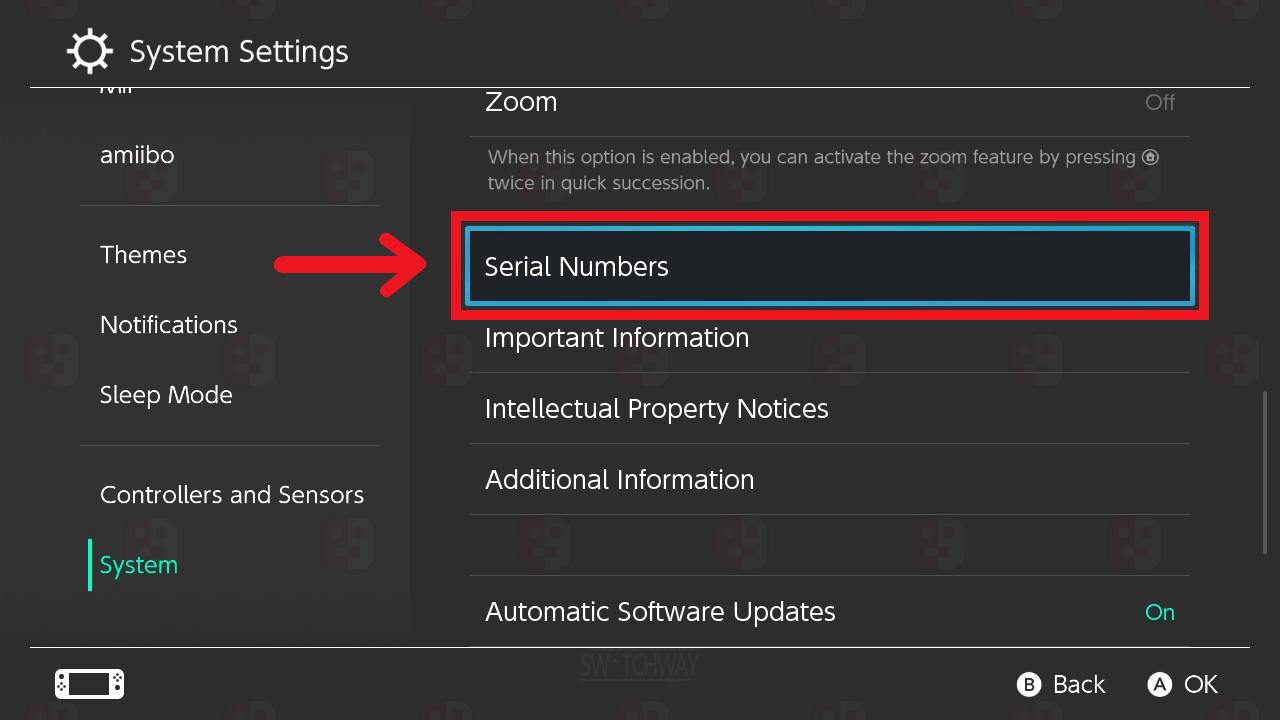
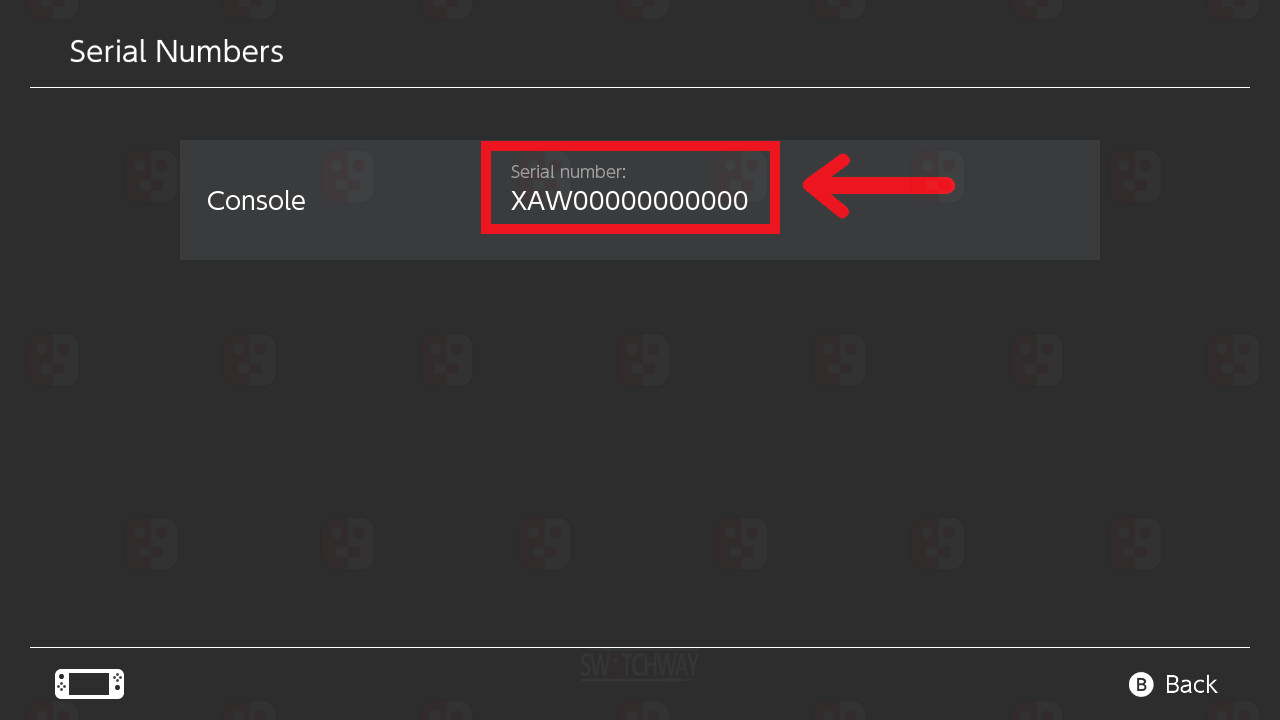
Move over to System Update, scroll down and select Serial Numbers. The serial number will show as XAW00000000000.
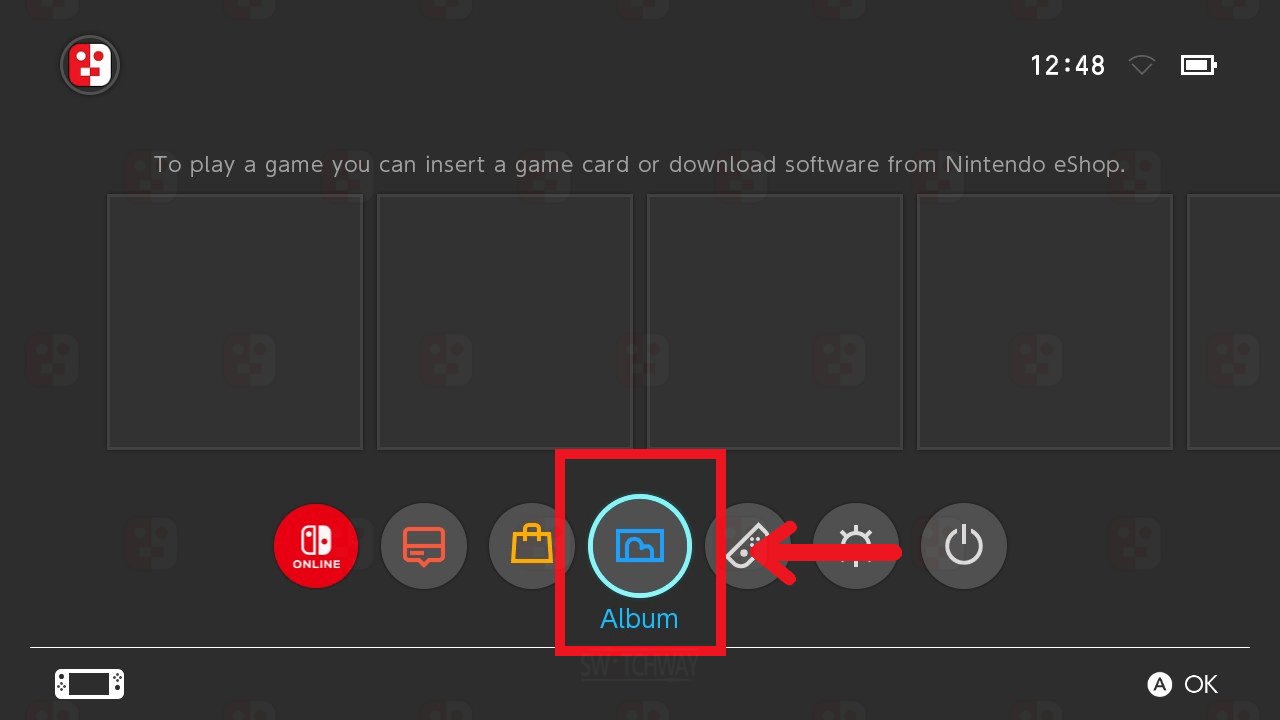
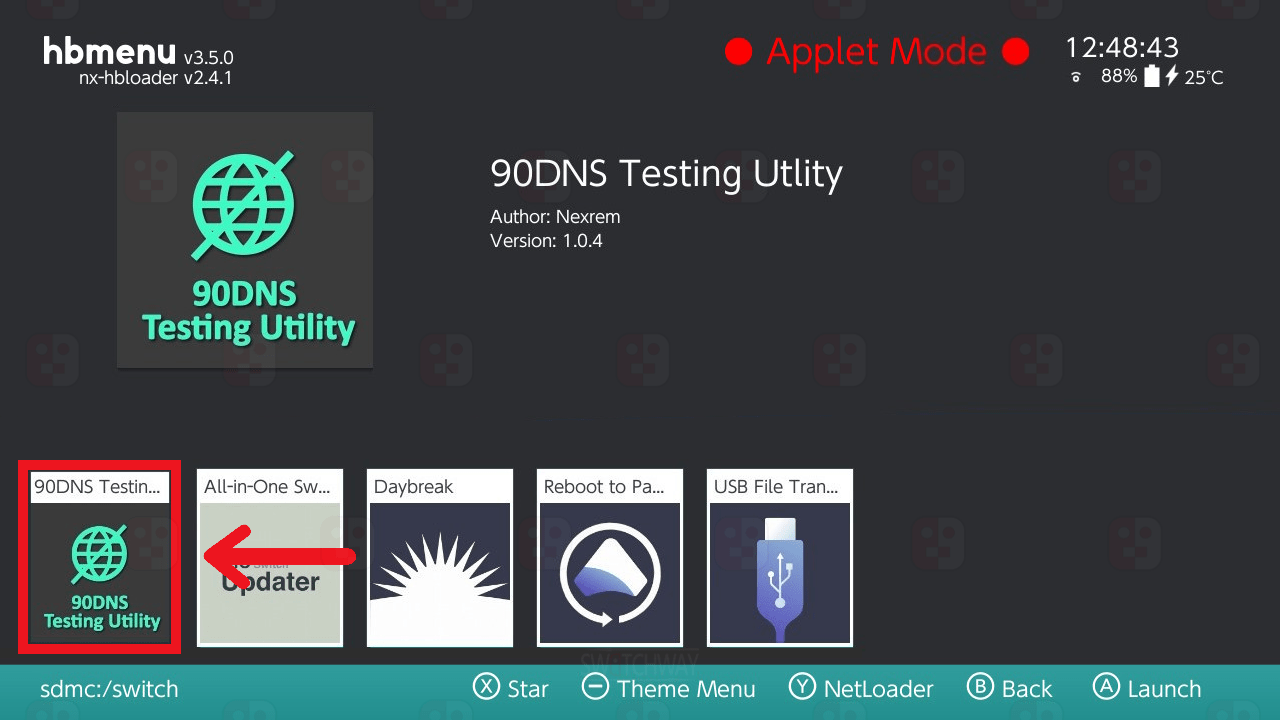
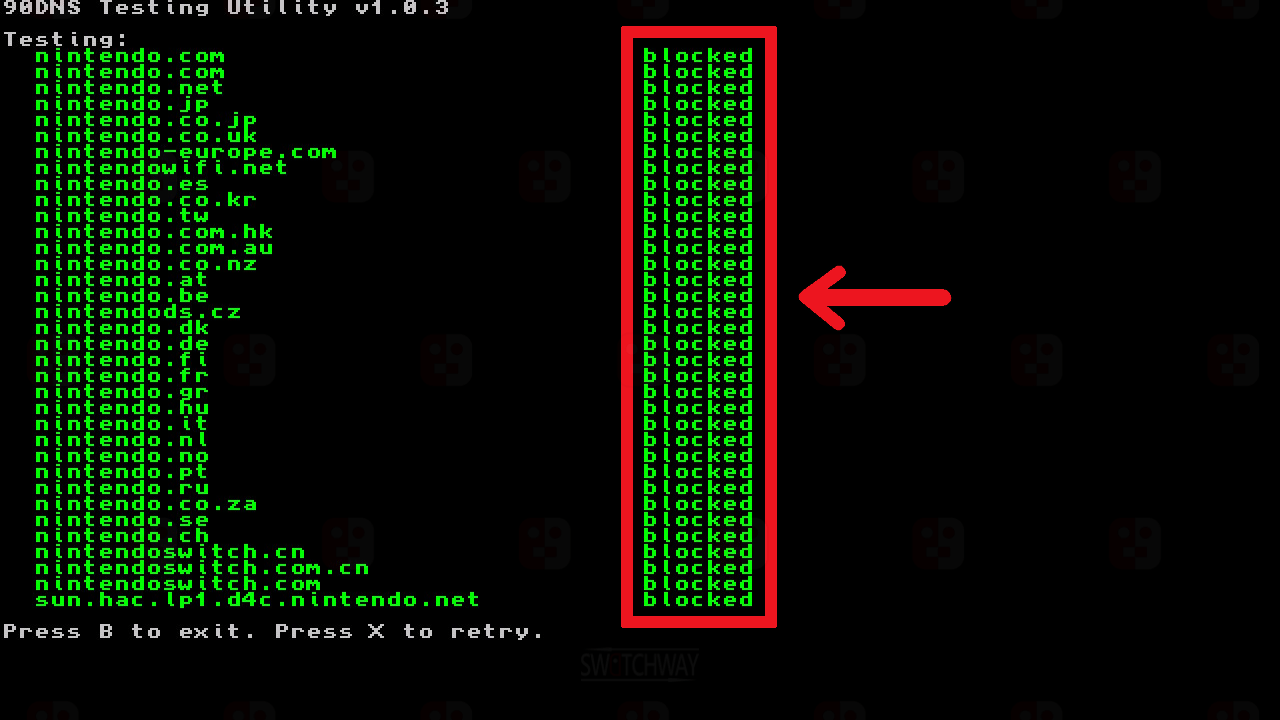
Exit System Settings, open the Album to access the hbmenu. Run the 90DNS Testing Utility, all connections to Nintendo will show as blocked.
Once you have checked the ban protection is active you are safe to connect to your WiFi network.
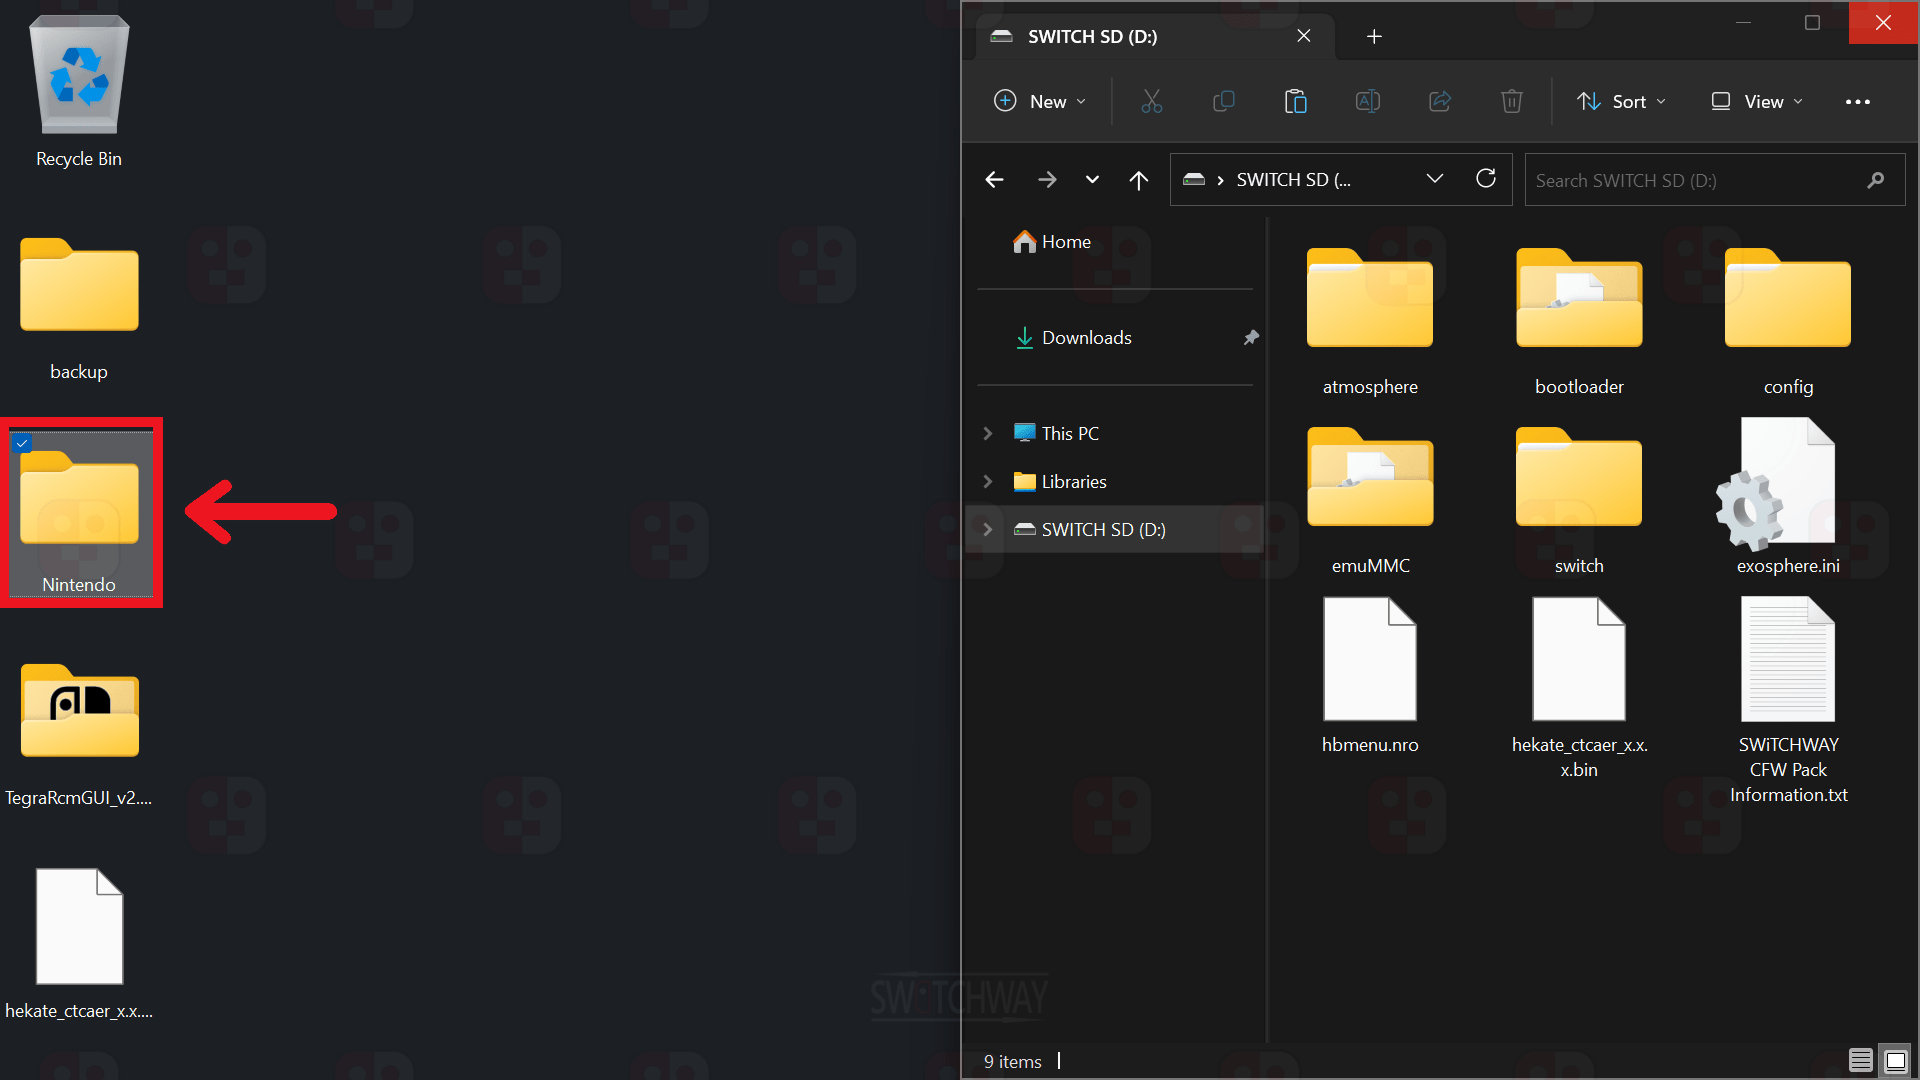
If you backed up the Nintendo folder when you started, choose one of the options below:
OFW/sysMMC & emuMMC load games from different locations on your microSD card.
Games playable in OFW/sysMMC: Move it back to the root of your microSD card.
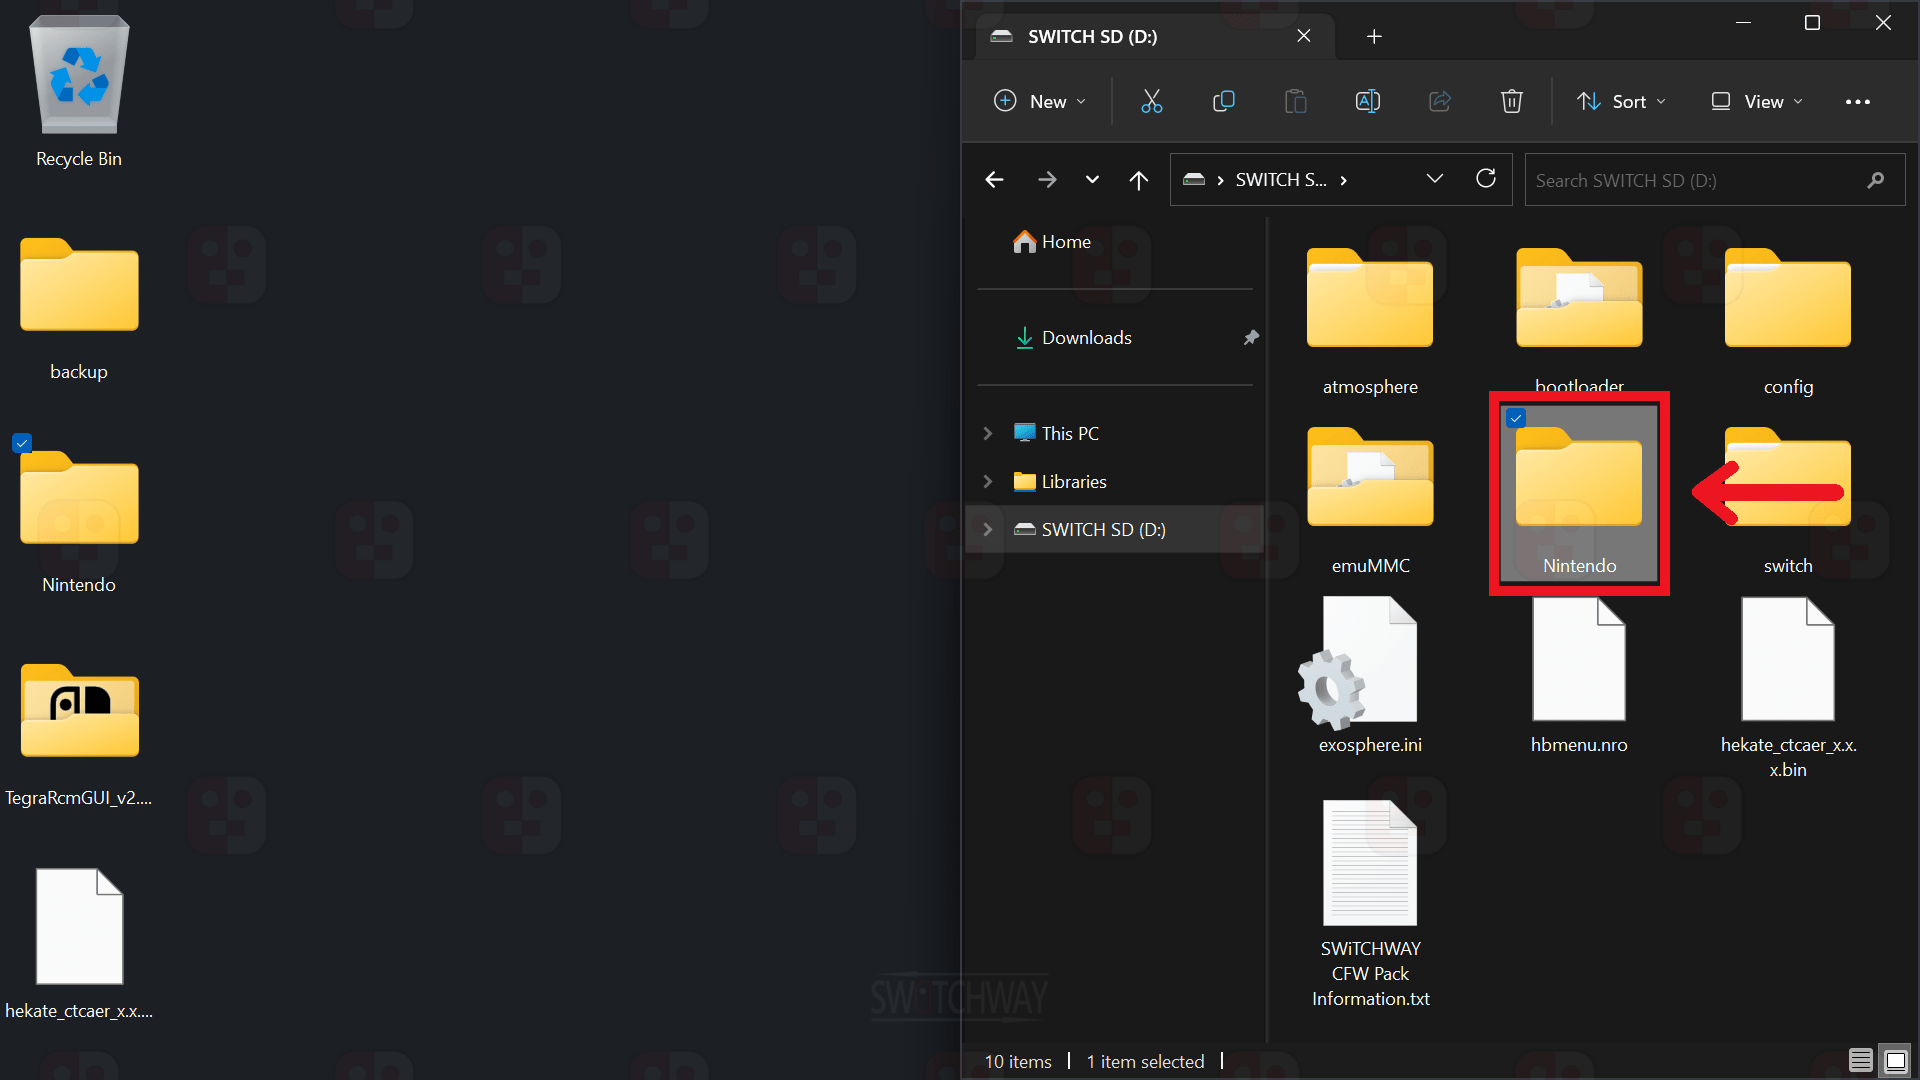
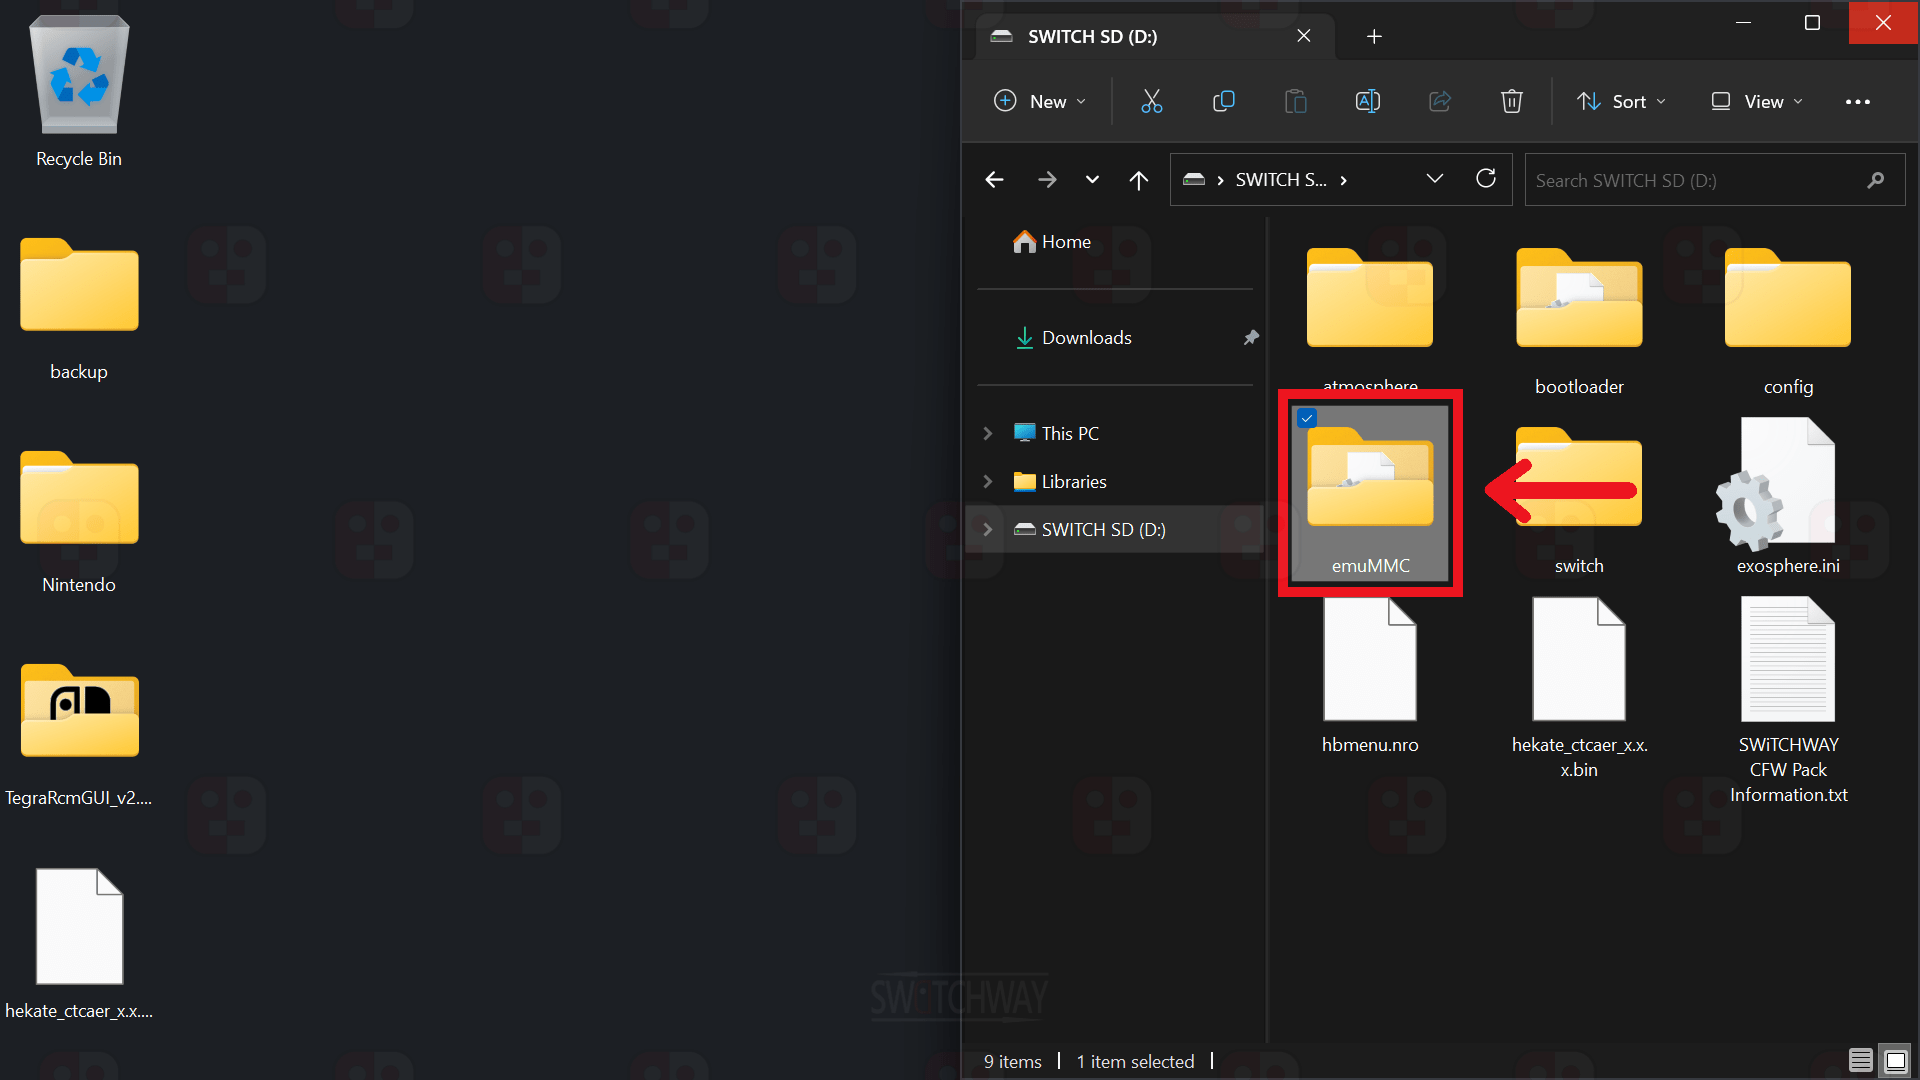
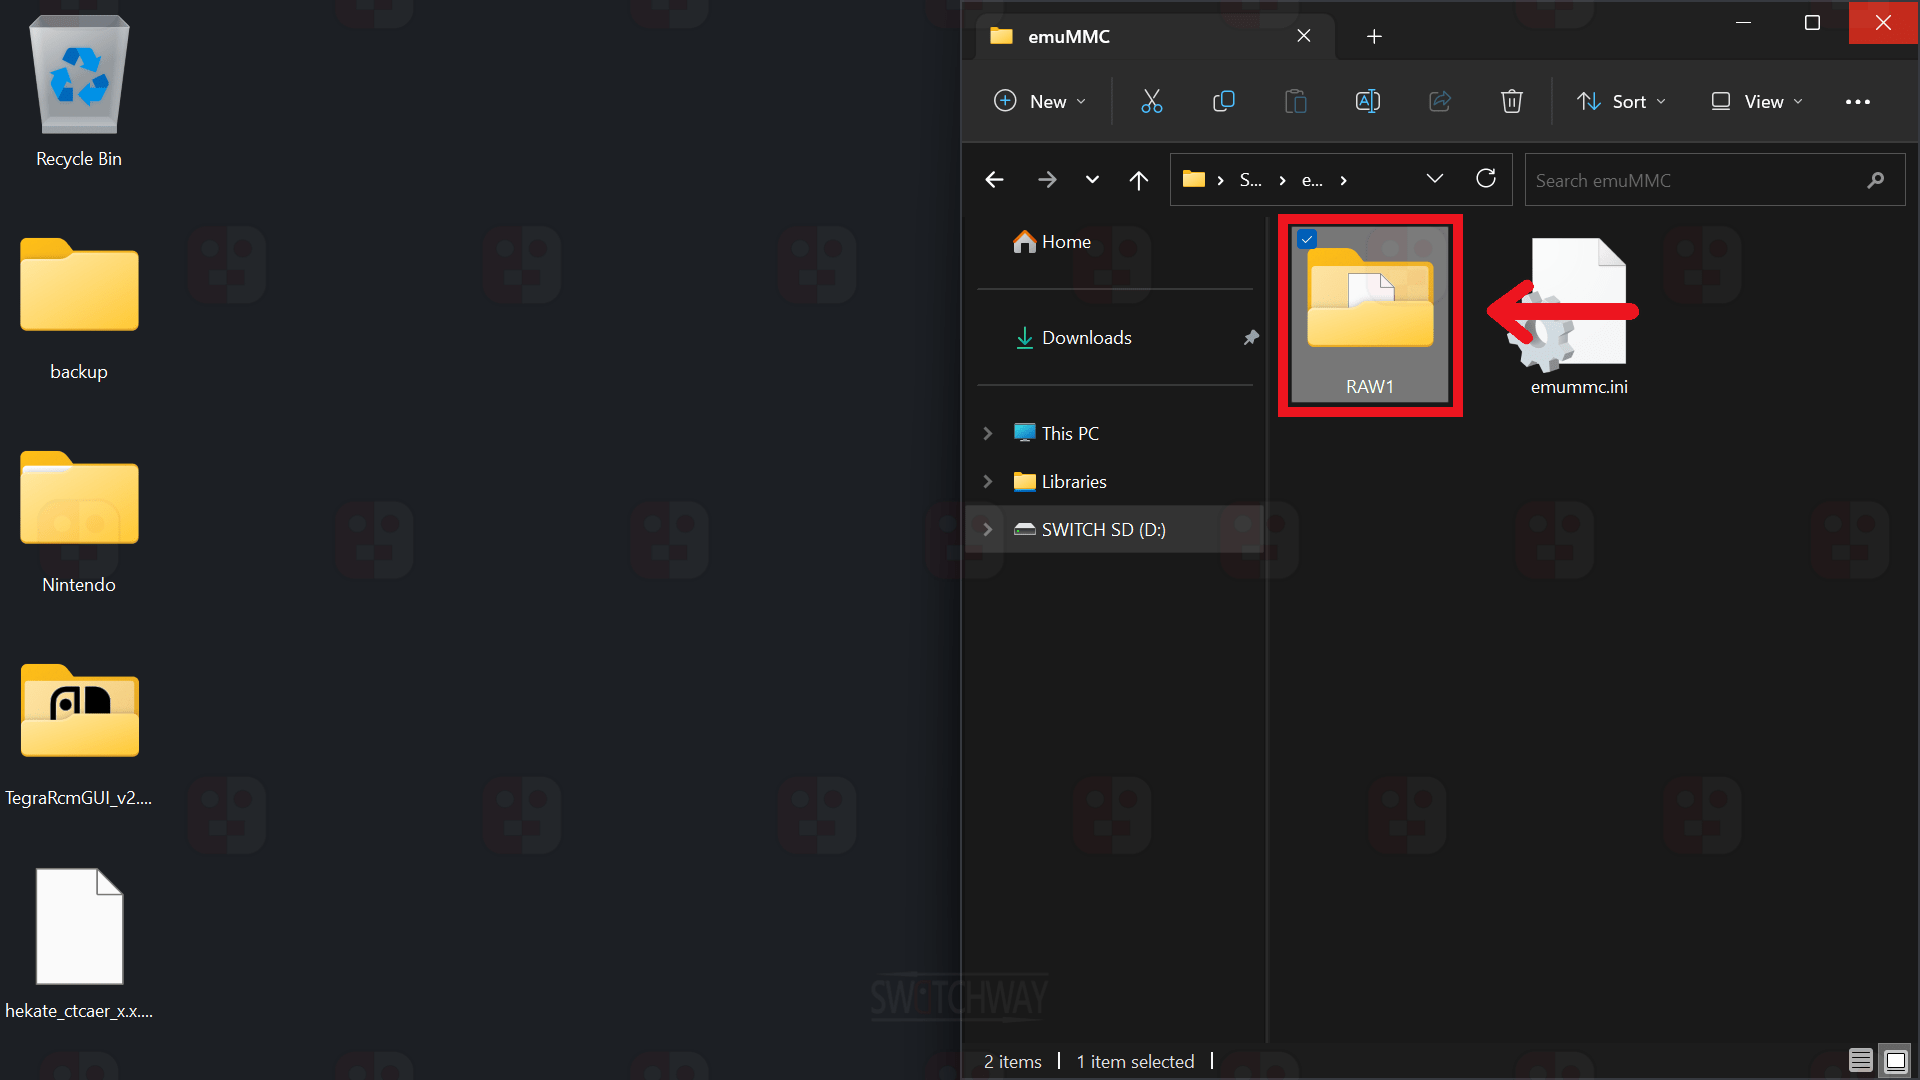
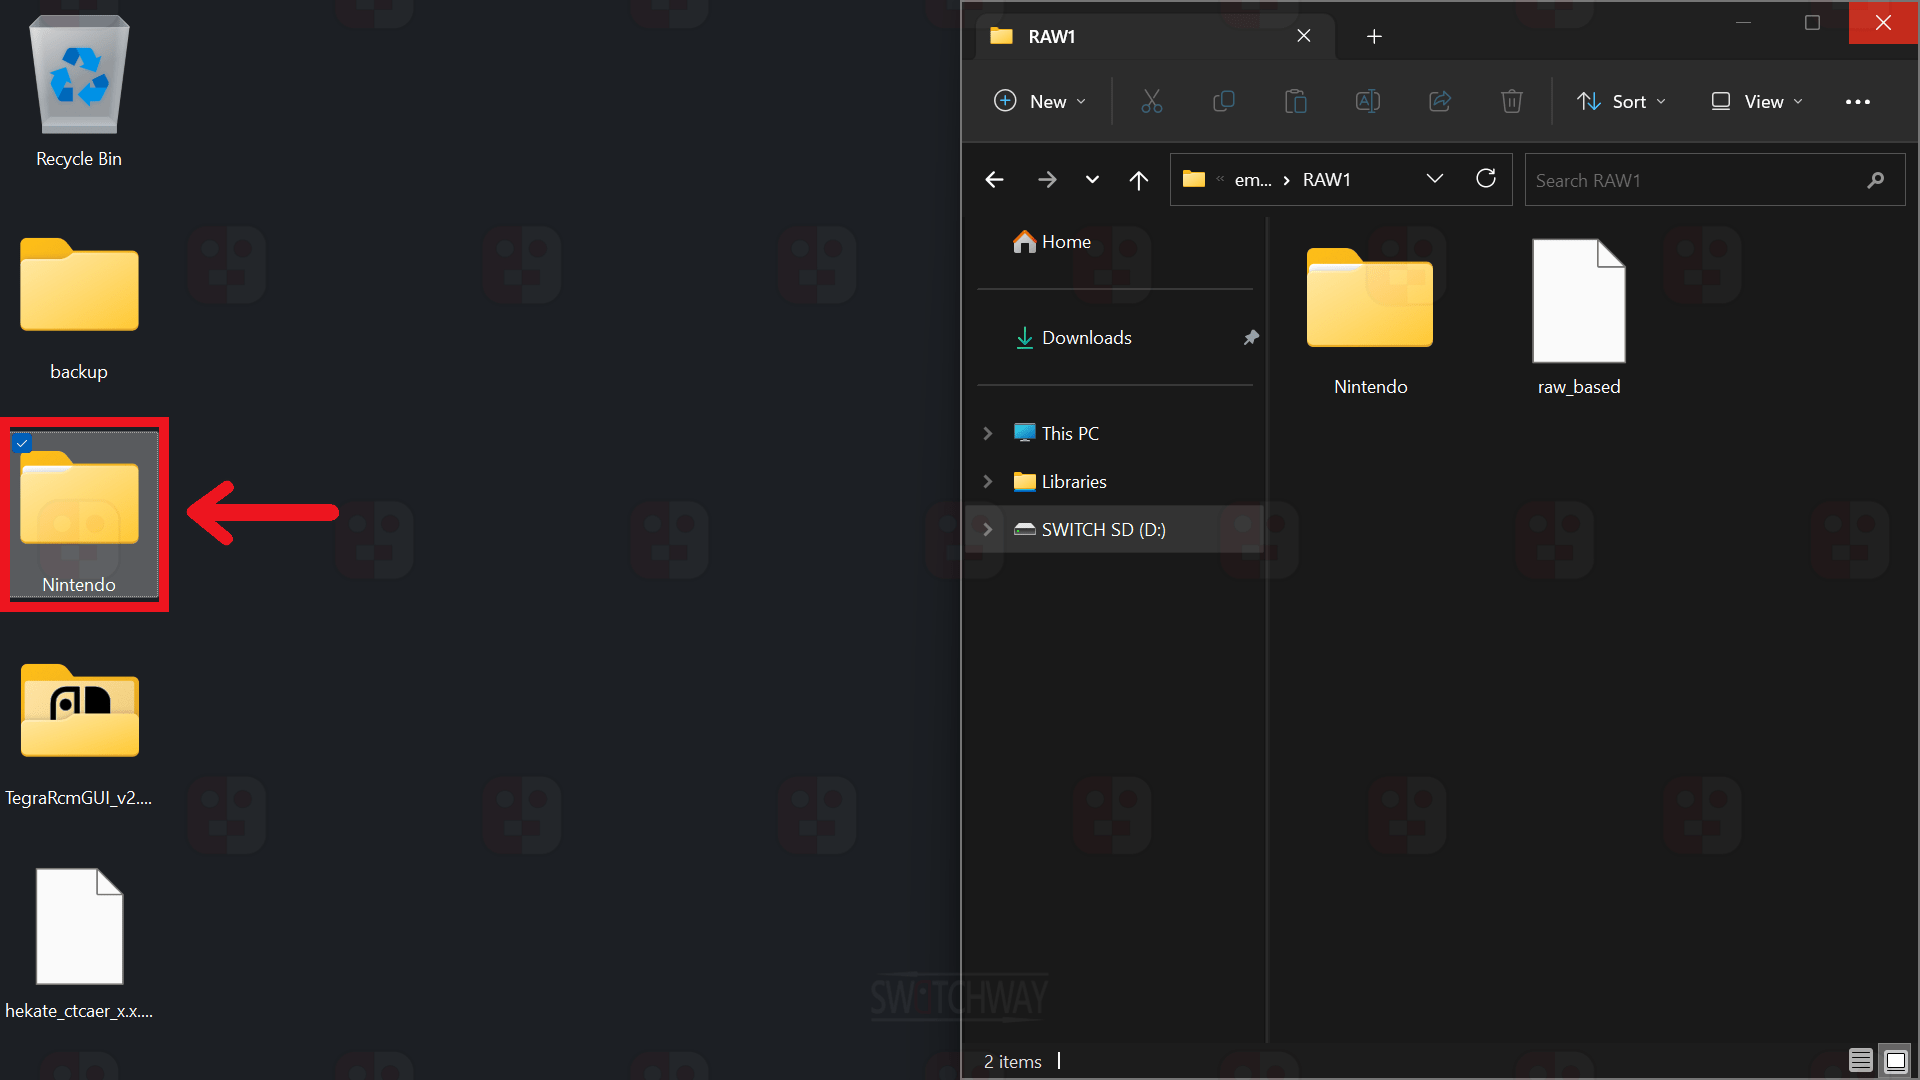
Games playable in emuMMC: Move it to the emuMMC/RAW1 folder (the backed up Nintendofolder from your PC will merge with the Nintendo folder that is already in the emuMMC/RAW1 folder).
⚠️ Warning ⚠️Modifying your Switch is dangerous. It can lead to account bans, which will prevent you from accessing Nintendo's online services and can also lead to potential console bricks. If you decide to modify your Switch in any way, we take no responsibility for any damage you cause to your switch. If you have any questions, or need help getting started, you can join our discord server by clicking the link above.